
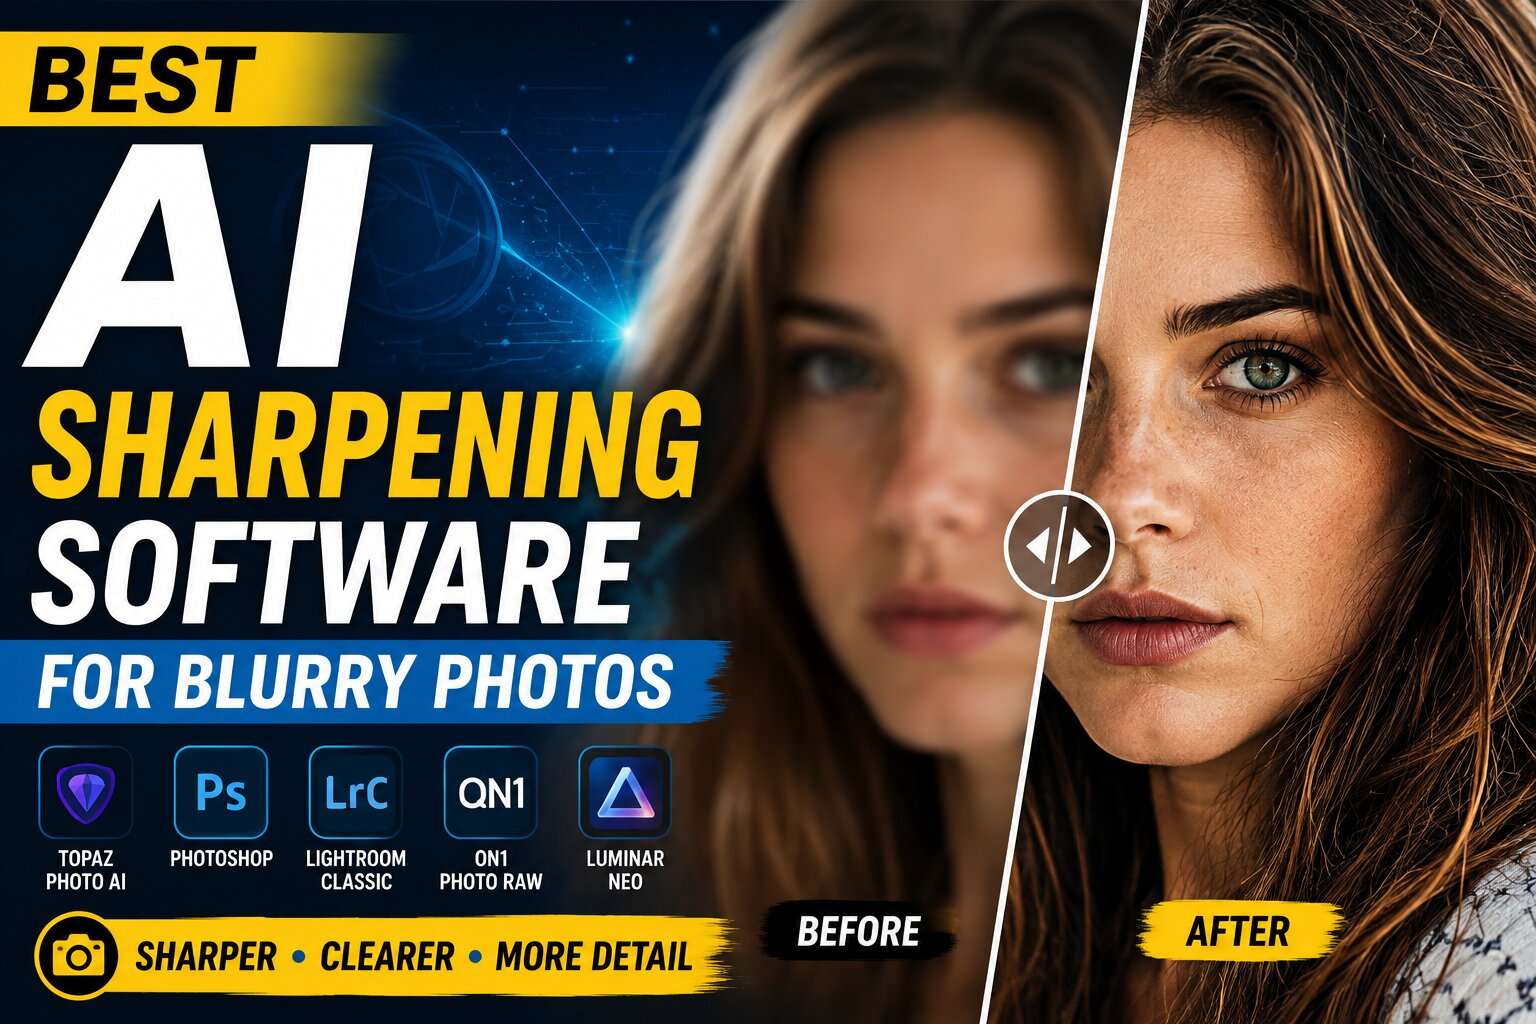
Discover the best AI sharpening software for blurry photos in 2026. Compare Topaz, Lightroom, Photoshop, ON1, Luminar and more for restoring image detail.
Table of Contents
Introduction
A slightly blurry photograph used to be one of the hardest images to rescue.
If the camera moved during exposure, the subject moved, focus missed the intended point, or the original image was too soft, traditional sharpening could improve the appearance of edges—but it could not genuinely solve the underlying problem.
AI sharpening has changed what is possible.
Modern AI-powered photo sharpening tools can analyze an image and attempt to determine why it looks soft. Instead of simply increasing contrast along existing edges, advanced systems can target problems such as motion blur, camera shake, missed focus, lens softness, and loss of fine detail.
That makes AI sharpening particularly useful for photographers dealing with:
- Slightly out-of-focus portraits
- Wildlife photographs
- Sports images
- Wedding photographs
- Handheld low-light images
- Camera-shake blur
- Soft lens images
- Old photographs
- Cropped images
- Low-resolution photographs
However, there is an important limitation.
AI sharpening cannot perfectly fix every blurry photo.
If an image contains very little usable information, aggressive AI processing may create artificial textures or details that were never actually captured.
The goal is therefore not to make every blurry photograph look perfect.
The goal is to recover as much believable detail as possible while keeping the image natural.
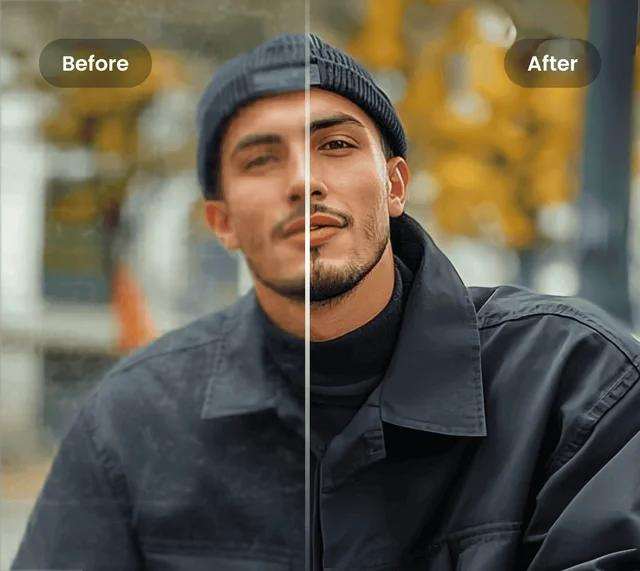
In this guide, we’ll compare the best AI sharpening software for blurry photos in 2026, explain how AI sharpening works, identify which tools are best for different types of blur, and show you how to choose the right software for your photography workflow.
AI sharpening is just one part of modern editing. For a broader look at how artificial intelligence is changing photography, see our complete AI Photography Guide.
Quick Answer
If you need a quick recommendation, Topaz Photo is one of the strongest options to consider when the primary problem is image softness or blur.
Its current Sharpen tool includes AI models designed for different situations, including general sharpening, stronger blur correction, and lens-related softness. Topaz specifically describes its sharpening technology as targeting causes of blur such as camera shake, motion blur, and missed focus rather than simply increasing edge contrast.
Other strong options include:
- Adobe Photoshop — best for photographers who want maximum editing control
- Adobe Lightroom — convenient for photographers already working inside the Lightroom ecosystem
- ON1 Photo RAW — useful for photographers who want sharpening within a broader RAW editing workflow
- Luminar Neo — beginner-friendly AI editing and enhancement
- DxO PhotoLab — strong RAW processing and detail optimization
The best choice depends on the type of blur you’re trying to correct.
For example:
Slight softness: Lightroom or Photoshop may be enough.
Motion blur or camera shake: A dedicated AI sharpening tool can be more useful.
Missed focus: AI sharpening may improve the photograph, but results are highly dependent on how severe the focus error is.
Low-resolution image: An AI enhancement tool with upscaling may be more appropriate than sharpening alone.
What Is AI Sharpening?
AI sharpening is a computational image-enhancement technique that uses machine-learning models to improve the perceived clarity and detail of a photograph.
Traditional sharpening generally increases contrast around existing edges.
For example, if an edge contains a transition between dark and light pixels, conventional sharpening can make that transition more pronounced.
This can make an image appear sharper.
AI sharpening takes a more advanced approach.
Instead of simply increasing edge contrast, AI models can analyze patterns across the image and estimate what type of blur or softness is affecting the photograph.
Depending on the software, the model may attempt to address:
- Camera shake
- Motion blur
- Missed focus
- Lens softness
- Fine-detail loss
- Low-resolution softness
The result can be substantially different from simply moving a sharpening slider.
AI Sharpening vs Traditional Sharpening
Understanding this difference is important before choosing software.
Traditional Sharpening
Traditional sharpening primarily increases local contrast around edges.
Common sharpening controls include:
- Amount
- Radius
- Detail
- Masking
These controls are useful because they give photographers predictable control over edge definition.
However, traditional sharpening generally works with the information already present in the photograph.

If an image is genuinely blurry, simply increasing sharpening can make the blur more obvious rather than fixing it.
AI Sharpening
AI sharpening attempts to analyze the image and determine what caused the softness.
Depending on the application, it may use trained models to reconstruct or enhance fine details.
This can be particularly useful for photographs affected by:
- Motion
- Camera shake
- Slight focus errors
- Lens softness
- Low resolution
The difference can be summarized simply:
Traditional sharpening emphasizes existing edges.
AI sharpening attempts to improve the underlying image detail.
However, AI processing is still an estimation process.
That means the result must always be checked for unnatural details or artifacts.
Why Do Photos Become Blurry?
Before choosing sharpening software, you need to identify the type of blur in your photograph.
Different causes require different approaches.
1. Camera Shake
Camera shake occurs when the camera moves during the exposure.
It is particularly common when photographing handheld at slow shutter speeds.
The result may appear as:
- Double edges
- Directional softness
- Streaked details
- Overall lack of clarity
AI sharpening can sometimes improve mild camera-shake blur.
Severe camera movement is much harder to recover.
2. Motion Blur
Motion blur occurs when the subject moves while the shutter is open.
This is common in:
- Sports photography
- Wildlife photography
- Event photography
- Dance photography
- Street photography
- Children’s photography
For example, if a photographer uses a shutter speed that is too slow while photographing a running athlete, the subject may appear smeared across the frame.
AI sharpening can sometimes reduce the appearance of moderate motion blur.
However, severe motion blur can contain too little usable information for perfect recovery.
3. Missed Focus
Sometimes the camera locks focus on the wrong part of the scene.
A portrait may have the background relatively sharp while the subject’s eyes are soft.
Wildlife photographs can have the same problem.
The camera might focus on:
- Branches
- Grass
- Background foliage
- Another animal
- Clothing
- The wrong part of the subject
AI sharpening can sometimes improve slightly missed focus.
But the worse the focus error, the more difficult recovery becomes.
4. Lens Softness
Not every lens produces the same level of sharpness.
Some lenses can appear softer:
- At maximum aperture
- At certain focal lengths
- Toward the edges
- At inexpensive optical designs
- When used with certain camera combinations
This is different from motion blur or missed focus.
The image may be technically in focus but still lack fine micro-detail.
AI sharpening can help enhance perceived detail in these situations.
5. High ISO and Noise
Noise and softness often appear together.
When photographers shoot at very high ISO, noise can hide fine details.
Heavy noise reduction can then make the image even softer.
This creates a common workflow problem:
High ISO → Noise → Denoising → Loss of Detail → Need for Sharpening
This is why AI noise reduction and AI sharpening often work well together.
The correct workflow is generally not to maximize both.
Instead, use enough denoising to remove distracting noise and enough sharpening to restore useful detail.
6. Low-Resolution Images
Low-resolution photographs can appear soft simply because there are not enough pixels to represent fine detail.
This is particularly common with:
- Old digital photographs
- Screenshots
- Social media downloads
- Small JPEG files
- Heavily cropped photographs
- Images received through messaging applications
In these situations, sharpening alone may not be enough.
An AI upscaling or image-enhancement tool may be more appropriate.
Can AI Really Fix a Blurry Photo?
Sometimes—but not always.
This is one of the most important things to understand before using AI sharpening software.
If an image is only slightly soft, AI sharpening can produce a noticeable improvement.
If an image contains moderate camera shake or motion blur, some applications can produce surprisingly useful results.
But if the photograph is severely out of focus or contains extreme motion blur, AI cannot guarantee accurate recovery.
The software has to estimate missing information.
That creates a fundamental limitation:
AI can estimate missing detail, but it cannot guarantee that the estimated detail is what the camera actually captured.
This is especially important for professional photography.
A sharpened eye that looks convincing at first glance may contain artificial texture when examined closely.
AI Sharpening vs AI Image Enhancement
The terms are sometimes used interchangeably, but they are not exactly the same.
AI Sharpening
Primarily focuses on:
- Blur correction
- Edge definition
- Detail enhancement
- Focus improvement
- Motion correction
AI Image Enhancement
Can include:
- Sharpening
- Noise reduction
- Upscaling
- Face enhancement
- Color improvement
- Dynamic-range enhancement
- Detail reconstruction
An application such as Topaz Photo combines several enhancement functions, including sharpening, noise reduction, and upscaling. This makes it useful when a blurry photograph has more than one problem.
When Should You Use AI Sharpening?
AI sharpening is most useful when you have a photograph that is almost good enough but lacks the desired level of detail.
Good candidates include:
Slightly Soft Portraits
The face is recognizable and mostly in focus, but the eyes or facial details lack crispness.
Wildlife Photographs
The subject is usable but fine details such as feathers or fur appear soft.
Sports Photographs
The moment was captured correctly but the subject contains slight motion softness.
Wedding Photography
A valuable candid photograph may contain slight movement or camera shake.
Low-Light Photography
High ISO and slow shutter speeds can produce a combination of noise and softness.
Older Photographs
Historical or family photographs may benefit from AI sharpening and enhancement.
Cropped Photographs
Heavy cropping can make an otherwise good photograph appear soft.
When AI Sharpening May Not Work Well
AI sharpening isn’t a magic repair button.
You may get disappointing results when:
- The subject is extremely out of focus
- Motion blur is severe
- The image is extremely low resolution
- The original file is heavily compressed
- Facial features are completely missing
- The photograph contains severe camera shake
- The image has already been heavily sharpened
- The original detail has been destroyed by excessive noise reduction
In these situations, aggressive AI processing can introduce artifacts rather than genuine photographic detail.

What Does AI Sharpening Actually Do?
Although the exact technology differs between applications, a typical AI sharpening process can involve several stages.
Step 1: Analyze the Image
The software examines the image to identify edges, textures, patterns, and areas of softness.
Step 2: Identify the Likely Cause
Depending on the software, the AI may attempt to determine whether the image contains:
- Motion blur
- Camera shake
- Focus softness
- Lens softness
- General lack of detail
Step 3: Apply an AI Model
The application selects or applies a model trained to improve the specific type of softness.
Topaz’s current Sharpen tool, for example, offers Standard, Strong, and Lens Blur models for different sharpening situations.
Step 4: Reconstruct or Enhance Detail
The AI attempts to improve the appearance of fine details and edges.
Step 5: Balance the Result
Some applications also provide controls that allow you to reduce the strength of the AI effect or apply it selectively.
This is important because the strongest possible sharpening is rarely the most natural result.
Why AI Sharpening Can Produce Artificial Details
AI sharpening is powerful precisely because it can estimate information.
But estimation creates risk.
When the original image doesn’t contain enough information, an AI model may generate a texture that looks plausible but isn’t necessarily accurate.
This can appear as:
- Artificial eyelashes
- Strange skin texture
- Repeating hair patterns
- Over-defined feathers
- Crunchy foliage
- Halo-like edges
- Unnatural eyes
- Strange fabric patterns
This is why professional photographers should always compare the AI result with the original.
A photograph that looks impressive at first glance may contain obvious artifacts when viewed at 100%.
How Much Sharpening Should You Apply?
There is no universal sharpening value.
The correct amount depends on:
- Original image quality
- Camera sensor
- Lens
- ISO
- Blur type
- Output resolution
- Subject
- Viewing distance
A useful rule is:
Start with the weakest AI sharpening setting that noticeably improves the photograph.
Then increase the strength only if necessary.
Don’t begin with the strongest model simply because the image is blurry.
Topaz itself recommends trying its Standard model before Strong for very blurry or out-of-focus images because stronger processing can increase unwanted artifacts.
AI Sharpening and Noise Reduction
These two technologies work closely together.
Noise can hide detail.
Sharpening can emphasize noise.
This means the order of operations matters.
A practical workflow is:
RAW → Noise Reduction → AI Sharpening → Color/Exposure → Final Output
For a heavily noisy image, applying strong sharpening before noise reduction can make the photograph look worse.
On the other hand, excessive noise reduction before sharpening can remove genuine texture.
The goal is balance.
Can AI Sharpening Fix Out-of-Focus Eyes?
It can sometimes improve slightly soft eyes, but there is a major difference between slightly soft and completely out of focus.
If the eyes contain recognizable detail, AI sharpening may improve:
- Iris detail
- Eyelashes
- Eyebrow definition
- Eye edges
- Facial contrast
If the eyes are completely blurred, the software has far less information to work with.
The result may look sharper without being genuinely accurate.
For professional portrait photography, AI sharpening should therefore be treated as a rescue tool—not a replacement for accurate autofocus.
Can AI Sharpen Motion Blur?
Yes, in some cases.
AI sharpening applications can specifically target motion-related softness.
Topaz’s current sharpening documentation lists motion blur as one of the causes its Sharpen tool is designed to address.
However, the amount of recoverable detail depends heavily on the severity of the motion.
A photograph with mild motion blur may improve significantly.
A photograph where the subject has moved several pixels—or several dozen pixels—during exposure may remain visibly blurred.
AI Sharpening for Professional Photography
Professional photographers should approach AI sharpening differently from casual users.
The objective isn’t simply:
“Make it look sharper.”
The objective should be:
“Improve usable detail while maintaining photographic realism.”
This is especially important for:
- Wedding photography
- Portrait photography
- Wildlife photography
- Product photography
- Commercial photography
- Editorial photography
Before delivering an AI-sharpened image to a client, inspect it carefully at 100%.
Check the subject’s most important details first.
For portraits, inspect the eyes and skin.
For wildlife, inspect feathers and fur.
For products, inspect edges, materials, and textures.
For architecture, inspect straight lines and repeating patterns.
What We’ll Compare in This Guide
The AI sharpening market includes both dedicated enhancement applications and broader photo editors.
We’ll compare the leading options based on:
- AI sharpening quality
- Blur correction
- Motion blur handling
- Focus recovery
- Detail preservation
- RAW support
- Upscaling
- Noise reduction
- Batch processing
- Lightroom integration
- Photoshop integration
- Ease of use
- Workflow flexibility
- Overall value
The major applications we’ll examine include:
- Topaz Photo
- Adobe Photoshop
- Adobe Lightroom
- ON1 Photo RAW
- Luminar Neo
- DxO PhotoLab
Each has a different strength.
Some are designed for dedicated image repair.
Others are better suited to photographers who want sharpening as part of a complete editing workflow.
The Most Important Rule for AI Sharpening
Before choosing software, remember this:
The best AI sharpening tool is not the one that makes an image look the sharpest.
It is the one that produces the most believable improvement.
A photograph with slightly less sharpening but natural texture will usually be more useful than an extremely sharp image filled with AI artifacts.
That principle will guide the comparisons throughout this guide.
Top AI Sharpening Software for Blurry Photos
Several photo-editing applications can improve image sharpness, but they don’t all approach the problem in the same way.
Some provide traditional sharpening controls.
Others use dedicated AI models for blur recovery.
The difference becomes particularly important when you’re trying to improve an image affected by camera shake, motion blur, missed focus, or significant softness.
Here are the leading options to consider in 2026.
1. Topaz Photo
Best overall AI sharpening software for blurry photos
Topaz Photo is one of the strongest choices when sharpening is the primary problem you’re trying to solve.
Unlike conventional sharpening tools that primarily increase edge contrast, Topaz’s current Sharpen system is designed to address different causes of blur. Its available models include Standard, Strong, Lens Blur, Motion Blur, Natural, Refocus, Wildlife Sharpen, Portrait Sharpen, and Noise-Aware Sharpen.
That makes it particularly useful when you know what type of problem you’re trying to correct.
Key Features
- AI-powered sharpening
- Motion Blur model
- Lens Blur model
- Standard sharpening
- Strong sharpening
- Refocus model
- Wildlife Sharpen
- Portrait Sharpen
- Noise-Aware Sharpen
- Subject-aware processing
- AI masking
- Additional image enhancement tools
Standard Model
The Standard model is designed for general sharpening and relatively mild lens or motion blur.
This is usually the best place to start when a photograph is only slightly soft.
Strong Model
The Strong model is intended for more heavily blurred or out-of-focus photographs.
However, Topaz recommends trying the Standard model before moving to Strong because excessive processing can introduce unwanted artifacts.
Lens Blur Model
The Lens Blur model is designed for photographs affected by optical defocus.
This can be useful when the photograph appears soft because the lens did not focus correctly.
Motion Blur Model
The Motion Blur model is designed for directional streaking caused by camera movement or subject movement during exposure.
This makes it particularly relevant for:
- Sports
- Wildlife
- Street photography
- Weddings
- Events
- Handheld night photography
Wildlife Sharpen
Topaz now includes a dedicated Wildlife Sharpen model designed around fine natural detail such as:
- Fur
- Feathers
- Whiskers
- Scales
- Fine textures
The company recommends using this model on high-resolution images with low-to-medium blur and treating it as a finishing step rather than a heavy blur-recovery tool.
Portrait Sharpen
The Portrait Sharpen model is designed specifically for people photography.
It focuses on maintaining natural-looking:
- Hair
- Facial features
- Clothing
- Skin texture
Topaz recommends using it on higher-resolution portrait images that have already been denoised and deblurred.
Noise-Aware Sharpen
This is particularly interesting for photographers working with high ISO.
Traditional sharpening can emphasize both detail and noise.
Noise-Aware Sharpen attempts to distinguish image detail from noise before applying sharpening, making it useful for:
- Wildlife
- Sports
- Night photography
- High-ISO images
- Low-light portraits
Best For
Photographers who need dedicated AI sharpening and blur correction rather than basic edge enhancement.
Advantages
- Excellent range of sharpening models
- Designed for different blur types
- Strong motion-blur correction
- Dedicated wildlife model
- Dedicated portrait model
- Noise-aware sharpening
- Useful for difficult photographs
- Subject-aware processing
Limitations
- Strong processing can create artifacts
- More settings can mean a learning curve
- Severe blur remains difficult to recover
- Processing can be demanding on computer hardware
Overall Rating
★★★★★ 4.9/5
2. Adobe Photoshop
Best for advanced manual control
Photoshop remains one of the most powerful options for photographers who want precise control over sharpening.
However, it’s important to understand that Photoshop’s current sharpening capabilities are not identical to a dedicated AI blur-recovery application.
Adobe’s current Photoshop sharpening tools include Sharpen, Sharpen Edges, Sharpen More, Smart Sharpen, and Unsharp Mask. Adobe specifically notes that sharpening can improve slight softness but cannot restore missing detail or fix areas that are genuinely out of focus.
Smart Sharpen
Smart Sharpen provides controls for:
- Amount
- Radius
- Reduce Noise
- Gaussian Blur
- Lens Blur
- Motion Blur
The Motion Blur option can target blur caused by camera or subject movement.
Best For
- Professional photographers
- Retouchers
- Commercial photography
- Product photography
- Detailed masking
- Selective sharpening
- Advanced editing
Advantages
- Extremely precise control
- Excellent masking capabilities
- Smart Sharpen
- Lens Blur option
- Motion Blur option
- Non-destructive Smart Object workflow
- Powerful integration with professional retouching
Limitations
- Steeper learning curve
- Not primarily designed as a dedicated AI blur-recovery application
- Severe missed focus may remain difficult to fix
- More manual work than specialized AI tools
Important Photoshop Update
If you find older articles recommending Photoshop’s Camera Shake Reduction, be careful.
Adobe removed the Camera Shake Reduction filter from Photoshop starting with version 23.3 because the technology was not compatible with newer development platforms.
That means older recommendations telling users to select:
Filter → Sharpen → Shake Reduction
are no longer applicable to current Photoshop desktop versions.
Overall Rating
★★★★★ 4.7/5
3. Adobe Lightroom
Best for photographers who already use Lightroom
Lightroom is an excellent option when you need conventional sharpening as part of a complete RAW editing workflow.
Its Detail panel provides controls for:
- Amount
- Radius
- Detail
- Masking
Adobe explains that Amount controls edge definition, Radius controls the size of details affected, Detail controls the amount of high-frequency information emphasized, and Masking restricts sharpening primarily to stronger edges.
This gives photographers considerable control without leaving the Lightroom workflow.
Why Lightroom Is Convenient
If you’re already using Lightroom to:
- Import photographs
- Organize files
- Cull images
- Edit RAW files
- Correct colors
- Reduce noise
- Export photographs
you can also sharpen your images in the same application.
Adobe recommends viewing photographs at 100% when evaluating sharpening because subtle sharpening changes may not be obvious at smaller display sizes.
Best For
- Lightroom users
- RAW photographers
- Wedding photographers
- Portrait photographers
- Landscape photographers
- High-volume workflows
Advantages
- Integrated RAW workflow
- Easy to use
- Excellent Detail controls
- Masking
- Noise reduction
- Batch editing
- Non-destructive workflow
Limitations
- Conventional sharpening is not the same as advanced AI blur recovery
- Severe motion blur is difficult to fix
- Severe missed focus is difficult to recover
- Dedicated AI applications can provide stronger restoration for difficult files
Overall Rating
★★★★☆ 4.5/5
4. ON1 Photo RAW
Best all-in-one alternative for AI sharpening
ON1 Photo RAW 2026 includes TackSharp AI, which is specifically designed to restore crisp detail in slightly soft or blurred photographs.
ON1 positions TackSharp AI alongside NoNoise AI and Resize AI, allowing photographers to combine sharpening, noise reduction, and enlargement within the same application.
This is particularly useful because blur and noise often appear together.
For example:
High ISO → Noise → Noise Reduction → Soft Detail → TackSharp AI
Key Features
- TackSharp AI
- NoNoise AI
- Resize AI
- RAW processing
- Layers
- Masking
- AI selections
- Photo management
- Batch workflow
- Integrated editing
Best For
Photographers who want an all-in-one RAW editor with AI sharpening rather than a dedicated sharpening application.
Advantages
- TackSharp AI
- AI noise reduction
- AI enlargement
- Complete RAW workflow
- Layers and masking
- Photo organization
- No subscription required for the current Photo RAW license option
- Can replace several separate applications for some workflows
Limitations
- More complex than a dedicated sharpening tool
- Some photographers may not need its large collection of editing features
- Dedicated blur-recovery software can provide more specialized control
Overall Rating
★★★★☆ 4.6/5
5. Luminar Neo
Best for beginners and creative AI editing
Luminar Neo takes a broader approach to AI-powered photo editing.
Rather than focusing primarily on blur correction, it combines AI-powered enhancement with tools for:
- Color
- Exposure
- Portraits
- Sky enhancement
- Masking
- Creative effects
- Detail enhancement
Its Enhance AI tool analyzes photographs and applies automated corrections while still allowing the photographer to control the amount of adjustment.
Best For
- Beginners
- Hobby photographers
- Creative photographers
- Social-media creators
- Photographers wanting an easy AI editing workflow
Advantages
- Beginner-friendly
- AI-powered editing
- Broad collection of enhancement tools
- Easy interface
- Useful beyond sharpening
Limitations
- Not as specialized for severe blur recovery
- Dedicated sharpening applications offer more detailed blur-specific controls
- Better suited to general enhancement than serious image restoration
Overall Rating
★★★★☆ 4.3/5
6. DxO PhotoLab
Best for RAW processing and optical corrections
DxO PhotoLab is primarily a RAW development and photo-editing application rather than a dedicated blurry-photo restoration tool.
Its strength lies in combining RAW processing with sophisticated optical corrections and detail optimization.
For photographers whose images are slightly soft because of lens characteristics, RAW processing, or general detail limitations, PhotoLab can be a strong part of the workflow.
Best For
- RAW photographers
- Landscape photographers
- Professional photographers
- Lens correction workflows
- Photographers already using DxO’s ecosystem
Advantages
- Excellent RAW processing
- Strong optical corrections
- Detail optimization
- Advanced image processing
- Professional workflow
Limitations
- Not primarily a dedicated blur-recovery application
- Less specialized for severe motion blur
- More expensive than a simple sharpening tool
- Requires more learning than basic sharpening software
Overall Rating
★★★★☆ 4.5/5
AI Sharpening Software Comparison
| Software | AI Sharpening | Motion Blur | Focus Recovery | RAW Workflow | Best For |
|---|---|---|---|---|---|
| Topaz Photo | ⭐⭐⭐⭐⭐ | ⭐⭐⭐⭐⭐ | ⭐⭐⭐⭐⭐ | ⭐⭐⭐⭐☆ | Blurry photos |
| ON1 Photo RAW | ⭐⭐⭐⭐⭐ | ⭐⭐⭐⭐☆ | ⭐⭐⭐⭐☆ | ⭐⭐⭐⭐⭐ | All-in-one editing |
| Adobe Photoshop | ⭐⭐⭐⭐☆ | ⭐⭐⭐⭐☆ | ⭐⭐⭐☆☆ | ⭐⭐⭐⭐⭐ | Professional control |
| Adobe Lightroom | ⭐⭐⭐☆☆ | ⭐⭐☆☆☆ | ⭐⭐☆☆☆ | ⭐⭐⭐⭐⭐ | RAW workflow |
| DxO PhotoLab | ⭐⭐⭐⭐☆ | ⭐⭐⭐☆☆ | ⭐⭐⭐☆☆ | ⭐⭐⭐⭐⭐ | RAW processing |
| Luminar Neo | ⭐⭐⭐☆☆ | ⭐⭐⭐☆☆ | ⭐⭐⭐☆☆ | ⭐⭐⭐⭐☆ | Beginners |
Editorial note: These ratings are comparative assessments for this guide, not laboratory measurements. Results vary depending on the original image, camera, lens, resolution, ISO, blur severity, and software settings.
If you’re comparing more than sharpening tools, our guide to the best AI photography software covers a wider range of AI-powered tools for photographers.
Which AI Sharpening Software Is Best Overall?
For the specific problem of fixing blurry photographs, Topaz Photo currently has the strongest dedicated sharpening feature set among the applications compared here.
Its advantage is the variety of specialized models.
Instead of using one sharpening algorithm for every photograph, you can choose a model based on the problem:
Slight blur → Standard
Heavy blur → Strong
Lens/defocus blur → Lens Blur
Movement → Motion Blur
Wildlife detail → Wildlife Sharpen
Portrait detail → Portrait Sharpen
Noisy high-ISO image → Noise-Aware Sharpen
That specialization is what separates dedicated AI sharpening from conventional sharpening controls.
Which Is Best for Lightroom Users?
If Lightroom is already the center of your workflow, start with Lightroom’s built-in sharpening controls.
They provide:
- Amount
- Radius
- Detail
- Masking
and can be combined with Lightroom’s noise-reduction tools.
However, if the photograph is genuinely blurry rather than merely soft, consider moving the difficult files into a dedicated AI application.
A practical workflow can therefore be:
Lightroom → Identify blurry images → AI Sharpen selected images → Return to Lightroom
This avoids processing every photograph unnecessarily.
Which Is Best for Professional Retouching?
Adobe Photoshop remains one of the strongest choices when you need detailed manual control.
For example, you might use AI sharpening on the entire photograph and then move into Photoshop to selectively sharpen:
- Eyes
- Hair
- Clothing
- Product edges
- Important textures
You can also use Smart Objects so the sharpening remains editable.
Adobe specifically recommends converting the layer to a Smart Object before applying Smart Sharpen when you want the sharpening to remain editable.
Which Is Best for Wildlife Photography?
Topaz Photo is particularly strong for wildlife because it now provides a dedicated Wildlife Sharpen model.
The model is designed to preserve natural details such as fur, feathers, whiskers, and scales rather than applying the same sharpening treatment to every subject.
This matters because wildlife photographs often contain extremely fine textures.
A bird’s feathers shouldn’t look like painted lines.
A fox’s fur shouldn’t look plastic.
And a leopard’s whiskers shouldn’t become exaggerated white streaks.
For wildlife, natural detail is more important than maximum sharpness.
Which Is Best for Portrait Photography?
Topaz Photo has an advantage here because its current Portrait Sharpen model is specifically trained around people photography.
It is designed to preserve natural-looking facial features, hair, clothing, and skin texture.
However, Lightroom and Photoshop remain excellent choices when the photograph is already mostly sharp and only needs controlled finishing sharpening.
For professional portraits, avoid aggressive sharpening around skin.
Eyes, eyelashes, eyebrows, and hair can generally tolerate more detail enhancement than areas of smooth skin.
Which Is Best for Motion Blur?
Topaz Photo is one of the strongest choices because it provides a dedicated Motion Blur model.
Photoshop’s Smart Sharpen also includes a Motion Blur option, but it is better understood as a controlled sharpening tool rather than a dedicated AI restoration system.
For a mildly blurred sports or wildlife photograph, both may help.
For more difficult blur, a dedicated AI application is usually the better starting point.
Which Is Best for Slightly Soft Photos?
If the photograph is only slightly soft, you don’t necessarily need dedicated AI software.
Try:
Lightroom → Detail → Sharpening
or
Photoshop → Smart Sharpen
first.
Adobe’s own documentation describes sharpening as useful for slight softness caused by cameras, scanners, or resizing.
If the result isn’t enough, then move to a dedicated AI sharpening application.
This approach saves time and avoids unnecessary processing.
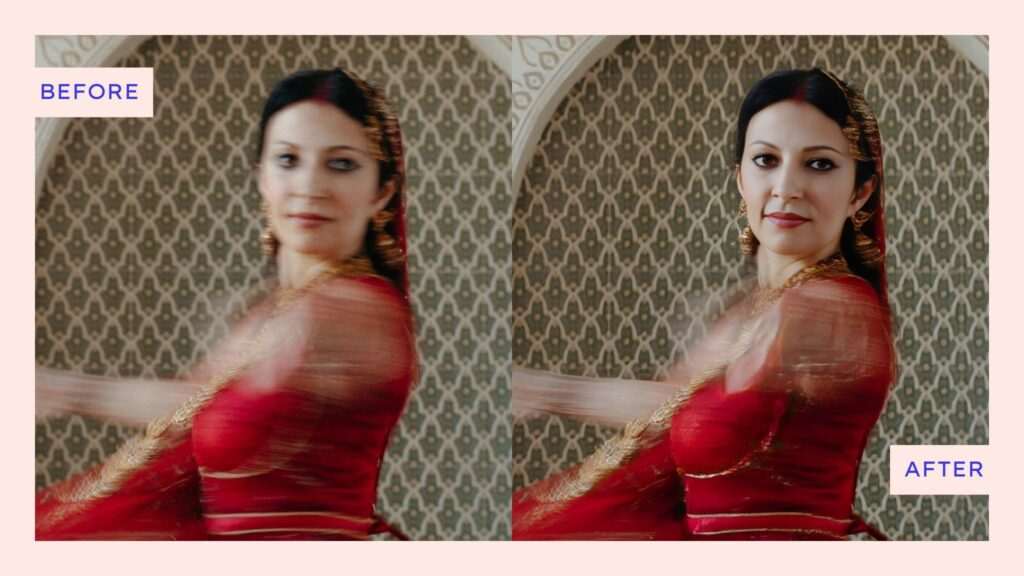
Which Is Best for High-ISO Blurry Photos?
For high-ISO images, sharpening and noise reduction need to work together.
If you sharpen a noisy photograph aggressively, you may make the grain more visible.
Topaz Photo’s Noise-Aware Sharpen is designed specifically for this type of situation by separating image detail from noise before sharpening.
ON1 also offers a combined workflow using NoNoise AI and TackSharp AI, which can be useful for high-ISO photographs that are both noisy and slightly soft.
A good workflow is:
Noise Reduction → AI Sharpening → Final Editing
rather than:
Heavy Sharpening → Try to Remove the Noise Later
Best AI Sharpening Software for Different Photography Needs
There is no single AI sharpening application that is perfect for every photograph.
The best choice depends on the type of blur, the subject, the original resolution, and the editing workflow you already use.
A wildlife photographer may prioritize feather and fur detail, while a wedding photographer may care more about recovering slightly soft candid photographs.
Here is how the leading options compare for specific photography situations.
Best AI Sharpening for Wildlife Photography
Winner: Topaz Photo
Wildlife photography is one of the most demanding applications for AI sharpening.
Fine details such as:
- Feathers
- Fur
- Whiskers
- Scales
- Eyes
- Claws
- Fine foliage
can easily become unnatural when sharpening is too aggressive.
Topaz Photo currently offers a dedicated Wildlife Sharpen model designed specifically for fine natural details. Topaz recommends using it on higher-resolution images with low-to-medium blur and treating it as a finishing step rather than a solution for severe blur.
Recommended Workflow
RAW → Denoise → Deblur → Wildlife Sharpen → Color Correction → Export
The important point is not to use Wildlife Sharpen as a replacement for heavy blur recovery.
If the photograph has significant motion blur or is badly out of focus, one of the dedicated blur models may be more appropriate first.
Best Alternative
ON1 Photo RAW
ON1’s TackSharp AI can restore crisp detail in slightly soft or blurred photographs, while NoNoise AI can handle noise in the same workflow.
Best AI Sharpening for Portrait Photography
Winner: Topaz Photo
Portraits require a different approach to sharpening.
You want the:
- Eyes
- Eyelashes
- Hair
- Eyebrows
- Clothing
to look detailed without turning the skin into an unnatural texture.
Topaz Photo’s Portrait Sharpen model is specifically designed for people photography. Topaz recommends using it on high-resolution portraits that have already been denoised and deblurred.
Recommended Workflow
RAW → Denoise → Deblur → Portrait Sharpen → Skin Retouching → Final Sharpening
Don’t sharpen the entire face equally.
Skin usually requires less sharpening than eyes, hair, and clothing.
Best Alternative
Photoshop
Photoshop is particularly useful when you want to manually control where sharpening is applied.
You can sharpen the eyes and hair while leaving smoother skin relatively untouched.
Best AI Sharpening for Wedding Photography
Winner: Topaz Photo
Wedding photographers frequently encounter photographs that are valuable despite minor technical imperfections.
You may have:
- A great candid moment with slight camera shake
- A dancing couple with motion blur
- A low-light reception photograph
- A high-ISO ceremony image
- A slightly soft emotional moment
These aren’t necessarily photographs you want to discard.
AI sharpening can sometimes make such images much more usable.
Recommended Workflow
For a high-ISO wedding photograph:
RAW → Noise Reduction → AI Sharpening → Exposure → Color → Skin Retouching → Export
For slight motion blur:
RAW → AI Motion Blur Correction → Noise Reduction → Color → Final Sharpening
Topaz’s current Sharpen tool includes a Motion Blur model specifically designed for streaking caused by camera or subject movement.
Best Alternative
ON1 Photo RAW
ON1 can be particularly convenient when you want sharpening and noise reduction together in a broader editing environment. Its current Photo RAW release includes both TackSharp AI and NoNoise AI.
Best AI Sharpening for Sports Photography
Winner: Topaz Photo
Sports photography frequently produces motion blur because subjects move quickly.
The problem can become worse when photographers use a shutter speed that is too slow because of poor lighting.
AI sharpening can sometimes reduce the visible effect of mild motion blur.
Topaz’s Motion Blur model is specifically designed for this type of streaking.
Recommended Workflow
RAW → Noise Reduction → Motion Blur → Detail Check → Color Correction → Export
Don’t expect miracles from severe motion blur.
If an athlete’s face has been smeared significantly across the frame, there may simply not be enough original information to reconstruct accurately.
Best AI Sharpening for Low-Light Photography
Winner: Topaz Photo
Low-light photographs often have two problems at the same time:
Noise + Softness
Applying aggressive sharpening first can make the noise more visible.
A better workflow is:
Noise Reduction → AI Sharpening → Final Detail Adjustment
Topaz’s Noise-Aware Sharpen is designed specifically for situations where noise and detail exist together. It attempts to separate image detail from noise before sharpening.
This can be useful for:
- Night photography
- Concert photography
- Indoor events
- High-ISO portraits
- Wildlife at dusk
- Night street photography
Best AI Sharpening for Old Photos
Winner: ON1 Photo RAW
Old photographs often have more problems than simple softness.
They may contain:
- Blur
- Dust
- Scratches
- Fading
- Low resolution
- Noise
- Damaged areas
ON1’s current ecosystem includes Restore AI for repairing aging or damaged photographs, alongside TackSharp AI for sharpening and deblurring.
That makes ON1 particularly interesting when the goal is broader photo restoration rather than sharpening alone.
Recommended Workflow
Scan → Repair → Noise Reduction → Sharpen → Upscale → Color Restoration
Don’t sharpen a severely damaged scan before repairing the underlying problems.
Best AI Sharpening for Low-Resolution Photos
Winner: Topaz Photo + Upscaling Workflow
Low-resolution photographs present a special problem.
If there aren’t enough pixels representing the subject, sharpening alone cannot create a detailed high-resolution photograph.
In this situation, consider:
Upscaling → Sharpening
rather than simply increasing sharpening.
Topaz’s current ecosystem includes separate upscaling capabilities, while Topaz Photo itself provides sharpening and other enhancement tools.
ON1 Photo RAW 2026 also integrates Resize AI alongside TackSharp AI, making it another option for photographers who need enlargement and sharpening in one environment.
Best AI Sharpening for Camera Shake
Winner: Topaz Photo
Camera shake usually creates directional softness.
Instead of every edge simply becoming less defined, the edges may appear stretched or duplicated in the direction of the movement.
A dedicated deblur model can therefore be more useful than conventional sharpening.
Topaz’s current Sharpen tool is explicitly designed to address camera shake as one of the root causes of blur.
Try This Order
- Open the original RAW file.
- Apply moderate noise reduction if required.
- Start with the Standard sharpening model.
- Increase strength gradually.
- Compare against the original.
- Try a stronger model only if necessary.
- Check important details at 100%.
- Export only after confirming the result looks natural.
Topaz recommends trying Standard before Strong to reduce the risk of excessive sharpening and artifacts.
Best AI Sharpening for Motion Blur
Winner: Topaz Photo
Motion blur is one of the situations where dedicated AI sharpening has the greatest potential advantage over conventional sharpening.
Traditional sharpening can increase contrast around a blurred edge.
It cannot easily reverse the direction of the blur.
A dedicated Motion Blur model is designed specifically for this type of problem.
Topaz describes its Motion Blur model as targeting the streaked or smeared appearance created by camera or subject movement during exposure.
However, the severity matters.
Mild Motion Blur
Good candidate for AI correction
Moderate Motion Blur
Potentially recoverable
Severe Motion Blur
Limited recovery
If the subject has moved substantially during exposure, much of the original information may simply not exist in the file.
Best AI Sharpening for Missed Focus
Winner: Topaz Photo
Missed focus is one of the most difficult problems to correct.
If the subject is only slightly outside the focal plane, AI sharpening may improve the appearance.
If the subject is severely out of focus, however, the software must estimate a significant amount of missing information.
Topaz provides both Lens Blur and Refocus models for different types of softness.
Example
Imagine a portrait where the photographer accidentally focused slightly behind the subject.
If the eyes still contain recognizable detail, AI sharpening may improve them.
If the eyes are completely blurred, the result should be treated with much more skepticism.
Best AI Sharpening for JPEG Photos
AI sharpening can work with JPEG photographs, but RAW files are generally preferable when available.
RAW files retain considerably more original image information and provide greater flexibility during processing.
JPEG files have already undergone:
- Compression
- Sharpening
- Noise reduction
- Color processing
- Tonal processing
This can make aggressive AI processing more difficult.
If JPEG is your only source, start conservatively.
Avoid stacking multiple sharpening tools.
AI Sharpening Workflow for Photographers
A good AI sharpening workflow doesn’t mean sending every image through every AI tool.
Instead, identify the actual problem first.
Step 1: Cull Your Photos
Don’t spend five minutes repairing an image that isn’t worth saving.
Select only photographs with genuine value.
Step 2: Identify the Problem
Ask:
Is it noise?
Is it motion blur?
Is it camera shake?
Is it missed focus?
Is it lens softness?
Is it low resolution?
The answer determines the appropriate tool.
Step 3: Apply Noise Reduction if Necessary
If the photograph is noisy, remove enough noise to prevent sharpening from exaggerating grain.
Step 4: Apply AI Sharpening
Choose the model that matches the problem.
For example:
Slight softness → Standard
Heavy blur → Strong
Lens/focus softness → Lens Blur
Motion → Motion Blur
Wildlife detail → Wildlife Sharpen
Portrait detail → Portrait Sharpen
Noisy image → Noise-Aware
Topaz currently provides these specialized models within its Sharpen system.
Step 5: Check the Subject
Don’t inspect only the overall image.
Zoom into the most important part.
Step 6: Compare Before and After
Turn the AI effect off.
Then turn it back on.
If the image looks dramatically sharper but less natural, reduce the strength.
Step 7: Apply Final Sharpening
After resizing for its final destination, apply appropriate output sharpening if required.
How to Avoid Artificial-Looking AI Sharpening
The biggest mistake photographers make is assuming:
More sharpness = better photograph
It doesn’t.
A natural photograph contains subtle transitions and textures.
When AI sharpening becomes too aggressive, you may see:
- Bright halos
- Dark halos
- Crunchy edges
- Plastic skin
- Artificial feathers
- Repeated textures
- Strange hair
- Overdefined eyes
- Noisy backgrounds
The solution is simple:
Reduce the strength.
If necessary, mask the effect so it affects only the important subject.
Topaz Photo’s current workflow allows sharpening to be applied to selected areas rather than automatically treating every part of the image equally.
Should You Sharpen the Entire Image?
Not necessarily.
Selective sharpening is often better.
For a portrait, you might sharpen:
Eyes + Hair + Eyebrows
while applying little or no sharpening to:
Skin + Background
For wildlife:
Eyes + Face + Fur/Feathers
can receive more attention than:
Sky + Background
For product photography:
Product edges + Important textures
can be prioritized over:
Background surfaces
This approach produces a more natural result than applying maximum sharpening globally.
AI Sharpening vs Upscaling
These tools solve different problems.
Sharpening
Primarily improves the appearance of existing detail and attempts to correct softness or blur.
Upscaling
Creates a larger image by generating additional pixels.
Modern AI upscaling can also improve perceived detail while increasing resolution.
If your image is:
High resolution + blurry
→ Start with AI sharpening.
If your image is:
Low resolution + blurry
→ Consider upscaling before final sharpening.
If your image is:
Low resolution + noisy + blurry
→ Consider:
Denoise → Upscale → Sharpen
The exact order can vary by application.
ON1’s current editing pipeline, for example, processes NoNoise AI and TackSharp AI early in its workflow when those tools are used, while later development and local adjustments are applied afterward.
Because sharpening can make digital noise more visible, photographers working with high-ISO images should also consider dedicated AI noise reduction software before applying aggressive sharpening.
AI Sharpening Settings: Where Should You Start?
Don’t begin with maximum strength.
A safer approach is:
Mildly Soft Image
Low strength → Compare → Increase only if needed
Moderate Blur
Medium strength → Check subject → Adjust
Severe Blur
Try a dedicated blur model → Compare carefully → Stop if artifacts appear
The goal isn’t to force every photograph into perfect sharpness.
The goal is to find the point where improvement stops being realistic.
When You Should Not Use AI Sharpening
Sometimes the correct decision is to leave the photograph alone.
Avoid aggressive AI sharpening when:
- The image is already sharp
- Noise dominates the photograph
- The original resolution is extremely low
- The subject contains very little information
- Blur is severe
- The photograph has already been heavily processed
- AI artifacts become more noticeable than the original softness
And most importantly:
Don’t sharpen an image simply because it looks slightly soft at 400% zoom.
Always consider how the photograph will actually be viewed.
A photograph that looks slightly soft at extreme magnification may look excellent as a normal-size print or web image.
Final Practical Recommendation
If you’re unsure where to start, use this decision tree:
Slight softness?
→ Lightroom or Photoshop.
Motion blur?
→ Topaz Photo Motion Blur.
Missed focus?
→ Topaz Photo Lens Blur/Refocus.
Wildlife detail?
→ Topaz Photo Wildlife Sharpen.
Portrait detail?
→ Topaz Photo Portrait Sharpen.
High ISO + softness?
→ Noise reduction + Noise-Aware sharpening.
Low-resolution image?
→ Upscale + sharpening.
Old or damaged photograph?
→ Restoration + upscaling + sharpening.
Want an all-in-one AI editor?
→ ON1 Photo RAW.
The software is only half the equation.
Choosing the correct workflow is what determines whether the final photograph looks naturally sharp or obviously processed.
How to Choose the Best AI Sharpening Software
Choosing AI sharpening software isn’t simply about finding the application with the strongest sharpening effect.
The right software depends on what is wrong with your photograph, how severe the problem is, and how you normally edit your images.
Before buying anything, consider these factors.
1. Identify the Type of Blur
First determine why the photograph is blurry.
Is it:
- Camera shake?
- Motion blur?
- Missed focus?
- Lens softness?
- High ISO?
- Low resolution?
- Compression?
- General lack of detail?
A tool with dedicated blur models can be more useful than a conventional sharpening slider when the photograph contains genuine blur.
For example, Topaz Photo currently provides separate models for general sharpening, strong blur, lens blur, motion blur, refocusing, wildlife detail, and other situations.
2. Consider Your Existing Workflow
If you’re already using Lightroom, adding another application may not be necessary for every photograph.
Lightroom is excellent for conventional sharpening and RAW processing.
If you regularly encounter difficult blurry photographs that Lightroom cannot adequately improve, a dedicated AI application can become a useful secondary tool.
3. Check Detail Preservation
Don’t judge sharpening by how dramatic the image looks.
Instead, inspect:
- Fine hair
- Skin
- Eyes
- Feathers
- Fur
- Textures
- Straight edges
- Background details
The best result should look sharper without looking artificially generated.
4. Look for Selective Sharpening
Selective sharpening is particularly useful for portraits and wildlife.
You may want to sharpen the eyes and subject while keeping the background relatively untouched.
Applications with masking or selection tools give you greater control over this process.
5. Consider Batch Processing
Professional photographers may have hundreds or thousands of photographs to process.
A tool that works well on one image but requires extensive manual adjustment for every photograph may not be practical for a professional workflow.
For large collections, look for:
- Batch processing
- Presets
- Consistent AI models
- Fast previews
- RAW support
- Workflow integration
Best AI Sharpening Software: Our Recommendations
After comparing the major options, here’s how we would categorize them.
🏆 Best Overall: Topaz Photo
Best for: Photographers specifically looking to improve blurry or soft photographs.
Topaz Photo stands out because sharpening is treated as a dedicated image-recovery problem rather than simply an edge-enhancement adjustment.
Its current Sharpen tool includes specialized AI models for standard sharpening, strong blur, lens blur, motion blur, natural detail, refocusing, wildlife, and other use cases.
Choose it if:
- Your images are genuinely blurry
- You regularly photograph wildlife or sports
- You need motion-blur correction
- You have missed-focus photographs worth saving
- You want dedicated AI sharpening
- You need more than conventional Lightroom sharpening
Our rating: 4.9/5
🥈 Best for Professional Manual Control: Photoshop
Best for: Professional photographers and retouchers.
Photoshop remains extremely powerful when you want to control exactly where and how sharpening is applied.
It’s particularly useful when AI sharpening is only one step in a larger retouching workflow.
Choose it if:
- You already use Photoshop
- You need detailed masking
- You perform professional retouching
- You want maximum manual control
- You need sharpening combined with compositing and other edits
Our rating: 4.7/5
🥉 Best for Lightroom Users: Adobe Lightroom
Best for: Photographers who want sharpening integrated into their RAW workflow.
If your photographs are only slightly soft, Lightroom may be all you need.
Its conventional sharpening controls are powerful enough for many everyday images, and keeping sharpening inside your existing workflow saves time.
Choose it if:
- You already use Lightroom
- Your photographs are mostly sharp
- You need conventional sharpening
- You process large RAW collections
- You don’t regularly need severe blur correction
Our rating: 4.5/5
Best All-in-One Alternative: ON1 Photo RAW
Best for: Photographers who want sharpening, denoising, RAW processing, masking, and other editing features in one application.
ON1 Photo RAW 2026.4 currently includes TackSharp AI for slightly soft or blurry images, NoNoise AI for noise reduction, and Resize AI 2026 for super-resolution and detail recovery.
That combination can be especially useful when a photograph has multiple problems.
For example:
High ISO + Noise + Softness + Low Resolution
can potentially be addressed within the same broader workflow.
Choose it if:
- You want an alternative to Lightroom
- You want an all-in-one application
- You need AI sharpening and denoising
- You also need upscaling
- You don’t want to maintain several separate applications
Our rating: 4.6/5
Best for Beginners: Luminar Neo
Best for: Beginners who want a simple AI-powered editing experience.
Luminar Neo is more of a general AI photo editor than a dedicated blurry-photo recovery application.
That makes it a good choice if sharpening is only one of many things you want to do.
Choose it if:
- You’re new to photo editing
- You want an easy interface
- You want AI enhancement alongside creative tools
- You don’t need advanced blur recovery
Our rating: 4.3/5
Best for RAW and Optical Corrections: DxO PhotoLab
Best for: Photographers who prioritize RAW development and optical corrections.
DxO PhotoLab makes sense when sharpening is part of a broader professional RAW workflow.
It’s particularly attractive to photographers who want to optimize the image from the RAW stage rather than relying entirely on a dedicated AI restoration application.
Choose it if:
- You shoot RAW
- Lens corrections matter to you
- You want professional RAW processing
- You need detail optimization as part of a broader workflow
Our rating: 4.5/5
AI Sharpening Software Buying Guide
| Your Situation | Recommended Software |
|---|---|
| Severe blur | Topaz Photo |
| Motion blur | Topaz Photo |
| Camera shake | Topaz Photo |
| Missed focus | Topaz Photo |
| Wildlife detail | Topaz Photo |
| Portrait sharpening | Topaz Photo / Photoshop |
| Slight softness | Lightroom |
| Professional retouching | Photoshop |
| RAW + AI sharpening | ON1 Photo RAW |
| Noise + sharpening | Topaz Photo / ON1 Photo RAW |
| Low-resolution images | Topaz Photo / ON1 Photo RAW |
| Beginner-friendly editing | Luminar Neo |
| RAW + optical corrections | DxO PhotoLab |
AI Sharpening Mistakes Photographers Should Avoid
AI sharpening is powerful, but poor settings can make a photograph look worse.
Mistake 1: Maximum Sharpening
More sharpening doesn’t automatically mean more detail.
Start conservatively.
Mistake 2: Sharpening Noise
If the photograph contains significant noise, aggressive sharpening can make the noise much more visible.
Consider denoising first.
Mistake 3: Ignoring Artifacts
Always inspect important details at 100%.
Look for:
- Halos
- Repeated textures
- Artificial hair
- Plastic skin
- Overdefined edges
- Strange eyes
- Excessive micro-contrast
Mistake 4: Expecting AI to Fix Everything
A severely out-of-focus photograph may not contain enough information to recover naturally.
AI can estimate missing information, but it cannot guarantee that the reconstruction is accurate.
Mistake 5: Sharpening Every Photograph
Don’t automatically run your entire catalog through AI sharpening.
Cull first.
Only process photographs that actually benefit from it.
Mistake 6: Ignoring the Final Output
A photograph intended for Instagram doesn’t need the same sharpening treatment as a large print.
Consider where the image will ultimately be viewed.
Best AI Sharpening Workflow for Photographers
A practical workflow looks like this:
Step 1: Cull
Select only the photographs worth rescuing.
Step 2: Identify the Problem
Determine whether you’re dealing with:
Noise → Denoise
Motion → Motion Blur correction
Missed focus → Lens Blur/Refocus
Slight softness → Standard sharpening
Low resolution → Upscaling
Step 3: Process Conservatively
Start with moderate settings.
Step 4: Check at 100%
Inspect the subject’s most important details.
Step 5: Apply Local Adjustments
If possible, restrict sharpening to the areas that need it.
Step 6: Compare With the Original
Don’t judge the AI result without looking at the original.
Step 7: Export for the Final Destination
Resize and apply appropriate final sharpening for:
- Website
- Social media
- Client gallery
- Portfolio
Frequently Asked Questions
What is the best AI sharpening software for blurry photos?
Topaz Photo is our overall recommendation for photographers specifically trying to improve blurry or soft photographs.
Its current Sharpen tool includes specialized models for motion blur, lens blur, strong blur, refocusing, wildlife detail, and other sharpening situations.
Can AI completely fix a blurry photo?
No.
AI can significantly improve some blurry photographs, particularly when the blur is mild or moderate.
However, severe motion blur or severe missed focus may contain too little original information for accurate recovery.
Can AI fix an out-of-focus photo?
Sometimes.
Slight focus errors can potentially be improved.
Severe focus errors are much more difficult because important image information was never captured sharply in the first place.
Is Topaz better than Lightroom for sharpening?
For dedicated blur correction, Topaz Photo is generally the stronger choice.
For normal sharpening within a RAW workflow, Lightroom is extremely convenient and may be all you need.
The two applications serve somewhat different purposes.
Is AI sharpening better than Photoshop?
It depends on the task.
For dedicated AI blur correction, specialized software such as Topaz Photo has an advantage.
For professional retouching and selective manual control, Photoshop remains extremely powerful.
Many photographers can benefit from using both.
Can AI sharpening fix motion blur?
It can sometimes improve mild or moderate motion blur.
Topaz Photo provides a dedicated Motion Blur model designed to address the streaked appearance caused by camera or subject movement during exposure.
However, severe motion blur may remain impossible to recover naturally.
Can AI sharpening fix camera shake?
Yes, in some cases.
Modern AI sharpening tools can attempt to reverse the visual effects of camera movement.
The result depends heavily on the severity and direction of the shake.
Should I denoise before sharpening?
Usually, yes when the image contains significant noise.
Sharpening can emphasize noise, so reducing excessive noise first can produce a cleaner final result.
However, avoid excessive denoising because removing too much texture can make the sharpening process less effective.
Can AI sharpen a JPEG?
Yes.
AI sharpening tools can process JPEG images.
However, RAW files generally provide more original information and greater editing flexibility.
If JPEG is your only source, use conservative settings and watch for compression artifacts.
Can AI sharpen an old photograph?
Yes.
Old photographs can benefit from sharpening, but they often require more than sharpening alone.
A restoration workflow may include:
Repair → Denoise → Upscale → Sharpen → Color Correction
ON1 Photo RAW, for example, combines sharpening, noise reduction, and AI enlargement features within its current workflow.
Does AI sharpening create fake details?
It can.
This is one of the biggest limitations of AI-based image enhancement.
When the original photograph lacks sufficient information, the software may estimate details rather than recover information that was genuinely captured.
Always inspect important areas carefully before using the result professionally.
What is the best AI sharpening software for wildlife photography?
Topaz Photo is our top choice because its current Sharpen system includes a dedicated Wildlife Sharpen model designed to preserve natural fine details such as fur, feathers, whiskers, and scales.
What is the best AI sharpening software for portraits?
Topaz Photo and Photoshop are strong choices.
Topaz provides specialized AI sharpening for portraits, while Photoshop offers extensive manual control for selectively sharpening eyes, hair, clothing, and other details.
Why Trust The Candid Shoot?
At The Candid Shoot, our goal is to help photographers make practical decisions about cameras, editing software, AI photography tools, and real-world photography workflows.
For AI sharpening software, we don’t consider a tool “better” simply because it produces the most dramatic before-and-after effect.
We evaluate the technology from a photographer’s perspective.
Our comparison considers:
- Type of blur
- Detail preservation
- AI sharpening capabilities
- Motion-blur correction
- Focus recovery
- Noise handling
- RAW workflow
- Upscaling capabilities
- Masking and selective editing
- Ease of use
- Professional workflow suitability
We also distinguish between traditional sharpening and AI-powered blur correction, because these technologies solve different problems.
Software features and AI models can change frequently, so we recommend checking the developer’s current documentation before purchasing or relying on a specific feature.
How We Evaluated These AI Sharpening Tools
For this guide, we evaluated the major applications based on their stated capabilities and their usefulness for real photography workflows.
Our assessment focused on six common situations:
- Slightly soft photographs
- Motion blur
- Camera shake
- Missed focus
- High-ISO softness
- Low-resolution images
We also considered whether each application works as a dedicated sharpening solution or as part of a broader editing ecosystem.
For example, Topaz Photo currently provides multiple dedicated sharpening models, while ON1 Photo RAW combines TackSharp AI with NoNoise AI and Resize AI in a broader photo-editing application.
This distinction matters because the best software for a photographer who needs occasional sharpening may be completely different from the best software for someone regularly rescuing difficult images.
Final Verdict
After comparing the leading options, Topaz Photo is our overall pick for the best AI sharpening software for blurry photos in 2026.
Its biggest advantage is specialization.
Instead of treating every soft image the same way, its current Sharpen tool provides different AI models for different problems, including:
- Standard softness
- Strong blur
- Lens blur
- Motion blur
- Refocusing
- Wildlife detail
- Natural texture enhancement
That makes it particularly useful when you’re trying to rescue photographs that conventional sharpening cannot adequately improve.

However, that doesn’t mean everyone needs Topaz.
Choose Lightroom if:
You mainly need conventional sharpening inside an existing RAW workflow.
Choose Photoshop if:
You need advanced manual control and professional retouching.
Choose ON1 Photo RAW if:
You want sharpening, denoising, upscaling, RAW processing, and other editing tools in one application. Its current 2026.4 release combines TackSharp AI, NoNoise AI, and Resize AI in the same ecosystem.
Choose Luminar Neo if:
You want beginner-friendly AI editing beyond sharpening.
Choose DxO PhotoLab if:
Your priority is professional RAW development and optical correction.
The most important lesson is simple:
Don’t choose AI sharpening software based solely on how sharp it can make an image. Choose the tool that improves detail while keeping the photograph believable.
Conclusion
AI sharpening has become one of the most useful rescue technologies available to photographers.
A photograph that would once have been immediately discarded because of slight softness, camera movement, or missed focus may now be worth processing.
But AI sharpening isn’t magic.
The quality of the original photograph still matters.
The best results usually come from images that contain some usable detail that the AI can enhance or recover.
For mild softness, Lightroom or Photoshop may be sufficient.
For difficult blur, motion, camera shake, or missed focus, a dedicated AI solution such as Topaz Photo can provide substantially more specialized processing.
For photographers who want an all-in-one editing environment, ON1 Photo RAW offers an attractive alternative by combining AI sharpening with denoising, enlargement, RAW processing, and other editing capabilities.
Ultimately, the smartest workflow isn’t:
“Sharpen everything.”
It’s:
Cull → Identify the problem → Choose the appropriate AI tool → Process conservatively → Inspect at 100% → Compare with the original → Export for the final destination.
Used carefully, AI sharpening can turn a technically imperfect photograph into a genuinely useful image—without making it look artificially processed.
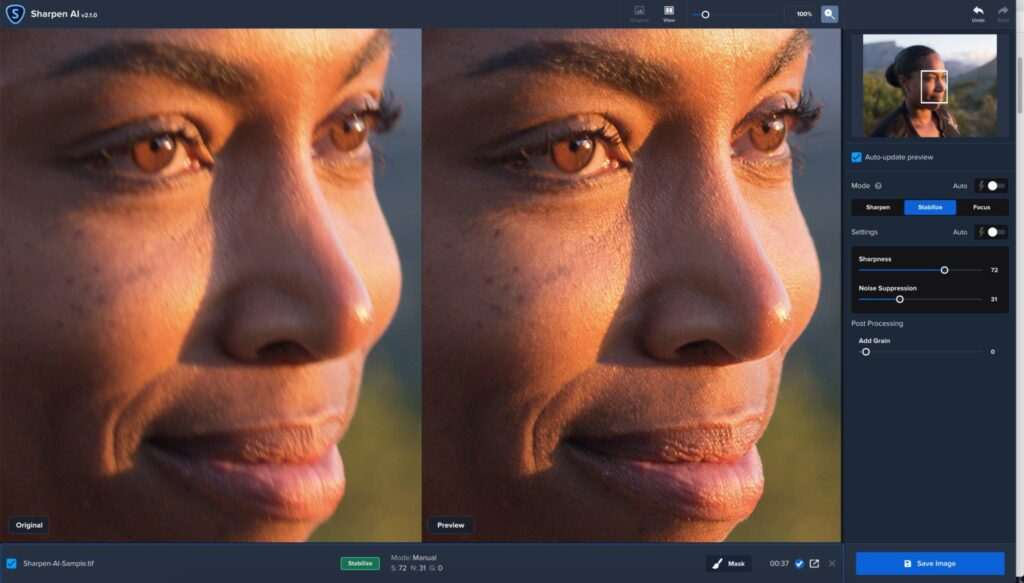
AI can also assist photographers beyond image editing. See our guide to ChatGPT for photographers for practical ways to use AI throughout your photography business and workflow.
Related AI Photography Guides
- AI Photography Guide: 35 Powerful Tools, Tips & Techniques
- Topaz Photo AI Review (2026)
- Best AI Photo Editors in 2026
- Best AI Image Enhancers in 2026
- Luminar Neo Review (2026)
- Photoshop AI Review (2026)
- Lightroom AI Review (2026)
- Best AI Photo Retouching Tools in 2026
Resources:
- Topaz Photo Sharpen Documentation
- ON1 Photo RAW
- Adobe Photoshop Sharpening Guide
- Adobe Lightroom Sharpening Guide
- Luminar Neo Enhance AI
“Official software documentation and product pages referenced in this guide.”



Leave a Reply