
Learn product photography with this complete step-by-step guide. Discover lighting, cameras, backgrounds, editing, and professional techniques for stunning product photos.
Table of Contents
Introduction to Product Photography
Product photoshoot is one of the most profitable photography niches today. Every online store, local business, marketplace seller, and brand needs high-quality product images to attract customers and increase sales.
Whether you sell products on Amazon, Flipkart, Etsy, Shopify, WooCommerce, or social media platforms, professional product photos can significantly improve conversion rates.
Many beginners believe they need expensive studio equipment to create professional product photographs. However, successful product photography relies more on lighting, composition, and presentation than costly gear.
A simple camera, proper lighting, and a clean background can often produce images that look professional and trustworthy.
This complete guide covers everything you need to know about product Product photoshoot, including equipment, lighting setups, camera settings, composition techniques, editing workflows, and business opportunities.
By the end of this guide, you’ll understand how to create product photographs that look professional, attract buyers, and help brands generate more sales.



Why Trust The Candid Shoot?
At The Candid Shoot, we publish practical photography guides based on real-world shooting techniques, camera knowledge, lighting setups, and post-processing workflows. Our goal is to simplify photography concepts so beginners, hobbyists, creators, and professionals can capture better images with confidence.
Every guide is carefully reviewed and updated to reflect current photography trends, camera technology, AI-powered editing tools, and industry best practices. Whenever relevant, we reference trusted photography resources and official manufacturer documentation to ensure our recommendations remain accurate and reliable.
Whether you’re photographing products for an online store, social media, Amazon listings, or personal projects, our tutorials are designed to help you improve image quality while making informed equipment and workflow decisions.
Quick Answer
Product photography is the process of creating high-quality images that accurately showcase a product’s appearance, features, and details. Effective product photography combines proper lighting, composition, camera settings, backgrounds, and editing techniques to produce professional images that increase customer trust and improve online sales.
Learn More About Product Photography
If you’re looking to master product photography from beginner to advanced level, don’t miss our complete guide:
👉 Powerful Product Photography Secrets for Photos
Inside this comprehensive guide, you’ll learn:
- Camera settings for product photography
- Lighting techniques for every budget
- Background selection
- Composition tips
- Lens recommendations
- Editing workflow
- AI tools for product photography
- Studio setup ideas
- Photography mistakes to avoid
- Professional workflow from planning to final image
This pillar guide connects all of our product photography tutorials in one place, making it the perfect starting point for beginners and experienced photographers alike.
What Is Product Photography?
Product photoshoot is a specialized branch of commercial photography focused on capturing products for marketing, advertising, ecommerce, catalogs, and promotional purposes.
Unlike portrait or landscape photography, product photography aims to present products clearly while highlighting their features, quality, and value.
The primary goal is simple:
Help customers understand and trust the product before purchasing.
Good product photography can:
- Increase sales
- Improve conversion rates
- Reduce product returns
- Build brand trust
- Enhance professional appearance
Poor product photoshoot often creates the opposite effect.
Why Product Photoshoot Matters
Modern consumers make purchasing decisions based largely on visuals.
Before reading descriptions, most buyers examine product photos.
Research consistently shows that better images often lead to higher conversion rates.
High-quality product photography helps:
Build Trust
Professional images create confidence.
Improve Click-Through Rates
Products with better photos attract more attention.
Increase Conversions
Clear product images help customers make buying decisions.
Strengthen Branding
Consistent photography improves brand recognition.
Reduce Returns
Customers understand products more accurately.
For ecommerce businesses, product photography is not an expense.
It is an investment.
Types of Product Photoshoot
Product photoshoot includes several specialized styles.
Each serves different purposes.
Ecommerce Product Photoshoot
Most common style.
Characteristics:
- White background
- Clean presentation
- Accurate colors
Used by:
- Amazon sellers
- Shopify stores
- Ecommerce brands
Lifestyle Product Photoshoot
Shows products being used in real-world situations.
Examples:
- Coffee mugs on desks
- Watches on wrists
- Clothing worn by models
Benefits:
- Better storytelling
- Emotional connection
- Increased engagement
Commercial Product Photoshoot
Created for advertising campaigns.
Often includes:
- Advanced lighting
- Creative concepts
- High-end retouching
Used by:
- Brands
- Agencies
- Advertisers
Flat Lay Photography
Products photographed from directly above.
Popular for:
- Social media
- Fashion accessories
- Food photography
- Beauty products
Macro Product Photoshoot
Highlights fine details.
Common subjects:
- Jewelry
- Watches
- Electronics
- Handmade products
Essential Product Photoshoot Equipment
Many beginners overspend on equipment before learning the fundamentals.
Start with essentials.
Upgrade gradually.
Best Cameras for Product Photoshoot
Modern cameras are highly capable.
The camera matters less than lighting and technique.
Beginner Cameras
- Canon R50
- Sony ZV-E10
- Nikon Z50
Intermediate Cameras
- Canon R10
- Sony A6700
- Fujifilm X-T5
Professional Cameras
- Sony A7 IV
- Canon R6 Mark II
- Nikon Z6 III
Why Mirrorless Cameras Dominate Product Photoshoot
Mirrorless cameras offer:
- Accurate live previews
- Better autofocus
- Compact designs
- Excellent image quality
Most modern commercial photographers now use mirrorless systems.







Best Lenses for Product Photoshoot
Lens selection affects image quality significantly.
50mm Lens
One of the most versatile options.
Best for:
- Small products
- Lifestyle photography
- General commercial work
85mm Lens
Excellent for:
- Product isolation
- Compression
- Premium-looking images
Macro Lenses
Essential for:
- Jewelry
- Watches
- Electronics
- Cosmetics
Popular options:
- 90mm Macro
- 100mm Macro
- 105mm Macro
Macro lenses reveal details invisible to standard lenses.
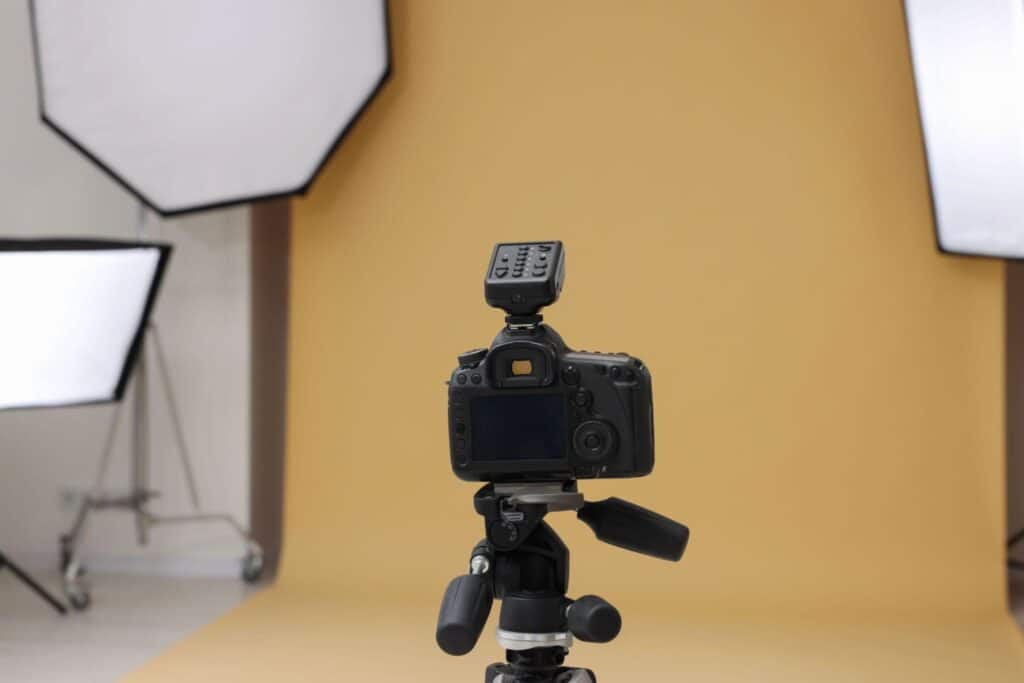
Tripods: The Most Important Product Photoshoot Tool
Many photographers focus on cameras first.
However, tripods often provide greater benefits.
Advantages:
- Sharper images
- Consistent framing
- Easier editing
- Lower ISO usage
A tripod should be considered mandatory for serious product photography.
Recommended Tripod Features
Look for:
- Adjustable height
- Stable construction
- Ball head
- Quick-release plate
Good tripods improve efficiency dramatically.
Backgrounds for Product Photoshoot
Backgrounds play a major role in product presentation.
White Backgrounds
Industry standard.
Perfect for:
- Amazon
- Ecommerce
- Catalog photography
Benefits:
- Clean appearance
- Focus on product
- Easy editing
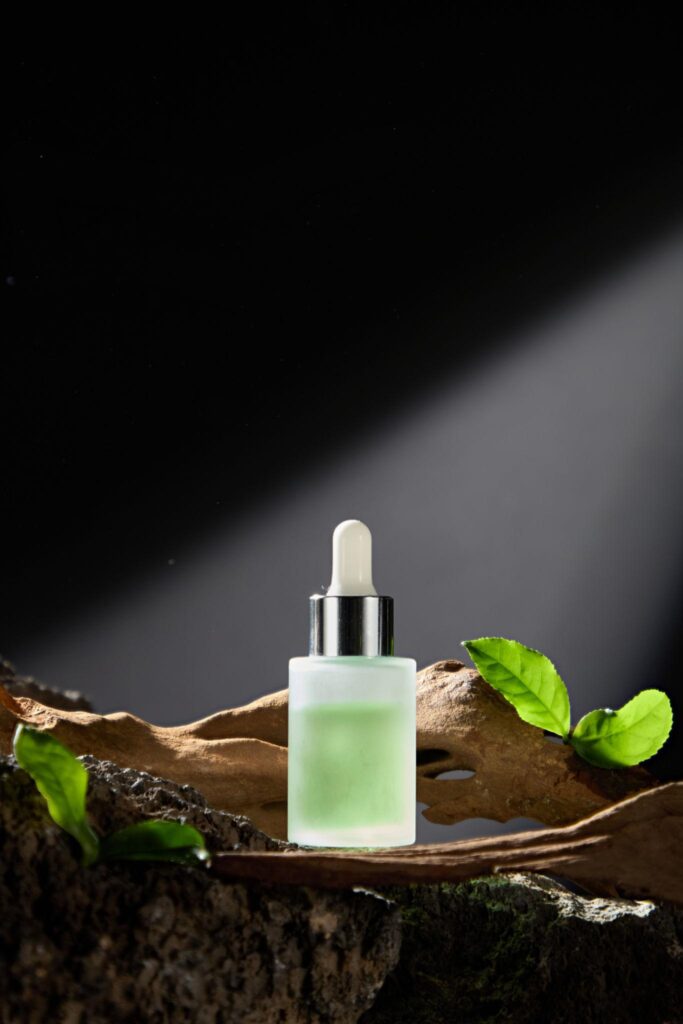
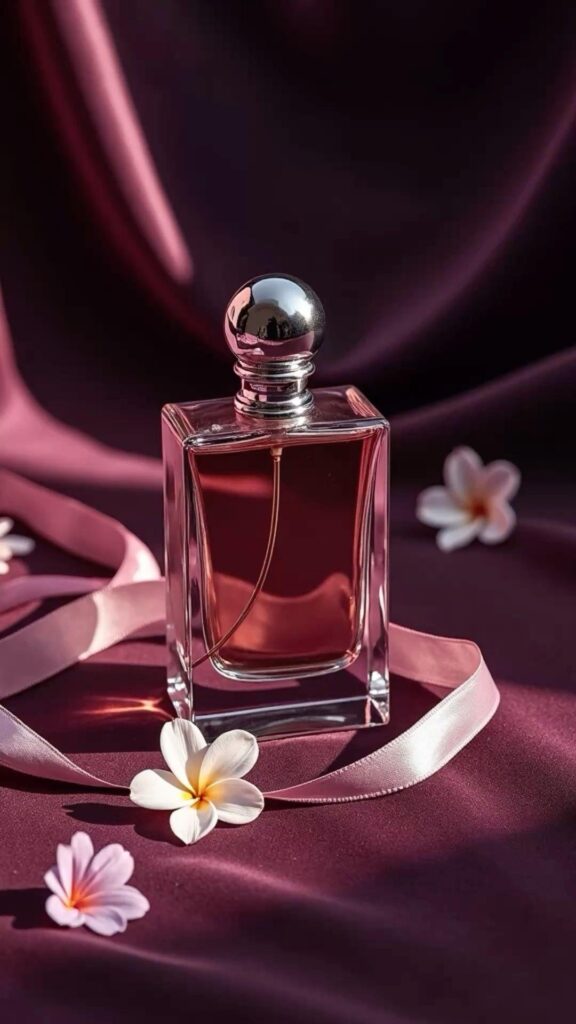
Black Backgrounds
Create luxury and drama.
Popular for:
- Watches
- Perfumes
- Premium products
Colored Backgrounds
Useful for:
- Social media
- Branding
- Creative campaigns
Textured Backgrounds
Examples:
- Wood
- Marble
- Concrete
Frequently used in lifestyle product photography.
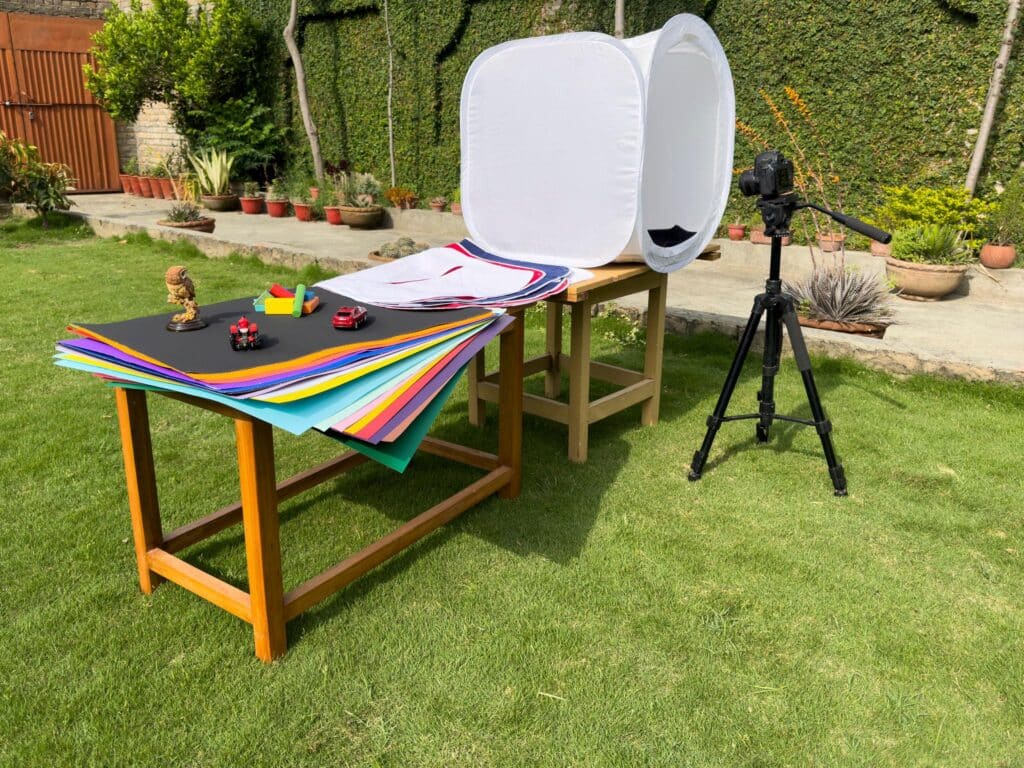
Light Tents and Product Boxes
Light tents simplify product photography.
Benefits:
- Even lighting
- Reduced reflections
- Easy setup
Particularly useful for:
- Jewelry
- Small products
- Reflective surfaces
Many beginners achieve excellent results using inexpensive light tents.
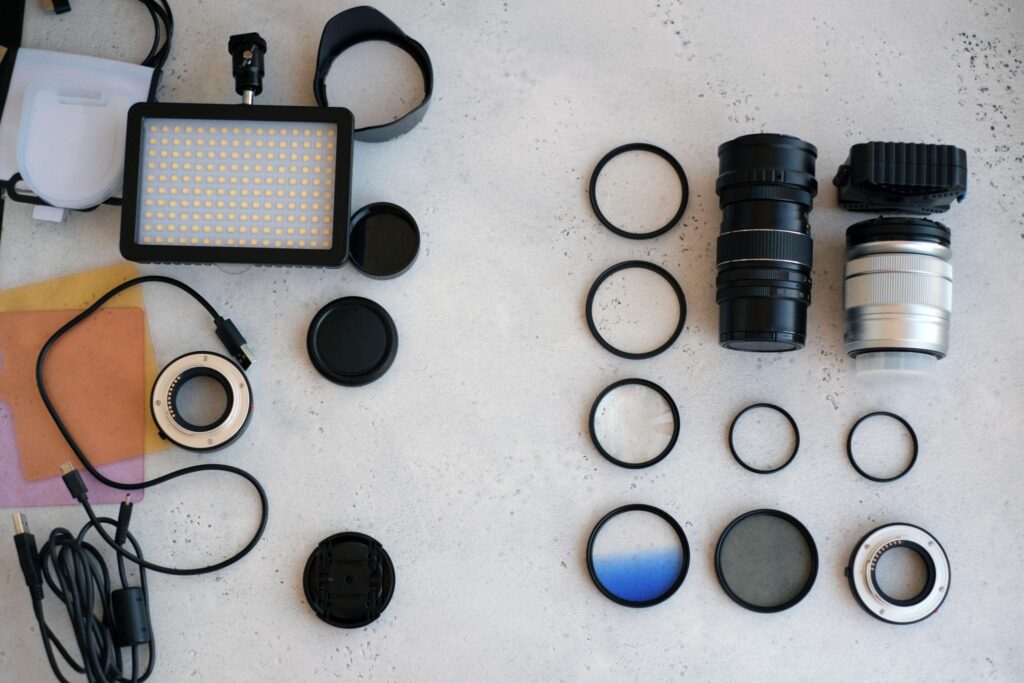
Essential Accessories
Additional accessories improve workflow and image quality.
Recommended items:
- Memory cards
- Extra batteries
- Reflectors
- Diffusers
- Acrylic sheets
- Cleaning cloths
- Product stands
- Clamps
Small accessories often solve large problems.
Common Beginner Mistakes
Avoid these early mistakes:
Using Harsh Light
Creates distracting shadows.
Ignoring Reflections
Common with shiny products.
Using Busy Backgrounds
Distracts attention.
Shooting Handheld
Reduces consistency.
Overediting
Makes products appear unrealistic.
The goal is accurate representation, not deception.
Related Articles:
- Photography Tutorials
- Photography for Beginners
- Camera Buying & Gear Guide
- Portrait & Fashion Photography Guide
- Creative Lighting Ideas for Home Photoshoot
- Product Photography Setup at Home
- Best Ring Light for Photography
- Best Camera for YouTube Beginners
- DIY Photoshoot Ideas at Home
- Best Camera Under ₹30,000
- Best Camera Under ₹1 Lakh
- Photography Pricing Guide
Camera Settings for Product Photoshoot
Many beginners struggle with product photoshoot because they rely on automatic camera settings.
Professional product photographers typically work in Manual Mode because it provides complete control over exposure, consistency, and image quality.
Unlike portraits or sports photography, products rarely move. This allows photographers to use slower shutter speeds, lower ISO values, and narrower apertures to maximize image quality.
The goal is simple:
Create sharp, clean, and accurate product photographs.
Understanding Exposure in Product Photography
Every product photograph depends on three camera settings:
- Aperture
- Shutter Speed
- ISO
These settings work together to control brightness and image quality.
Unlike action photography, product photography prioritizes consistency over speed.
Aperture Settings
Aperture controls:
- Brightness
- Depth of field
Product photographers usually need more of the product in focus than portrait photographers.
Recommended Aperture Settings:
Small Products
f/8 to f/11
Jewelry Photography
f/11 to f/16
Flat Lay Photography
f/8 to f/13
Large Products
f/8 to f/11
Using wider apertures such as f/1.8 may create beautiful background blur, but often leaves important parts of the product out of focus.
Shutter Speed Settings
Because products remain stationary, shutter speed becomes less critical.
When using a tripod:
- 1/30 sec
- 1/10 sec
- 1 second
- Multiple seconds
can all produce sharp images.
This allows photographers to:
- Keep ISO low
- Maximize image quality
- Reduce noise
ISO Settings
Always keep ISO as low as possible.
Recommended:
ISO 100
Benefits:
- Maximum detail
- Less noise
- Better color accuracy
- Cleaner editing
High ISO values rarely provide advantages in product photography.
White Balance Settings
Accurate colors are essential.
Customers expect products to look the same in real life as they do online.
Recommended White Balance:
Daylight
For window-light photography.
Flash
For strobe photography.
Custom White Balance
Best for professional product work.
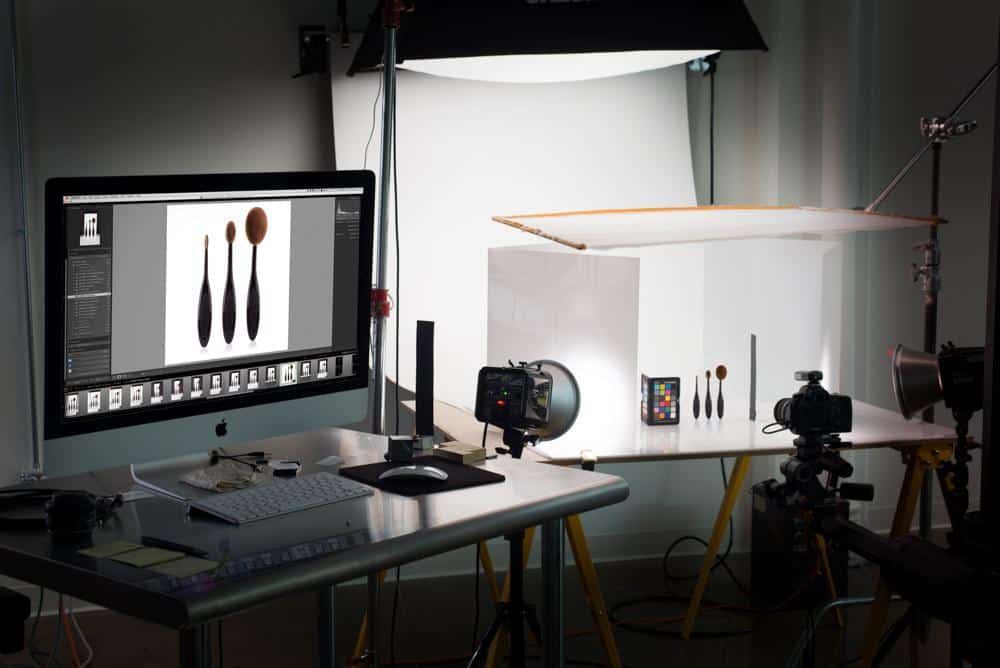
Many photographers use gray cards or color checkers for perfect color accuracy.
Focus Settings
Product photography requires precision.
Recommended:
- Single Point Autofocus
- Manual Focus for macro work
Always focus on the most important part of the product.
Examples:
- Logo
- Product label
- Gemstone
- Watch face
- Product branding
Product Photography Lighting Guide
Lighting is the most important element of product photography.
A beginner with excellent lighting often produces better results than someone using an expensive camera with poor lighting.
Great lighting helps:
- Reveal details
- Control reflections
- Improve color accuracy
- Create professional appearance
Natural Light Product Photography
Natural light remains one of the easiest ways to start.
Many successful ecommerce photographers use nothing more than window light.
Advantages:
- Free
- Soft
- Easy to use
- Beginner friendly
Natural light works particularly well for:
- Handmade products
- Lifestyle photography
- Small businesses
- Social media content
Window Light Setup
One of the simplest setups.
Requirements:
- Large window
- White foam board
- Product surface
Position the product:
- Near the window
- Opposite a reflector
This creates soft, even illumination.
Benefits of Window Light
Window lighting offers:
- Soft shadows
- Natural colors
- Minimal equipment cost
Ideal for:
- Food photography
- Cosmetics
- Home decor
- Clothing accessories
Artificial Lighting for Product Photography
Artificial lighting provides complete consistency.
Benefits:
- Works any time
- Repeatable results
- Professional appearance
Common lighting tools include:
- Softboxes
- LED Panels
- Speedlights
- Studio Strobes
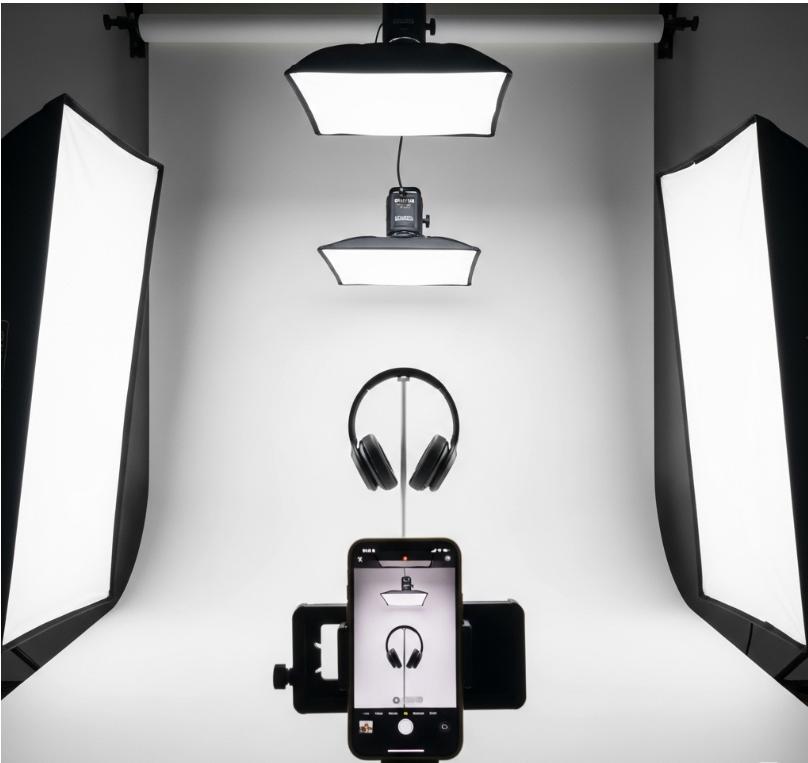
Softbox Lighting
Softboxes remain one of the most popular product photography tools.
Advantages:
- Soft shadows
- Controlled light
- Professional results
Softboxes are ideal for:
- Ecommerce photography
- Commercial photography
- Catalog photography
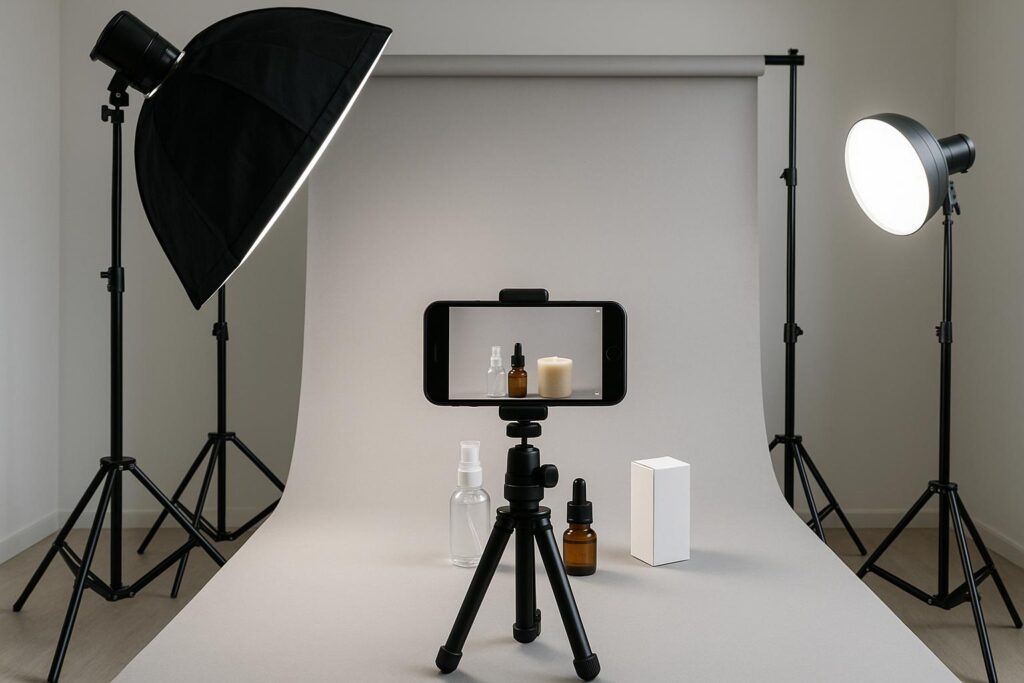
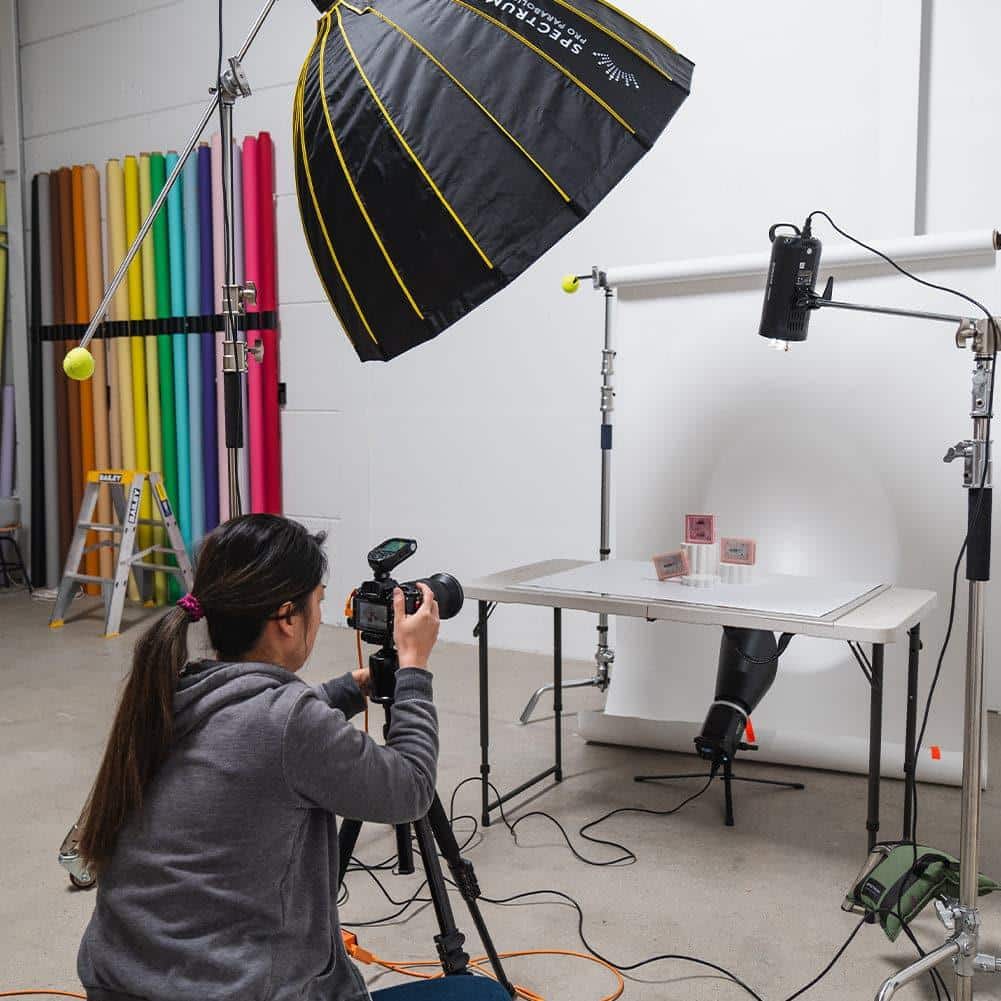
One-Light Product Setup
Many photographers begin with a single softbox.
Benefits:
- Affordable
- Easy to learn
- Portable
Setup:
Light → Product → Reflector
This simple arrangement produces surprisingly professional results.
Two-Light Product Setup
Adds greater control.
Setup:
Key Light + Fill Light
Benefits:
- Reduced shadows
- Balanced exposure
- Cleaner product presentation
Frequently used for:
- Ecommerce stores
- Product catalogs
- Small commercial projects
Three-Light Product Setup
Professional approach.
Includes:
- Key Light
- Fill Light
- Background Light
Advantages:
- Greater separation
- Enhanced depth
- More premium appearance
Often used for:
- Advertising campaigns
- Commercial photography
- Luxury products
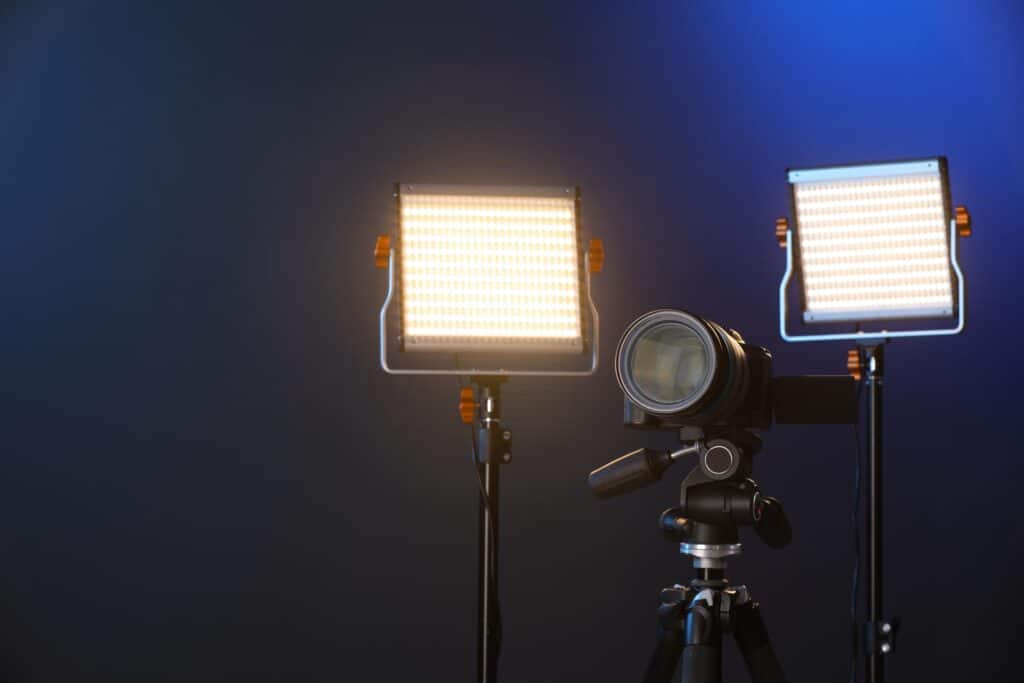
LED Lights vs Softboxes
Many beginners ask which option is better.
The answer depends on goals.
LED Lights
Advantages:
- Affordable
- Continuous light
- Easy learning
Best For:
- Beginners
- Social media content
- Small products
Softboxes
Advantages:
- Softer light
- Better control
- Professional results
Best For:
- Ecommerce photography
- Commercial work
- Product catalogs
For most photographers, softboxes remain the preferred choice.

Light Tents for Product Photography
Light tents simplify lighting dramatically.
Especially useful for:
- Jewelry
- Watches
- Cosmetics
- Reflective products
Benefits:
- Diffused light
- Fewer reflections
- Consistent results
Many beginners achieve professional-looking photographs using affordable light tents.
White Background Product Photography
White background photography dominates ecommerce.
Popular platforms:
- Amazon
- Flipkart
- Shopify
- WooCommerce
Benefits:
- Clean appearance
- Focus on product
- Easier editing
White backgrounds increase professionalism and trust.
How to Create Pure White Backgrounds
Professional workflow:
- White backdrop
- Softbox lighting
- Proper exposure
- Lightroom adjustments
Avoid overexposing products while attempting to brighten backgrounds.
Black Background Product Photography
Black backgrounds create premium visuals.
Popular for:
- Watches
- Perfumes
- Electronics
- Luxury products
Benefits:
- Dramatic appearance
- High contrast
- Premium feel
Luxury brands frequently use black backgrounds to create exclusivity.
Reflective Product Photography
Reflective surfaces present unique challenges.
Common products:
- Jewelry
- Glassware
- Watches
- Electronics
Problems:
- Unwanted reflections
- Visible light sources
- Camera reflections
Solutions:
- Diffusion panels
- Light tents
- Black cards
- Careful positioning
Mastering reflections dramatically improves product photography skills.
Jewelry Photography Techniques
Jewelry remains one of the most demanding product photography categories.
Requirements:
- Macro lens
- Controlled lighting
- Clean surfaces
- Detailed retouching
Photographers must pay attention to:
- Dust
- Fingerprints
- Reflections
Small imperfections become highly visible in close-up images.
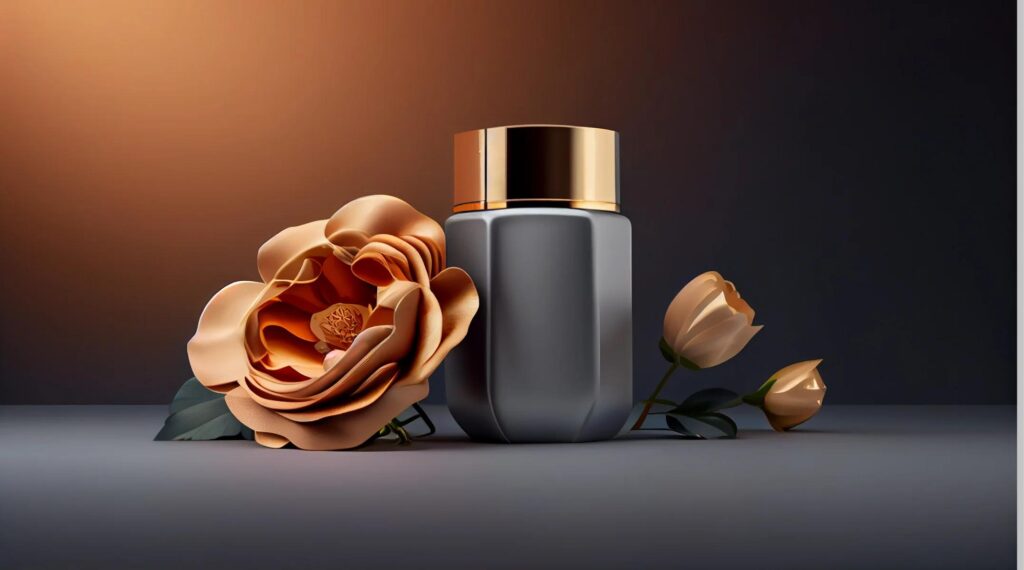
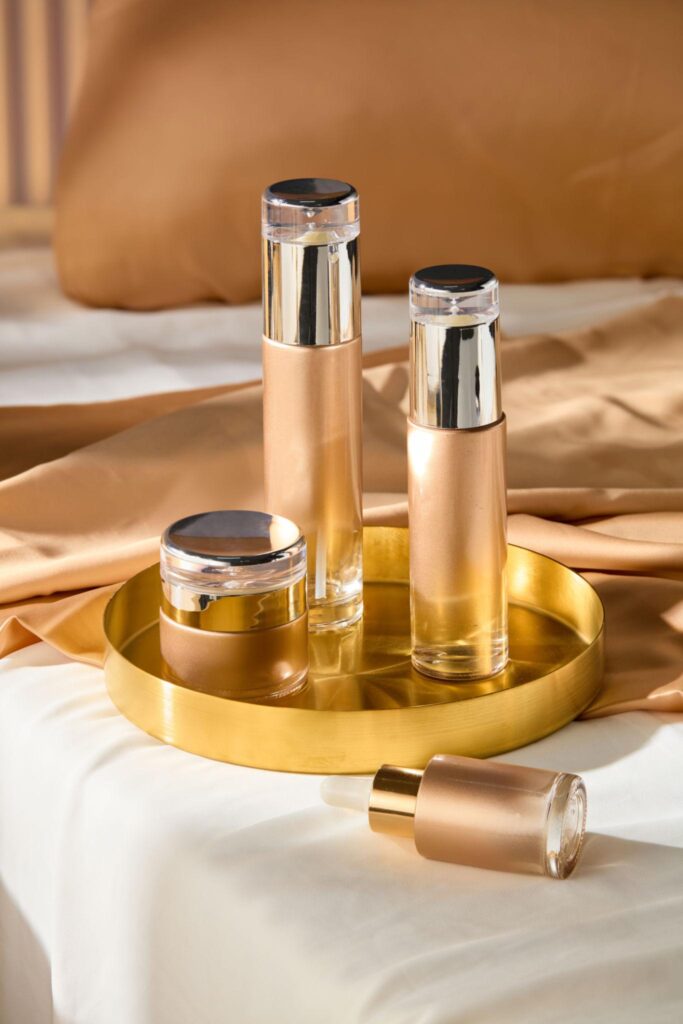
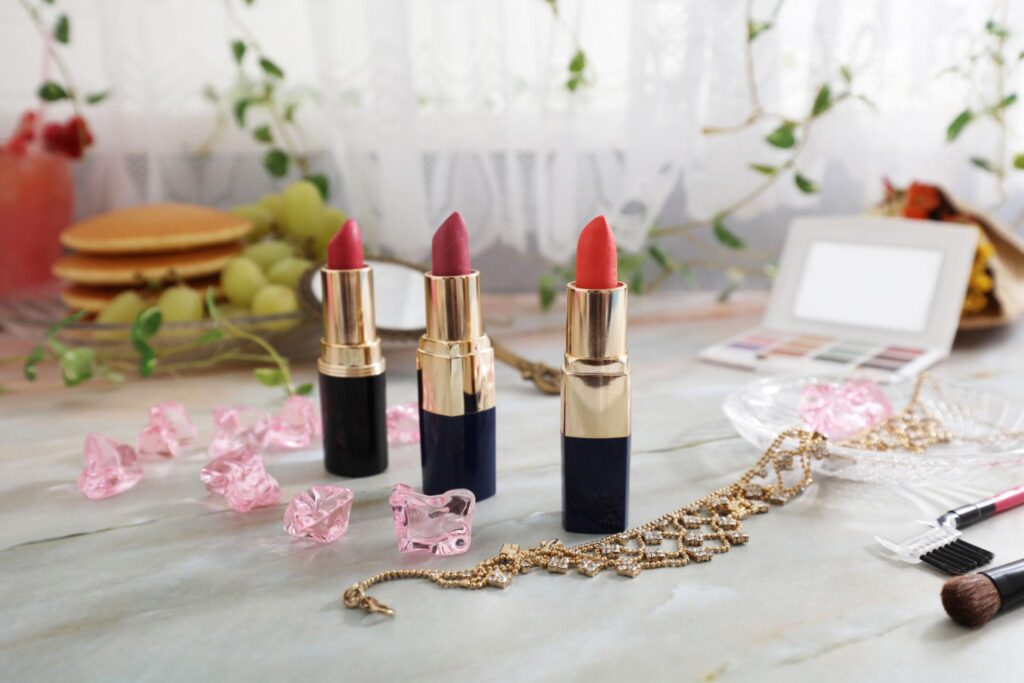
Cosmetic Product Photography
Beauty products perform exceptionally well with:
- Soft lighting
- Clean styling
- Minimal distractions
Popular subjects:
- Lipsticks
- Perfumes
- Skincare products
- Makeup kits
Brand consistency becomes particularly important.


Food Product Photography Basics
Food photography combines:
- Product photography
- Styling
- Lighting
Important considerations:
- Fresh appearance
- Color accuracy
- Texture visibility
Natural light often works extremely well for food photography.
Product Photography Lighting Mistakes
Avoid these common mistakes.
Using Harsh Direct Light
Creates distracting shadows.
Uneven Illumination
Reduces professionalism.
Incorrect White Balance
Creates inaccurate product colors.
Ignoring Reflections
Common beginner issue.
Overcomplicated Setups
Simple lighting often produces better results.
Related Articles:
- Product Photography Setup at Home
- Creative Lighting Ideas for Home Photoshoot
- Best Ring Light for Photography
- Best Lighting Kit for YouTube Beginners
- Photography Tutorials
- Photography for Beginners
- Camera Buying & Gear Guide
- Portrait & Fashion Photography Guide
- Best Camera Under ₹30,000
- Best Camera Under ₹1 Lakh
- DIY Photoshoot Ideas at Home
- Indoor Photoshoot Ideas at Home
- Aesthetic Photo Ideas for Instagram
Product Styling Techniques
Product photography is not just about cameras and lighting.
Styling plays an equally important role.
Even perfectly exposed images can look unprofessional if the product is poorly arranged.
Product styling helps:
- Increase visual appeal
- Support branding
- Create storytelling
- Improve engagement
- Boost conversions
The best product photographs make products appear desirable while remaining authentic.
Understanding Product Styling
Product styling refers to how products are presented within a photograph.
This includes:
- Placement
- Props
- Colors
- Textures
- Backgrounds
- Composition
Professional brands invest heavily in styling because presentation influences purchasing decisions.
Creating a Visual Story
Successful product images often tell a story.
Examples:
Coffee Mug
Instead of photographing only the mug:
Include:
- Coffee beans
- Notebook
- Laptop
- Wooden table
Skincare Products
Include:
- Towels
- Plants
- Mirrors
- Natural textures
Watches
Include:
- Leather accessories
- Premium surfaces
- Luxury props
Stories help customers imagine owning the product.
Choosing the Right Props
Props should support the product rather than compete with it.
Good props:
- Match brand identity
- Add context
- Enhance storytelling
Bad props:
- Distract attention
- Overpower the product
- Create confusion
The product must remain the hero.
Color Coordination
Colors influence mood and branding.
Popular combinations:
Luxury Products
- Black
- Gold
- Silver
Natural Products
- Green
- Beige
- Brown
Modern Brands
- White
- Gray
- Neutral tones
Maintaining consistent colors strengthens brand recognition.
Product Photography Composition
Composition determines how viewers interact with images.
A well-composed product photo directs attention immediately toward the product.
Rule of Thirds
One of the most effective composition techniques.
Place the product along grid intersections instead of the exact center.
Benefits:
- Better balance
- Improved visual flow
- More engaging images
Center Composition
Highly effective in product photography.
Particularly useful for:
- Ecommerce photography
- Luxury products
- Symmetrical products
Examples:
- Perfume bottles
- Watches
- Cosmetics
Leading Lines
Lines naturally guide attention.
Examples:
- Tables
- Shelves
- Product arrangements
Leading lines create stronger visual flow.
Negative Space
Negative space refers to empty areas around products.
Benefits:
- Cleaner appearance
- Premium feel
- Better ad design flexibility
Many luxury brands intentionally use large amounts of negative space.
Symmetry
Symmetry creates order and professionalism.
Works exceptionally well for:
- Watches
- Electronics
- Beauty products
- Packaging
Symmetrical compositions often appear more premium.
Flat Lay Photography Guide
Flat lay photography remains one of the most popular product photography styles.
Products are photographed directly from above.
Why Flat Lays Work
Benefits:
- Easy setup
- Excellent storytelling
- Social media friendly
- Highly versatile
Popular categories:
- Fashion accessories
- Food photography
- Beauty products
- Stationery
Building a Flat Lay
Start with:
- Clean surface
- Main product
- Supporting props
Then:
- Arrange items carefully
- Balance visual weight
- Maintain spacing
Avoid clutter.
Best Backgrounds for Flat Lays
Popular choices:
- White paper
- Wood surfaces
- Marble
- Concrete
- Fabric
Choose backgrounds that match brand identity.
Ecommerce Product Photography
Ecommerce photography prioritizes clarity and accuracy.
The goal:
Help customers understand products quickly.
Characteristics of Ecommerce Photography
- White background
- Consistent lighting
- Accurate colors
- Multiple angles
This style dominates:
- Amazon
- Shopify
- Flipkart
- WooCommerce
Required Product Angles
Photograph:
- Front view
- Side view
- Rear view
- Top view
- Detail shots
More information reduces customer uncertainty.
Importance of Consistency
All product images should maintain:
- Similar lighting
- Similar backgrounds
- Similar editing
Consistency improves professionalism.
Amazon Product Photography
Amazon has specific image requirements.
Main Image Requirements
Generally includes:
- Pure white background
- Product fills most of frame
- No distracting elements
Always verify current marketplace requirements.
Secondary Images
Can include:
- Lifestyle images
- Close-ups
- Infographics
- Product demonstrations
These images help explain benefits.
Clothing Product Photography
Clothing photography combines:
- Product photography
- Fashion photography
Several approaches exist.
Flat Lay Clothing Photography
Simple and affordable.
Benefits:
- Easy setup
- Consistent results
Ghost Mannequin Photography
Creates floating clothing appearance.
Popular among:
- Ecommerce stores
- Clothing brands
Benefits:
- Professional appearance
- Focus on garment shape
Model-Based Clothing Photography
Shows products being worn.
Benefits:
- Better visualization
- Lifestyle appeal
- Higher engagement
Popular among fashion brands.
Jewelry Photography Workflow
Jewelry photography demands precision.
Challenges include:
- Reflections
- Dust
- Fingerprints
Every detail becomes visible.
Essential Equipment
- Macro lens
- Tripod
- Diffused lighting
- Cleaning cloths
Jewelry Photography Tips
Always:
- Clean products thoroughly
- Use soft lighting
- Control reflections
- Inspect images carefully
Patience becomes essential.
Electronics Product Photography
Electronics require special attention.
Common products:
- Smartphones
- Headphones
- Laptops
- Cameras
Challenges:
- Reflective surfaces
- Screens
- Fingerprints
Use:
- Diffusers
- Softboxes
- Black cards
to improve results.
Cosmetic Product Photography
Beauty products often rely heavily on branding.
Focus on:
- Packaging
- Texture
- Color consistency
Popular props:
- Flowers
- Stones
- Fabric
- Mirrors
Minimal styling often works best.
Food Photography Techniques
Food photography combines art and marketing.
The objective:
Make food look irresistible.
Natural Light Food Photography
Many food photographers prefer window light.
Benefits:
- Soft shadows
- Realistic colors
- Simple setup
Styling Food Products
Consider:
- Garnishes
- Utensils
- Ingredients
These elements support storytelling.
Showing Texture
Texture creates appetite appeal.
Examples:
- Melted chocolate
- Fresh fruit
- Crispy crusts
Lighting should enhance texture rather than hide it.
Commercial Product Photography
Commercial photography often involves:
- Advertising campaigns
- Billboards
- Product launches
- Brand marketing
Requirements:
- Advanced lighting
- Creative concepts
- High-end retouching
This category typically commands higher rates.
Advanced Product Photography Techniques
As skills improve, photographers can explore advanced methods.
Focus Stacking
Combines multiple images.
Benefits:
- Extreme sharpness
- Greater depth of field
Commonly used for:
- Jewelry
- Watches
- Macro photography
Composite Photography
Combines multiple photographs into one image.
Used for:
- Advertising
- Creative campaigns
Splash Photography
Popular in:
- Beverage photography
- Cosmetic photography
Requires:
- Timing
- Lighting
- Practice
Creates dramatic visuals.
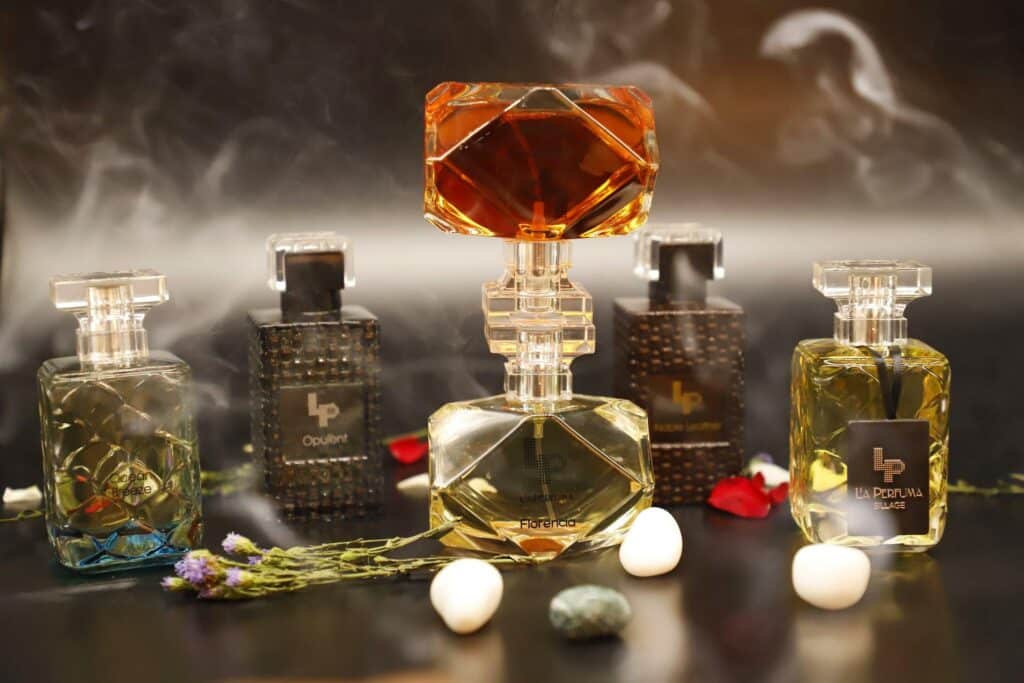
Smoke Photography
Often used with:
- Perfumes
- Luxury products
Adds atmosphere and visual interest.
Common Styling Mistakes
Avoid:
Too Many Props
Creates distractions.
Inconsistent Branding
Weakens brand identity.
Overediting Colors
Makes products appear unrealistic.
Ignoring Shadows
Products may appear artificial.
Cluttered Layouts
Reduce visual impact.
Simple compositions often perform best.
Related Articles:
- Product Photography Setup at Home
- Portrait & Fashion Photography Guide
- Photography Tutorials
- Photography for Beginners
- Camera Buying & Gear Guide
- Creative Lighting Ideas for Home Photoshoot
- DIY Photoshoot Ideas at Home
- Indoor Photoshoot Ideas at Home
- Best Ring Light for Photography
- Best Lighting Kit for YouTube Beginners
- Aesthetic Photo Ideas for Instagram
- Best Camera Under ₹30,000
- Best Camera Under ₹1 Lakh
- Photography Pricing Guide
- How Can I Start a Photography Business?
Product Photography Editing Workflow
Capturing a great product photo is only half the process.
Professional product photographers spend significant time editing images to ensure consistency, accuracy, and visual appeal.
Editing helps:
- Correct colors
- Remove distractions
- Improve brightness
- Enhance sharpness
- Maintain brand consistency
However, editing should improve reality rather than completely change it.
Products must still look like the actual item customers receive.
Organizing Product Images
Before editing, organize photographs properly.
Recommended folder structure:
Product Photography
├── Client Name
├── Product Category
├── RAW Files
├── Edited Files
├── Final Delivery
Good organization saves time and prevents confusion.
Culling Product Images
Select the strongest photographs.
Look for:
- Sharp focus
- Proper exposure
- Clean composition
- Accurate colors
- Minimal reflections
Delete duplicates and weak images.
Professional workflows prioritize quality over quantity.
Lightroom Workflow for Product Photography
Adobe Lightroom remains one of the most useful tools for product photographers.
Benefits:
- Fast editing
- Batch processing
- Color correction
- Exposure adjustments
Step 1: Correct Exposure
Adjust:
- Highlights
- Shadows
- Whites
- Blacks
Maintain detail throughout the image.
Step 2: Fix White Balance
Accurate color representation is critical.
Customers expect products to match photos.
Use:
- Gray cards
- Color checkers
- Custom white balance
whenever possible.
Step 3: Improve Contrast
Moderate contrast improves:
- Detail visibility
- Product definition
- Professional appearance
Avoid excessive contrast.
Step 4: Adjust Colors
Refine:
- Saturation
- Vibrance
- HSL settings
Always prioritize realistic colors.
Step 5: Sharpening
Sharpen carefully.
Product photographs benefit from:
- Clear details
- Crisp edges
- Visible textures
Over-sharpening creates artificial results.
Photoshop Workflow for Product Photography
Photoshop handles advanced retouching tasks.
Common uses include:
- Background removal
- Dust removal
- Reflection cleanup
- Composite creation
Removing Dust and Imperfections
Products often contain:
- Dust particles
- Fingerprints
- Scratches
Use:
- Healing Brush
- Clone Stamp
- Spot Healing Tool
to remove distractions.
Background Removal
Many ecommerce platforms require clean backgrounds.
Popular methods include:
- Pen Tool
- Select Subject
- Layer Masks
Clean selections improve professionalism.
Creating Pure White Backgrounds
Common for:
- Amazon listings
- Ecommerce stores
- Product catalogs
Workflow:
- Isolate product
- Refine edges
- Add white background
- Verify color accuracy
The product should remain realistic.
Reflection Control
Reflective products often require retouching.
Examples:
- Watches
- Electronics
- Jewelry
- Glass products
Remove unwanted reflections while preserving natural highlights.
Building a Product Photography Portfolio
A strong portfolio attracts clients.
Your portfolio should demonstrate:
- Technical skills
- Consistency
- Versatility
Essential Portfolio Categories
Include examples of:
Ecommerce Photography
White background products.
Lifestyle Photography
Products in real-world environments.
Jewelry Photography
Close-up detail work.
Food Photography
Styled product images.
Cosmetic Photography
Beauty and skincare products.
Creating Portfolio Projects
Beginners often lack paying clients.
Create sample projects using:
- Household products
- Local businesses
- Personal items
- Handmade products
Portfolio quality matters more than client count.
Building a Portfolio Website
A professional website increases credibility.
Include:
- About page
- Portfolio galleries
- Services
- Contact page
Your website should make it easy for potential clients to understand your work.
Product Photography Business Guide
Product photography offers excellent business opportunities.
The growth of ecommerce continues creating demand for high-quality product images.
Product Photography Services
Common services include:
Ecommerce Photography
Amazon Product Photography
Shopify Product Photography
Food Photography
Jewelry Photography
Advertising Photography
Social Media Product Photography
Diversification improves income stability.
Pricing Product Photography
Pricing varies based on:
- Experience
- Complexity
- Deliverables
- Usage rights
Avoid charging solely by time.
Instead, consider:
- Product count
- Editing requirements
- Commercial usage
Example Pricing Structure
Beginner
₹300–₹1,000 per image
Intermediate
₹1,000–₹3,000 per image
Professional
₹3,000–₹10,000+ per image
Pricing depends heavily on market and project scope.
Finding Product Photography Clients
Client acquisition remains one of the most important business skills.
Local Businesses
Contact:
- Clothing stores
- Restaurants
- Jewelers
- Cosmetic brands
Many small businesses need better product photographs.
Ecommerce Sellers
Reach out to:
- Shopify sellers
- Amazon sellers
- Etsy sellers
Offer portfolio examples.
Social Media Outreach
Instagram remains valuable for:
- Networking
- Portfolio sharing
- Client acquisition
Consistent posting improves visibility.
Referrals
Satisfied clients often become the best marketing channel.
Provide excellent service and request referrals when appropriate.
Delivering Product Photography Projects
Professional delivery improves client satisfaction.
Popular tools include:
- Google Drive
- Dropbox
- Pixieset
- WeTransfer
Deliver:
- High-resolution files
- Web-optimized files
- Organized folders
Consistency creates trust.
Complete Product Photography Equipment Checklist
Cameras
Beginner
- Canon R50
- Sony ZV-E10
- Nikon Z50
Intermediate
- Canon R10
- Sony A6700
- Fujifilm X-T5
Professional
- Sony A7 IV
- Canon R6 Mark II
- Nikon Z6 III
Lenses
Essential
- 50mm f/1.8
Recommended
- 85mm f/1.8
Macro
- 90mm Macro
- 100mm Macro
- 105mm Macro
Lighting
Beginner
- Reflector
- LED Panel
Intermediate
- Softbox
- Speedlight
Professional
- Godox AD200 Pro
- Godox SL60
- Studio Strobes
Accessories
- Tripod
- Light Tent
- Acrylic Sheets
- Product Turntable
- Background Paper
- Diffusers
- Memory Cards
- Cleaning Kit
Editing Software
Adobe Lightroom
Best overall editor.
Adobe Photoshop
Advanced retouching.
Canva
Marketing graphics.
Snapseed
Mobile editing.





Related Articles:
Photography Learning
- Photography Tutorials
- Photography for Beginners
- Camera Buying & Gear Guide
- Portrait & Fashion Photography Guide
Product Photography Resources
- Product Photography Setup at Home
- Creative Lighting Ideas for Home Photoshoot
- DIY Photoshoot Ideas at Home
- Indoor Photoshoot Ideas at Home
Equipment Guides
- Best Camera Under ₹30,000
- Best Camera Under ₹1 Lakh
- Best Camera for Instagram and Reels
- Best Camera for YouTube Beginners
- Best Ring Light for Photography
- Best Lighting Kit for YouTube Beginners
Business Guides
- Photography Pricing Guide
- How Much Does a Professional Photoshoot Cost in India?
- How Can I Start a Photography Business?
- How Do Beginner Photographers Get Their First Clients?
- What Are the Most Profitable Photography Niches?
Photography Ideas
- Aesthetic Photo Ideas for Instagram
- Photography Poses for Beginners
- Natural Poses for Photos
- Romantic Couple Poses
- Beach Couple Poses
- Pre-Wedding Photoshoot Ideas
More Photography Guides:
- Adobe Lightroom
- Adobe Photoshop
- Canva Design School
- Shopify Product Photography Guide
- Amazon Seller University
- Digital Photography School
- Canon Learn
- Nikon Learn & Explore
- Sony Alpha Universe
Conclusion
Product photography combines technical knowledge, lighting control, styling, composition, and editing.
While cameras and lenses matter, successful product photography depends primarily on presentation and consistency.
Start with simple setups.
Master lighting.
Understand composition.
Develop a strong editing workflow.
As your skills improve, you’ll be able to create professional product images that help businesses attract customers and increase sales.
Remember:
The best product photograph doesn’t simply show a product.
It helps customers imagine owning it.
Call To Action
Ready to improve your product photography skills?
Explore The Candid Shoot for detailed tutorials, camera reviews, lighting guides, photography business resources, and practical advice designed to help photographers create professional product images and grow successful photography careers.
Frequently Asked Questions About Product Photography
What is product photography and why is it important?
Product photography is the process of capturing high-quality images of products for ecommerce stores, advertisements, catalogs, social media, and marketing campaigns. It is important because product images are often the first thing customers notice when shopping online. Professional product photography builds trust, improves brand perception, increases click-through rates, and can significantly boost sales. High-quality images help customers understand product features, colors, sizes, and quality before making a purchase decision.
How can beginners start product photography at home?
Beginners can start product photography at home using a camera or smartphone, natural window light, a tripod, and a clean background. A simple setup with white poster paper, a reflector, and good lighting can produce professional-looking results. Learning basic camera settings, composition, and editing techniques is more important than investing in expensive equipment during the early stages.
What camera is best for product photography?
Many modern cameras work well for product photography. Popular beginner-friendly options include the Canon R50, Sony ZV-E10, and Nikon Z50. Intermediate photographers often choose the Canon R10, Sony A6700, or Fujifilm X-T5. Professionals frequently use cameras such as the Sony A7 IV, Canon R6 Mark II, and Nikon Z6 III because of their image quality, dynamic range, and lens compatibility. However, lighting and technique generally have a greater impact on results than the camera itself.
Which lens is best for product photography?
The best lens depends on the product type. A 50mm lens is excellent for general product photography because it provides natural-looking perspectives. Macro lenses such as 90mm, 100mm, or 105mm are ideal for jewelry, watches, cosmetics, and other small products that require extreme detail. For larger commercial setups, photographers often use 24-70mm zoom lenses because of their versatility.
What lighting is best for product photography?
Soft, diffused lighting is generally the best choice for product photography. Softboxes, LED panels, light tents, and window light are commonly used to create smooth shadows and even illumination. Proper lighting reveals product details, improves color accuracy, and minimizes unwanted reflections. Most professional product photographers prioritize lighting quality over expensive camera equipment.
Can I use a smartphone for product photography?
Yes. Modern smartphones can produce excellent product photographs when combined with good lighting and proper composition. Many small businesses and ecommerce sellers successfully use smartphones for social media content, product catalogs, and online stores. Using a tripod, natural light, and basic editing apps can significantly improve smartphone product photography results.
How do I take product photos with a white background?
To create professional white background product photos, place the product on a white backdrop and illuminate it evenly using soft lighting. Avoid harsh shadows and ensure the background is bright without overexposing the product. White background photography is widely used on Amazon, Shopify, Flipkart, and other ecommerce platforms because it creates a clean and professional appearance.
What are the best camera settings for product photography?
Most product photographers use manual mode with low ISO settings and narrow apertures. A common starting point includes ISO 100, aperture between f/8 and f/11, and a tripod-supported shutter speed. These settings maximize sharpness, reduce noise, and ensure more of the product remains in focus. Adjustments may vary depending on lighting conditions and product size.
How do professional photographers photograph reflective products?
Reflective products such as jewelry, watches, electronics, and glassware require controlled lighting and diffusion. Professional photographers often use softboxes, diffusion panels, light tents, and black cards to manage reflections. The goal is to control what appears on reflective surfaces while preserving product details and maintaining a clean, premium appearance.
What is lifestyle product photography?
Lifestyle product photography shows products being used in real-world situations rather than isolated on plain backgrounds. For example, a coffee mug may be photographed on a desk with a notebook and laptop. Lifestyle photography helps customers visualize how products fit into their daily lives, making it highly effective for social media marketing and ecommerce branding.
How do I edit product photos professionally?
Professional product photo editing typically involves exposure correction, white balance adjustments, color correction, dust removal, background cleanup, sharpening, and retouching. Adobe Lightroom is commonly used for color and exposure adjustments, while Adobe Photoshop handles advanced retouching tasks such as background removal and reflection cleanup. The objective is to create clean, accurate, and visually appealing images without making products look unrealistic.
How much should I charge for product photography?
Product photography pricing varies based on experience, product complexity, editing requirements, and commercial usage rights. Beginners may charge ₹300–₹1,000 per image, while experienced photographers often charge ₹1,000–₹3,000 per image. Commercial advertising projects and high-end product campaigns can command significantly higher rates. Pricing should reflect both photography and post-processing work.
How do I find product photography clients?
Product photography clients can be found through local businesses, ecommerce sellers, social media networking, referrals, and online marketplaces. Shopify store owners, Amazon sellers, jewelry brands, restaurants, cosmetic companies, and handmade product businesses frequently need professional product images. Building a strong portfolio and maintaining an active online presence can help attract long-term clients.
What products are easiest for beginners to photograph?
Beginners should start with simple products that do not have highly reflective surfaces. Examples include books, clothing, shoes, stationery, packaged goods, and home decor items. These products are easier to light and photograph than jewelry, glassware, or polished electronics. Practicing with simple products helps build confidence and technical skills.
Is product photography a profitable business?
Yes. Product photography can be a highly profitable photography niche because businesses constantly need fresh product images for ecommerce stores, advertising campaigns, social media content, and product launches. As online shopping continues to grow, demand for professional product photography remains strong. Photographers who develop technical skills, efficient workflows, and strong client relationships can build successful long-term businesses.





Leave a Reply