
Master photography with 30 essential photography tutorials for beginners, covering camera settings, composition, lighting, editing, equipment, and practical techniques.
Table of Contents
Introduction – Photography Tutorials
Photography can seem complicated when you are just starting. Aperture, shutter speed, ISO, lenses, exposure, focus, composition, and lighting can quickly become overwhelming. The good news is that you do not need an expensive camera or years of experience to start taking better photographs.
You need to understand a few fundamental principles and learn how to apply them through practice.
This Photography for Beginners guide takes you step by step through the essential photography basics. You will learn how cameras and lenses work, how to control exposure, how aperture, shutter speed, and ISO work together, how to focus accurately, and how to use composition and lighting to create stronger images.
You will also learn practical camera settings for different shooting situations, basic photo-editing techniques, and simple exercises that can help you improve faster.
Whether you are using a smartphone, a beginner mirrorless camera, a DSLR, or another digital camera, the principles in this guide apply to you.
What You Will Learn
By the end of this guide, you will understand how to:
- Use the exposure triangle to control brightness and creative effects.
- Choose appropriate aperture, shutter speed, and ISO settings.
- Understand depth of field and background blur.
- Focus more accurately on different types of subjects.
- Compose photographs using proven visual techniques.
- Use natural and artificial light more effectively.
- Choose basic camera equipment without overspending.
- Photograph portraits, landscapes, moving subjects, products, and everyday scenes.
- Edit your photographs using a simple beginner-friendly workflow.
- Practice photography systematically and develop your own visual style.
You do not need to master everything at once. Start with the fundamentals, practice one concept at a time, review your photographs, and gradually build your skills.
The goal is not simply to learn what every camera setting does. It is to understand why you would use each setting and how your choices affect the final photograph.
Let’s start with the foundation of photography: understanding how an image is created.
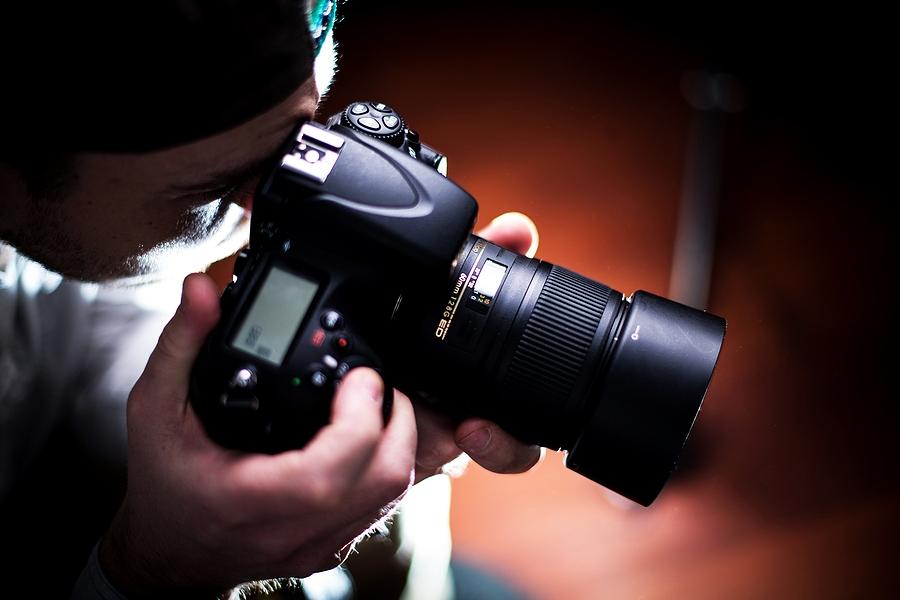
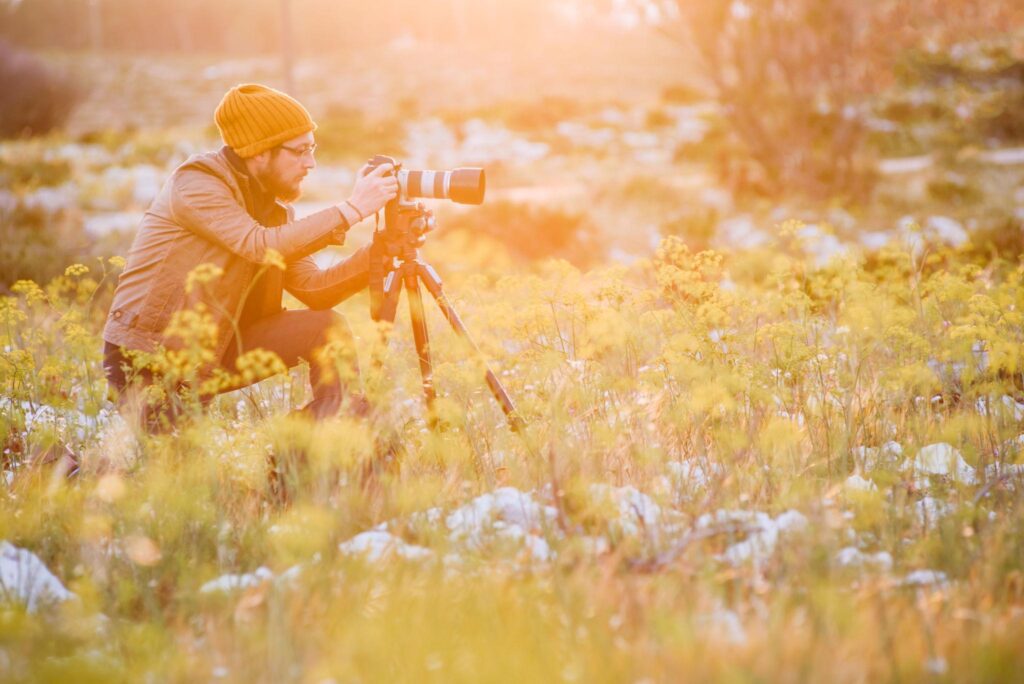
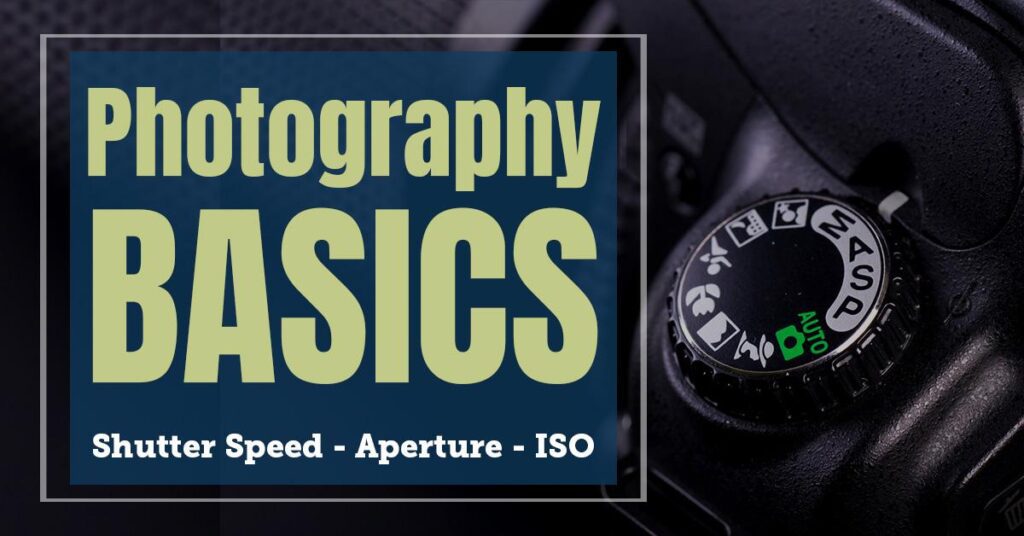

What Is Photography?
What Is Photography?
Photography is the process of creating an image by capturing light with a camera or other imaging device. A camera records the light reflected or emitted by a subject and converts that information into a digital image.
But photography is more than simply pressing the shutter button.
A strong photograph is created by making decisions about light, subject, and composition. These three foundations work together to determine how an image looks, feels, and communicates a story.
The Three Foundations of Photography
1. Light
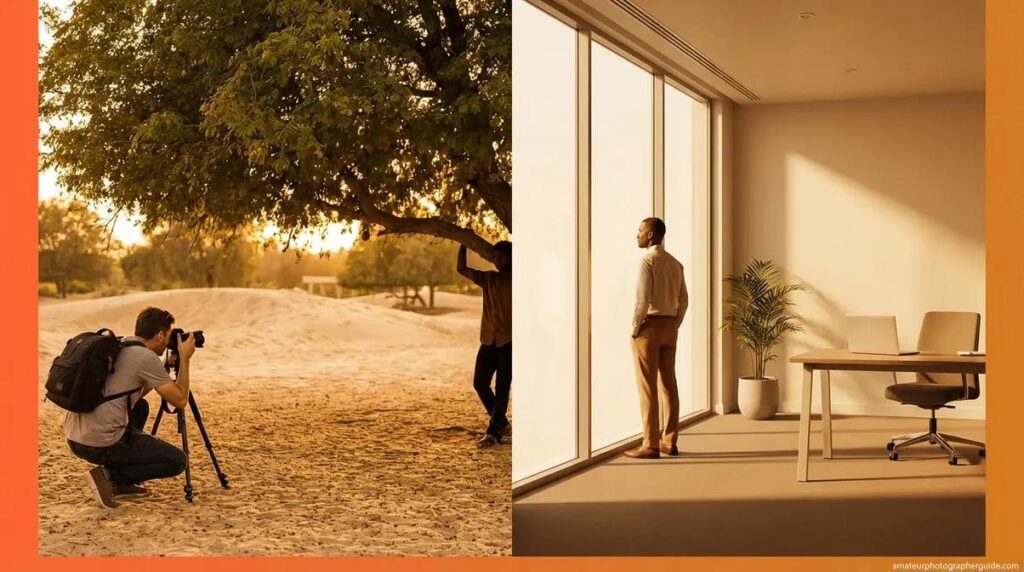
Light is the foundation of every photograph. Its direction, intensity, color, and quality can dramatically change the appearance of a subject.
For example, soft window light can create gentle portraits, while direct midday sunlight can produce stronger shadows and higher contrast.
Learning to observe light is one of the most valuable skills a beginner photographer can develop.
2. Subject
The subject is the person, object, animal, landscape, or moment you want the viewer to notice.
A photograph becomes more effective when the subject is clear. Before taking a picture, ask yourself:
What am I trying to show?
Knowing the answer can help you decide where to position yourself, what to include in the frame, and which camera settings to use.
3. Composition
Composition is the way visual elements are arranged inside the frame.
Where you place your subject, how much empty space you leave around it, the direction of lines, the relationship between foreground and background, and your camera angle can all influence how a viewer experiences the photograph.
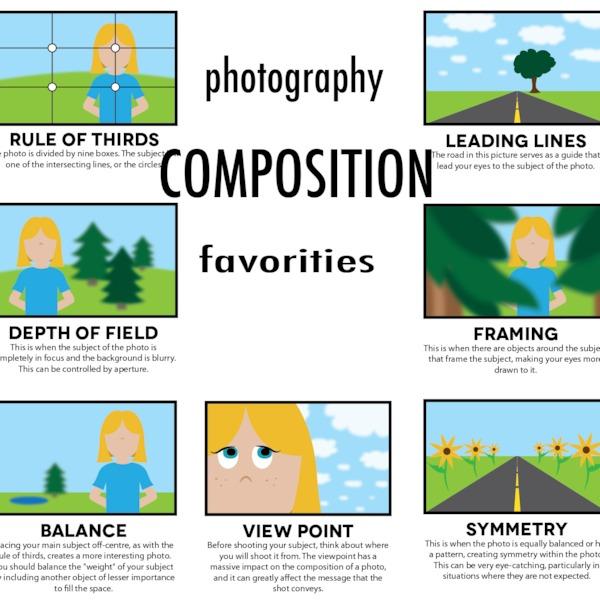
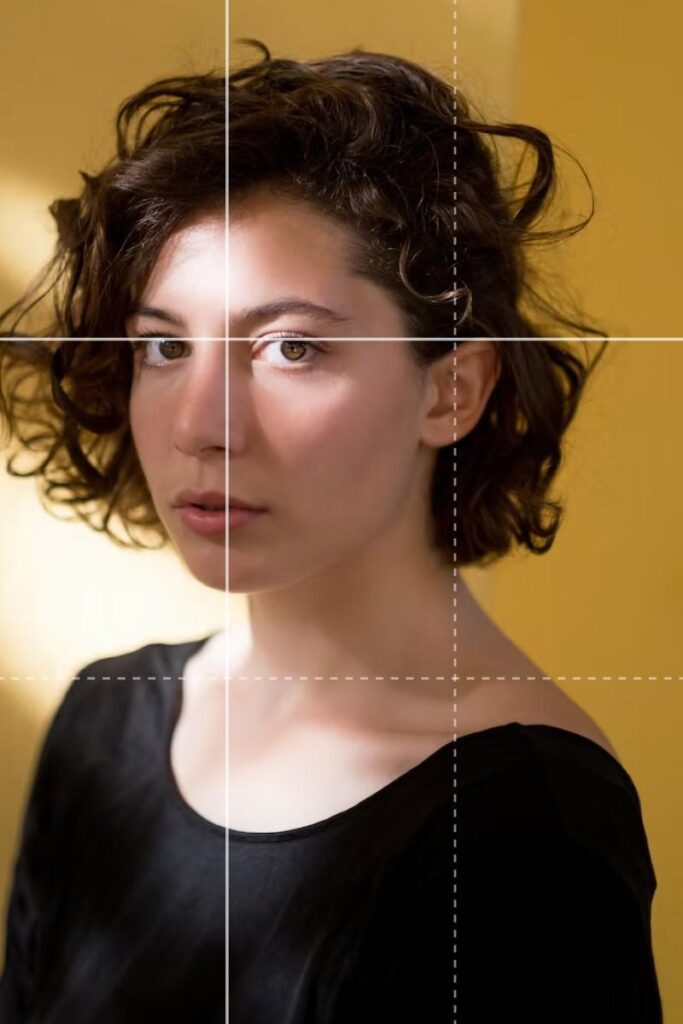
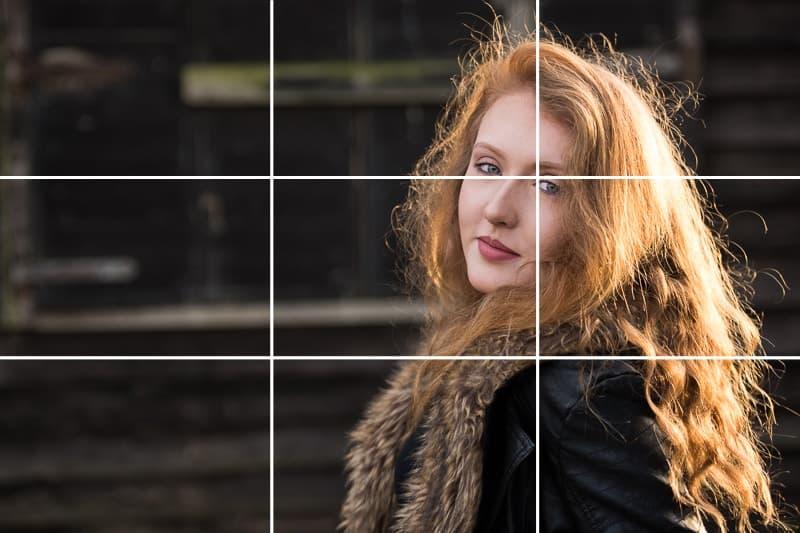
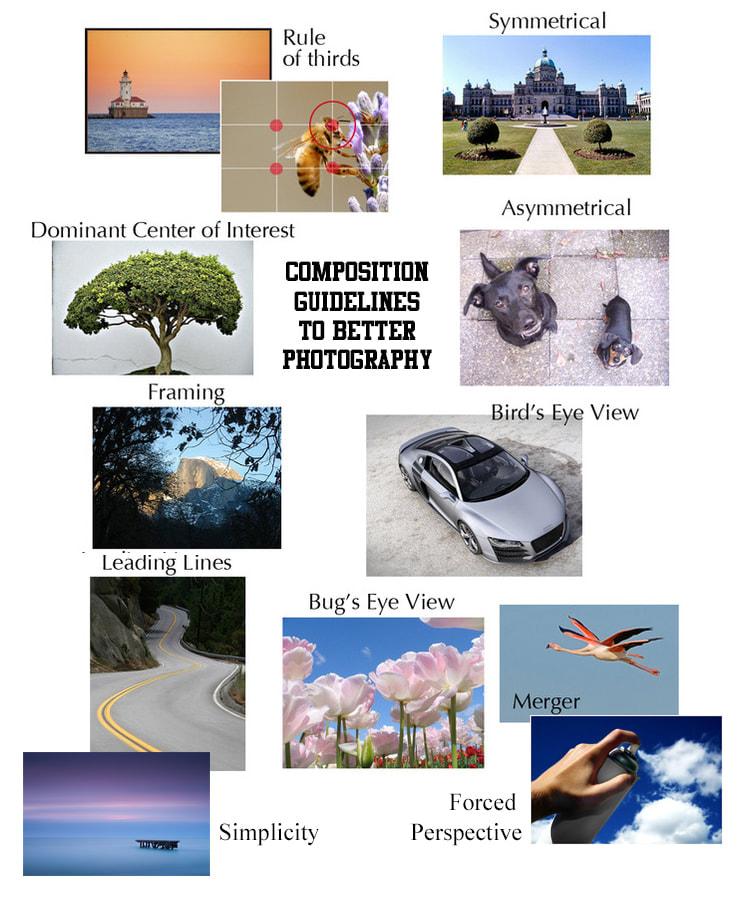
Techniques such as the rule of thirds, leading lines, framing, symmetry, and negative space can help you create more balanced and visually engaging images.
How a Photograph Is Created
At its simplest, the process looks like this:
Light → Lens → Aperture → Shutter → Camera Sensor → Image
Light enters through the lens. The aperture controls how much light passes through the lens, while the shutter determines how long that light reaches the sensor. The sensor records the incoming information, and the camera processes it into an image.
Your creative decisions determine what that image looks like.
For example, you can use a wide aperture to create a shallow depth of field, a fast shutter speed to freeze movement, or a slower shutter speed to intentionally show motion.
Beginner Takeaway
You don’t need to memorize every camera setting before you can take good photographs.
Start by learning to see light, identify your subject, and control the composition. Once these fundamentals become familiar, camera settings become much easier to understand and use creatively.
Why Learn Photography?
Learning photography is not simply about mastering a camera. It is about learning how to see, capture, and communicate moments through images.
Once you understand the fundamentals, you can make intentional decisions instead of relying entirely on automatic settings. You begin to understand why an image looks too dark, why a moving subject appears blurry, why a background is distracting, or why a photograph feels unbalanced.
Photography Gives You More Creative Control
A camera can record a scene, but your decisions determine how that scene looks.
Learning photography helps you control:
- Brightness through exposure settings.
- Background blur through aperture and subject positioning.
- Motion through shutter speed.
- Image quality and noise through ISO.
- Visual balance through composition.
- Mood and atmosphere through lighting.
- Color and finishing through editing.
This control allows you to create photographs that match your creative intention rather than simply accepting whatever the camera produces automatically.
Photography Helps You Capture Meaningful Moments
Photography can preserve moments that you may want to remember for years. Family gatherings, travel experiences, celebrations, relationships, everyday life, and important milestones can all become lasting visual memories.
You don’t need professional equipment to do this. Understanding light, composition, timing, and focus can make a significant difference even when you are photographing with a smartphone.
Photography Can Become a Creative Skill
As your technical skills improve, photography can become a way to explore your creativity.
You might become interested in portraits, landscapes, street photography, wildlife, sports, product photography, couple photography, or another genre. Each type of photography presents different challenges and gives you new opportunities to practice.
You Don’t Need Expensive Equipment to Start
One of the biggest misconceptions among beginners is that better equipment automatically produces better photographs.
Equipment can expand your capabilities, but it cannot replace an understanding of light, composition, timing, and storytelling.
Start with the camera or smartphone you already have. Learn its strengths and limitations, practice regularly, and upgrade your equipment when you have a clear reason to do so.
The most important investment for a beginner is not the most expensive camera. It is learning how to use the equipment you already have effectively.
Types of Photography
Photography covers a wide range of subjects, styles, and creative approaches. You do not need to choose a photography genre immediately. Start by experimenting with different subjects and pay attention to the types of images you most enjoy creating.
Understanding the major photography genres can also help you decide which skills, equipment, and techniques to learn next.
Portrait Photography
Portrait photography focuses on people and aims to capture their appearance, personality, expression, or mood. Good portraits rely heavily on lighting, composition, focus, posing, and the relationship between the subject and the background.
Best skills to learn: eye autofocus, aperture, lighting, posing, and background control.
Couple Photography
Couple photography focuses on capturing connection, emotion, interaction, and natural moments between two people. It often combines portrait techniques with candid photography and storytelling.
Best skills to learn: posing, composition, natural light, movement, and directing subjects.
Landscape Photography
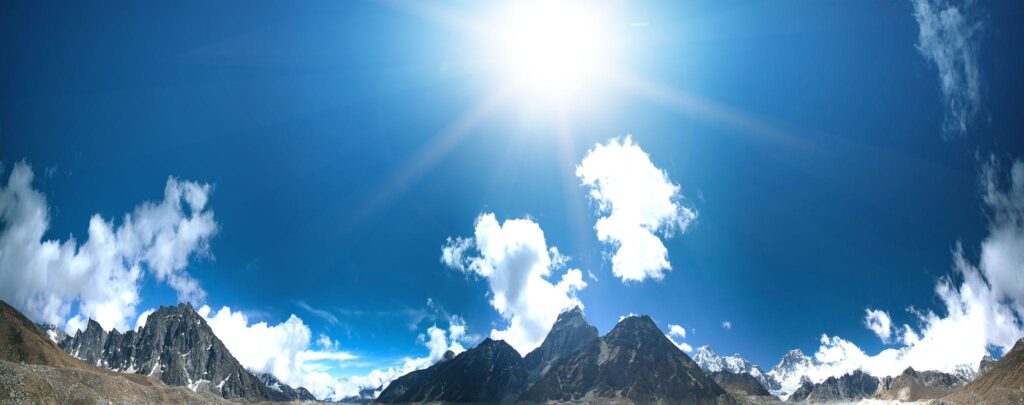
Landscape photography captures natural environments such as mountains, forests, beaches, deserts, and cityscapes. Composition, light, depth, and timing are particularly important.
Best skills to learn: composition, wide-angle photography, depth of field, exposure, and natural-light techniques.
Street Photography
Street photography documents people, places, and everyday moments in public environments. Timing and observation are often more important than expensive equipment.
Best skills to learn: composition, anticipation, autofocus, timing, and working with available light.
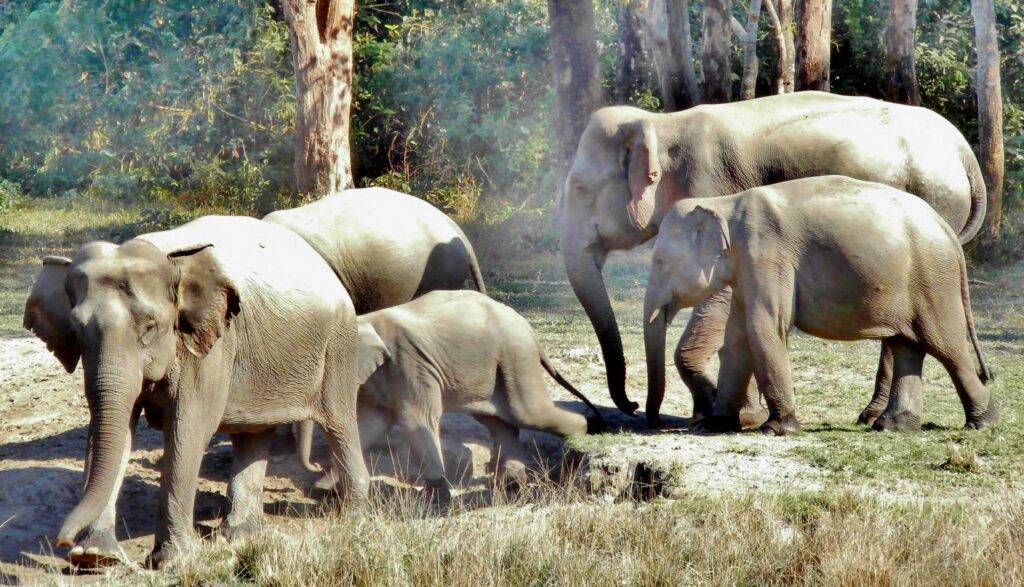
Wildlife Photography
Wildlife photography involves photographing animals in natural or controlled environments. Subjects can move unpredictably, making focus, shutter speed, patience, and lens selection especially important.
Best skills to learn: continuous autofocus, fast shutter speeds, tracking, long lenses, and exposure control.
Sports Photography
Sports photography focuses on fast-moving subjects and requires photographers to anticipate action and react quickly.
Best skills to learn: fast shutter speeds, continuous autofocus, burst shooting, tracking, and timing.
Product Photography
Product photography is used to present objects clearly and attractively for websites, catalogs, advertising, and online stores. Lighting, background control, sharpness, and consistency are particularly important.
Best skills to learn: controlled lighting, composition, focus, color accuracy, and editing.
Travel Photography
Travel photography combines several genres to document destinations, people, architecture, food, landscapes, and experiences.
Best skills to learn: composition, storytelling, available-light photography, candid photography, and adapting quickly to changing conditions.
Event Photography
Event photography captures important moments at weddings, parties, conferences, celebrations, and other gatherings. Photographers need to work quickly and adapt to changing lighting and subjects.
Best skills to learn: autofocus, exposure control, low-light photography, flash, timing, and candid shooting.
Mobile Photography
Modern smartphones can produce high-quality photographs and are excellent tools for learning photography fundamentals. Composition, lighting, timing, and perspective matter just as much when using a phone as they do with a dedicated camera.
Best skills to learn: composition, exposure control, computational photography, perspective, and mobile editing.
Which Photography Genre Should You Start With?
You do not need to specialize immediately. Try different subjects and see what naturally interests you.
If you enjoy photographing people, start with portrait or couple photography. If you enjoy nature, explore landscape or wildlife photography. If you like documenting everyday life, try street or travel photography. If you enjoy creating images for businesses, explore product photography.
The fundamentals you learn—light, exposure, focus, composition, and timing—transfer across almost every photography genre.
Once you know which type of photography interests you most, you can explore more specialized tutorials and techniques for that genre.


Understanding How a Camera Works
Before learning individual camera settings, it helps to understand what happens inside a camera when you take a photograph.
You do not need to understand every technical component to become a good photographer. However, knowing the basic path that light follows will make concepts such as aperture, shutter speed, ISO, lenses, and exposure much easier to understand.
How a Camera Creates an Image
The basic process is:
Light → Lens → Aperture → Shutter → Sensor → Image Processor → Photograph
Here’s what each part does.
1. Light Enters the Camera
Every photograph begins with light.
Light reflects from your subject and travels toward the camera. The amount, direction, and color of that light influence how the final photograph looks.
This is why learning to observe light is just as important as learning your camera settings.
2. The Lens Directs the Light
The lens collects and focuses light before it reaches the camera sensor.
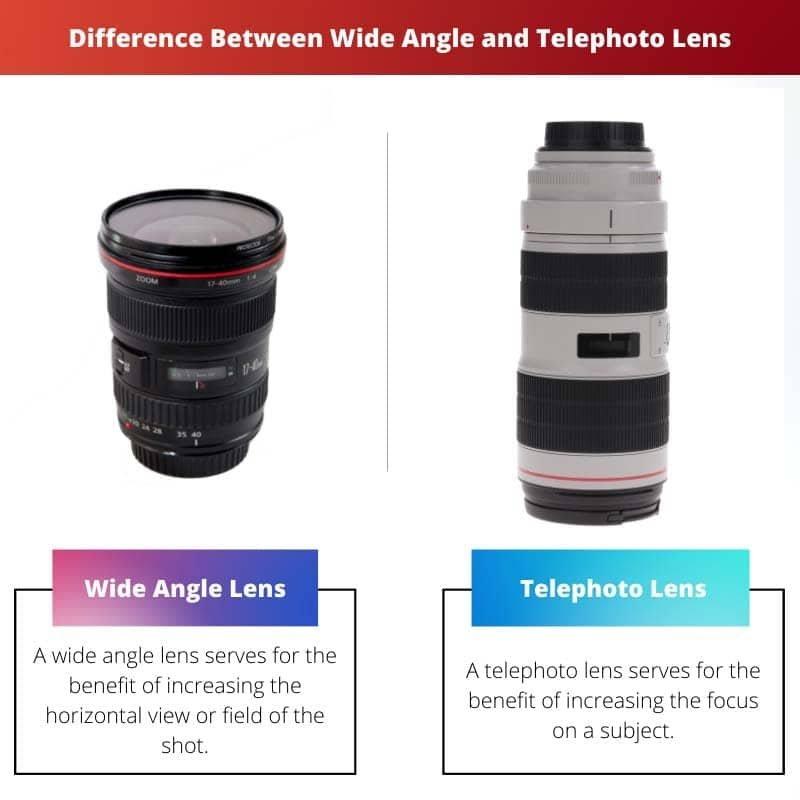
Different lenses provide different fields of view and can change how your subject appears in the frame. A wide-angle lens can capture more of a scene, while a telephoto lens can magnify distant subjects.
Your choice of lens also affects perspective, depth of field, and the overall appearance of an image.
3. The Aperture Controls the Opening
Inside the lens is an adjustable opening called the aperture.
The aperture controls how much light passes through the lens and also influences depth of field.
A wider aperture, represented by a smaller f-number such as f/1.8, can allow more light into the camera and produce a shallower depth of field.
A narrower aperture, such as f/8 or f/11, allows less light through and generally produces greater depth of field.
4. The Shutter Controls Exposure Time
The shutter controls how long light reaches the camera sensor.
A fast shutter speed such as 1/1000 second can help freeze fast movement.
A slower shutter speed such as 1/10 second allows more time for light to reach the sensor but can also create motion blur if the camera or subject moves.
5. The Sensor Records the Light
In a digital camera, the image sensor converts incoming light into electrical information.
The sensor contains millions of photosites that record different amounts of light. The camera then processes this information to create the digital image.
Sensor size can influence factors such as low-light performance, depth of field, and field of view when comparing cameras and lenses.
6. The Camera Processes the Image
After the sensor records the scene, the camera’s processor converts the captured information into an image file.
Depending on your camera settings and file format, the camera may apply processing such as sharpening, noise reduction, color adjustments, and other corrections.
When you photograph in RAW, much more of the original sensor information is retained for processing later.
What Happens When You Press the Shutter?
When you press the shutter button, the camera measures or uses the selected exposure settings, opens and closes the shutter for the chosen duration, records the light on the sensor, and processes or stores the resulting image.
The entire process happens extremely quickly, but understanding it gives you a foundation for controlling your camera instead of relying entirely on automatic settings.
Beginner Takeaway
Think of your camera as a system for controlling and recording light.
The lens determines how the scene is viewed, the aperture controls the opening, the shutter controls how long light is captured, and the sensor records that light.
Once you understand this basic process, learning the exposure triangle becomes much easier.
DSLR vs Mirrorless vs Smartphone: Which Is Right for Beginners?
Beginners often assume they need a dedicated camera before they can learn photography. You don’t. A smartphone, DSLR, or mirrorless camera can all be excellent tools for learning the fundamentals.
The right choice depends on what you want to photograph, how much control you want, and how much equipment you are willing to carry.
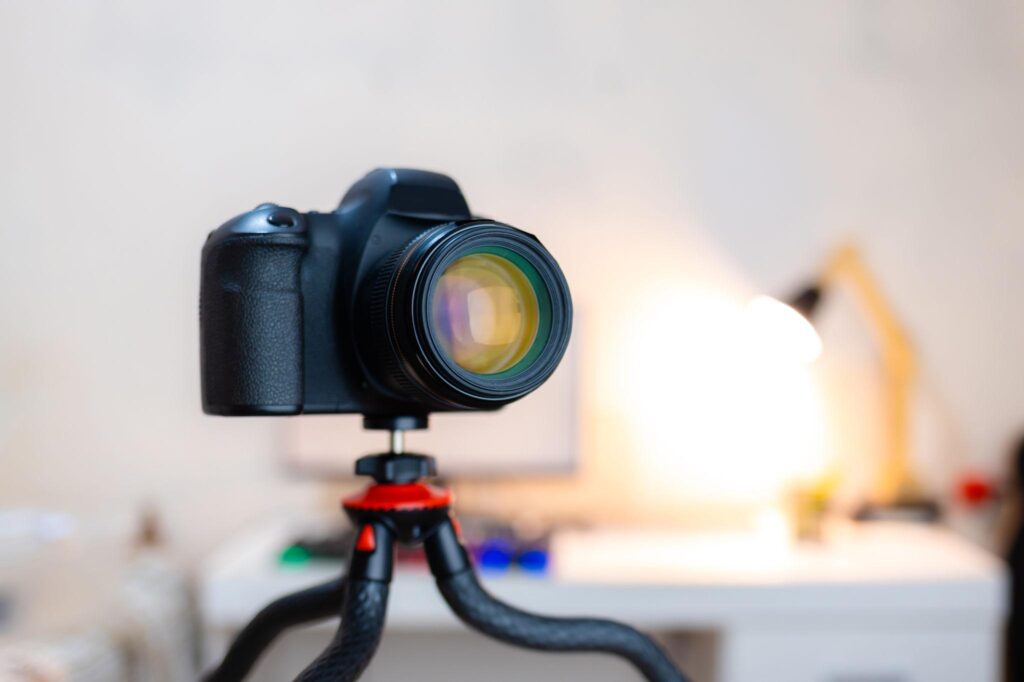
DSLR Cameras
A DSLR (Digital Single-Lens Reflex) uses a mirror and optical viewfinder system to show the scene through the camera’s lens.
DSLRs can provide excellent image quality, interchangeable lenses, extensive manual controls, and long battery life. However, they are generally larger and heavier than many modern mirrorless cameras.
DSLRs can still be useful for beginners who find a particular model affordable or already have access to a compatible lens system.
Best for: photographers who want traditional camera controls, interchangeable lenses, and a larger camera body.
Mirrorless Cameras
Mirrorless cameras do not use the traditional reflex mirror found in DSLRs. Light reaches the image sensor directly, and the camera uses an electronic viewfinder, rear screen, or both to display the scene.
Modern mirrorless cameras offer advanced autofocus, interchangeable lenses, strong image quality, and compact designs. Many also provide useful features such as subject detection and real-time exposure previews.
Best for: beginners who want a dedicated camera with modern features, interchangeable lenses, and room to grow.
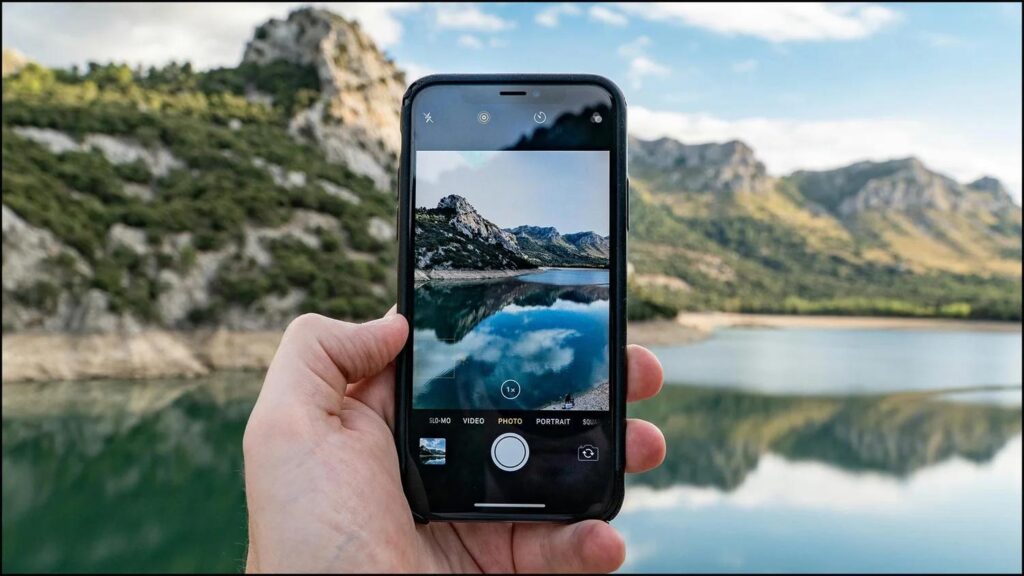
Smartphones
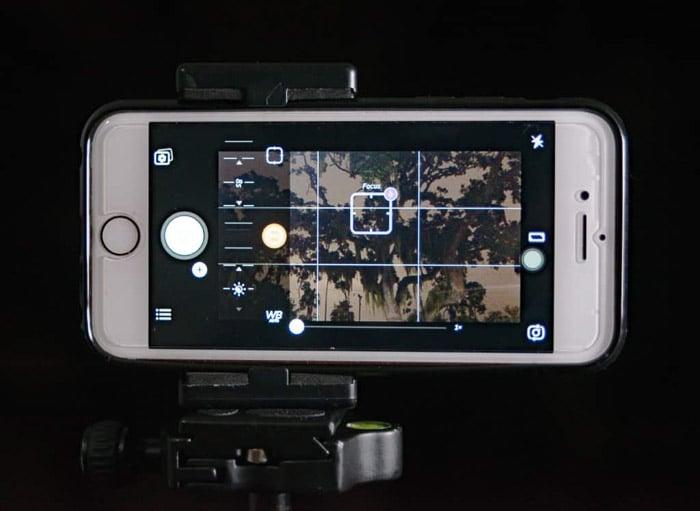
Smartphones have become powerful photography tools. Their computational photography systems can combine multiple exposures and automatically process images to improve dynamic range, noise, color, and detail.
They are also convenient because you always have one with you.
A smartphone may provide less direct control over certain aspects of photography than a dedicated camera, but it is more than capable of teaching you fundamental skills such as composition, lighting, perspective, timing, and exposure.
Best for: beginners who want maximum convenience or prefer to learn without purchasing a dedicated camera.
Which One Should a Beginner Choose?
There is no single camera type that is best for everyone.
Choose a smartphone if:
- You are completely new to photography.
- Convenience is your priority.
- You mainly photograph everyday life, travel, food, people, or social content.
- You want to learn composition and lighting before buying equipment.
Consider a mirrorless camera if:
- You want greater control over exposure and focusing.
- You want interchangeable lenses.
- You plan to explore photography seriously.
- You want a system that can grow with your skills.
Consider a DSLR if:
- You find a good model at a suitable price.
- You already own compatible lenses or accessories.
- You prefer its optical viewfinder or handling.
- You are comfortable with its larger size and weight.
Don’t Choose a Camera Only by Its Specifications
Megapixels, autofocus points, continuous shooting speed, and other specifications can be useful when comparing cameras, but they shouldn’t be the only factors you consider.
Also look at:
- Lens availability and cost
- Autofocus performance
- Ergonomics and controls
- Battery life
- Size and weight
- Image stabilization
- Video requirements
- Your photography genre
- Your total budget, including lenses and accessories
A camera is a tool. The best beginner camera is one that you will actually use, understand, and carry with you regularly.
If you’re ready to compare specific models, use a dedicated camera-buying guide rather than relying on a fixed price list here, because camera models and prices change frequently.
Smartphone Cameras
Advantages:
- Always available
- Easy to use
- Computational photography
- Great for social media
Disadvantages:
- Limited manual controls
- Smaller sensors
Examples:
- iPhone Pro Series
- Samsung Galaxy Ultra Series
- Vivo X Series
- Google Pixel Series

Essential Photography Equipment for Beginners
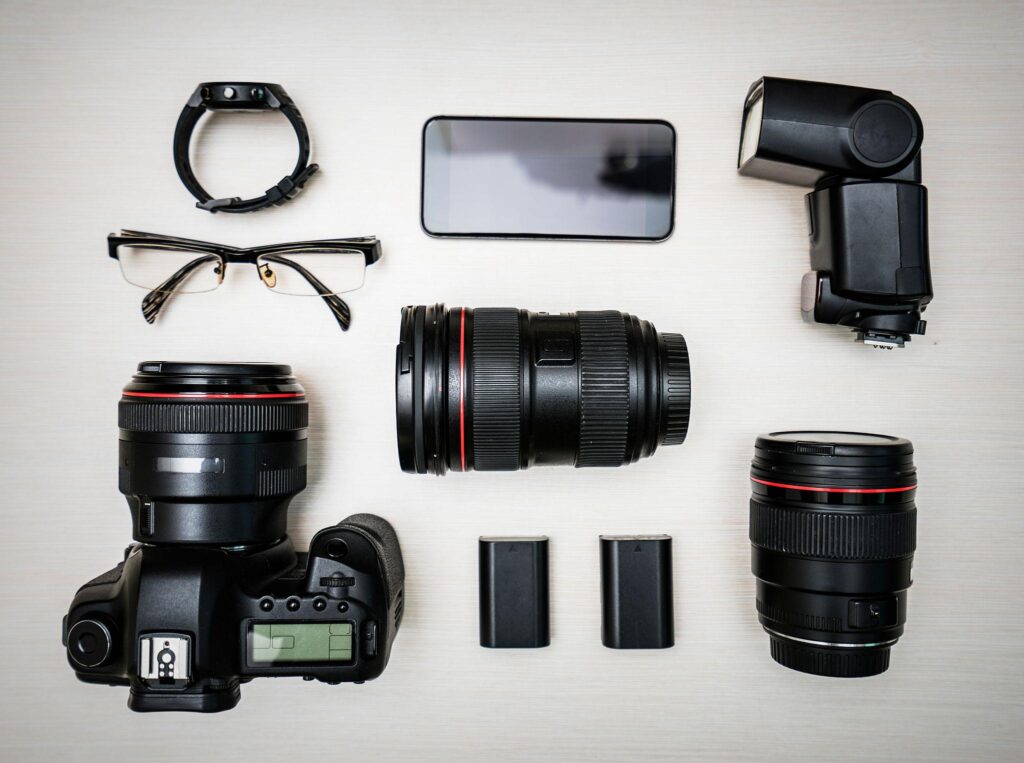
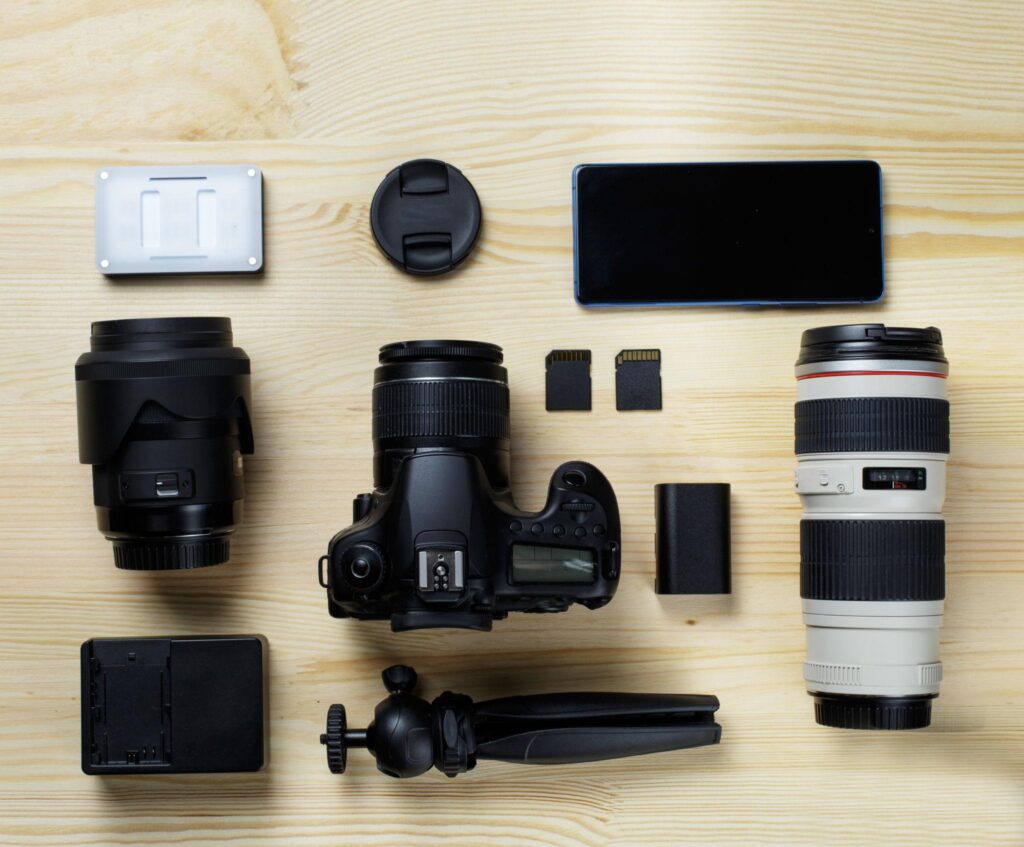
You don’t need a large collection of photography equipment to get started. In fact, buying too much gear before you understand what you actually need can make photography more complicated and expensive.
Start with the essentials and add equipment as your skills and photography goals develop.
1. Camera or Smartphone
Your first camera can be the smartphone you already own, a compact camera, a DSLR, or a mirrorless camera.
If you are using a dedicated camera, learn its basic controls before buying additional accessories. Understanding your existing equipment will usually improve your photographs more than immediately upgrading it.
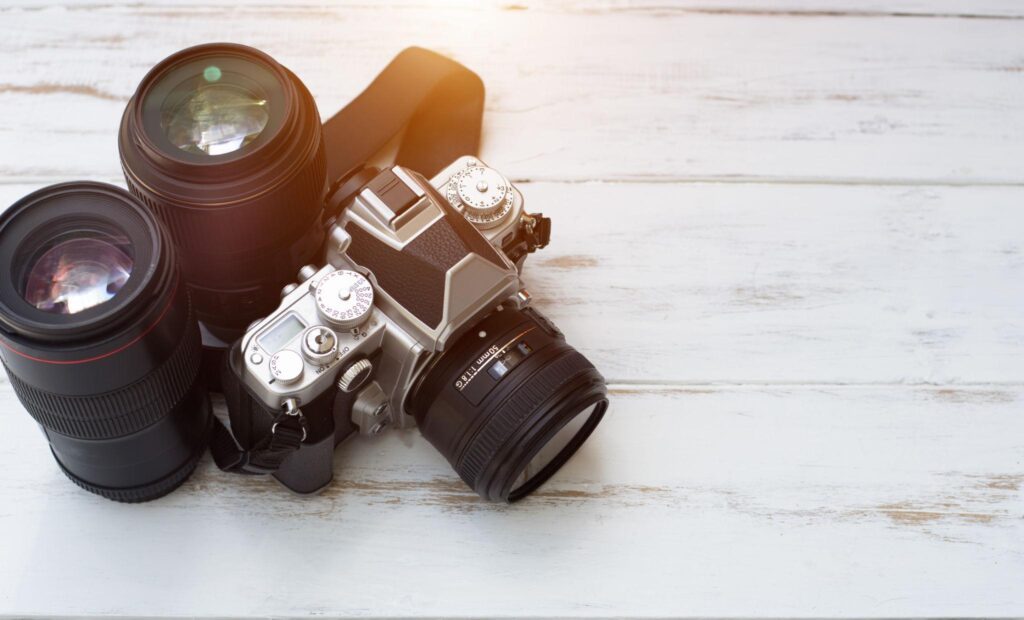
2. Lens
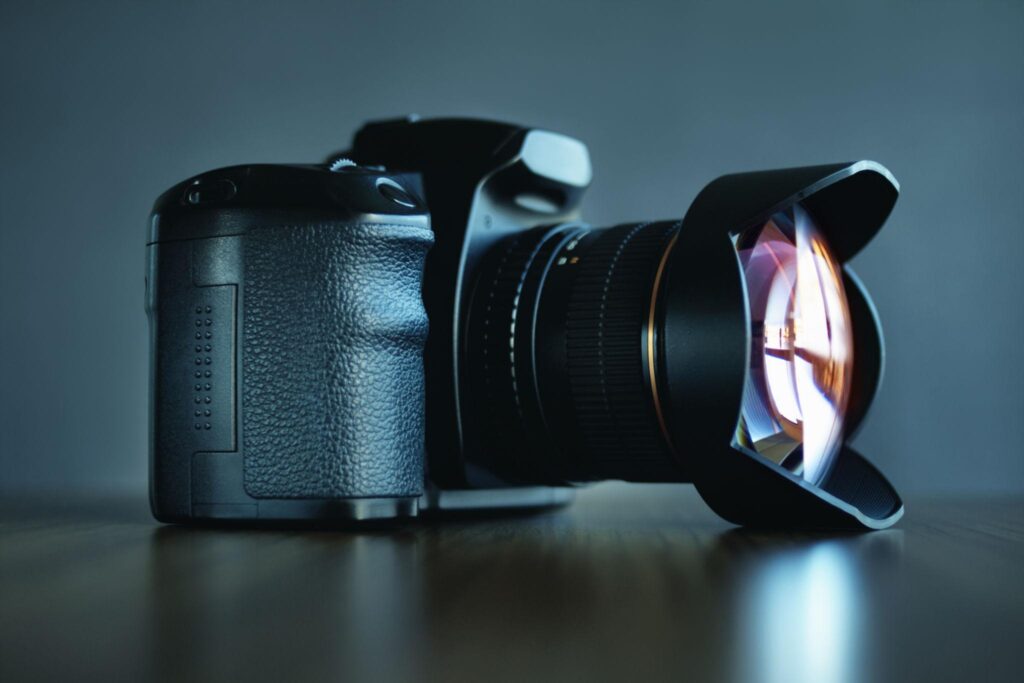
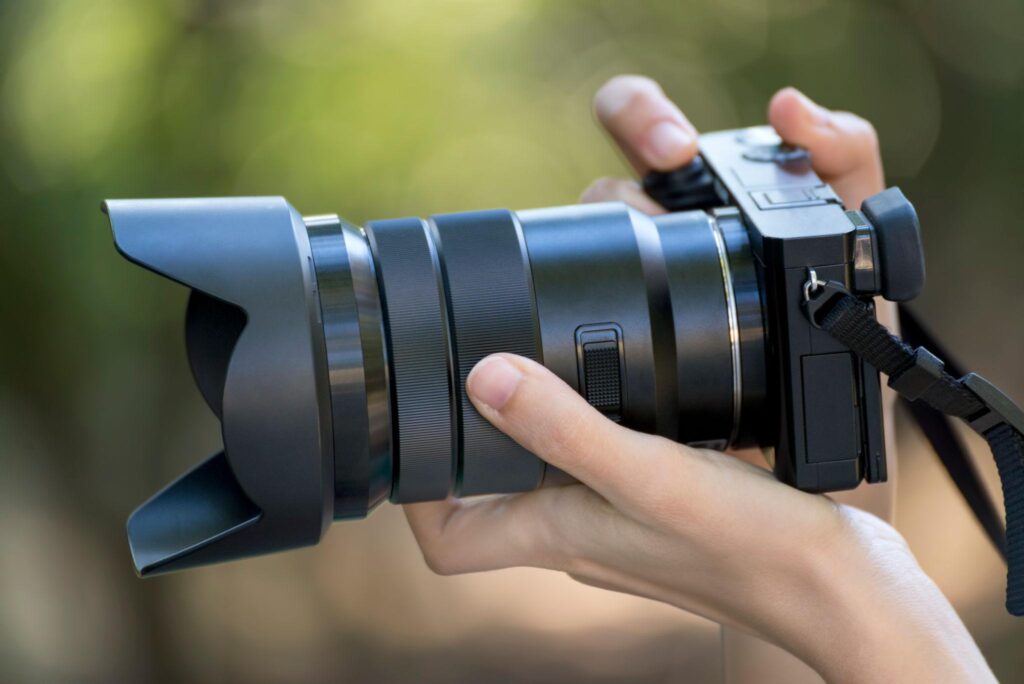
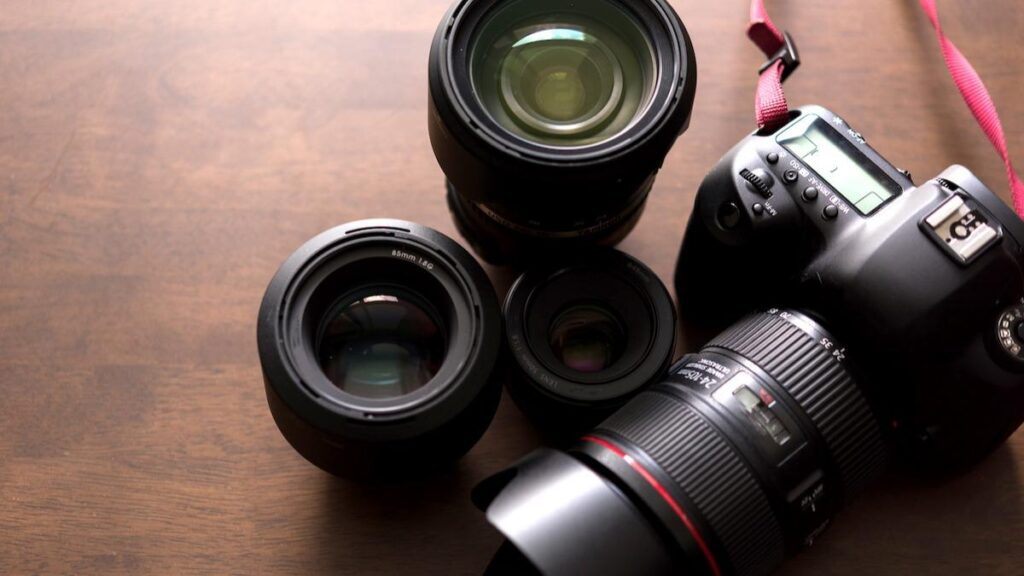
If you use a DSLR or mirrorless camera, the lens is one of the most important parts of your system.
A versatile kit lens can be enough for beginners to practice composition, exposure, portraits, landscapes, travel photography, and everyday subjects.
As you specialize, you may eventually want a different lens for portraits, wildlife, landscapes, sports, macro, or low-light photography.
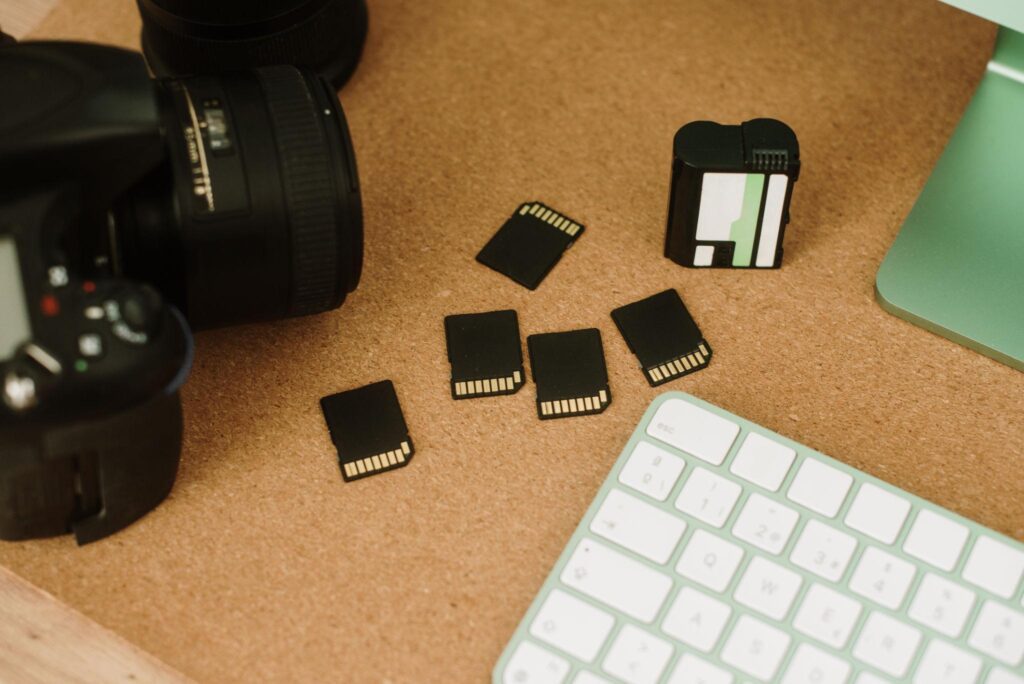
3. Memory Card
A reliable memory card is essential for cameras that use removable storage.
Choose a card with a capacity and sustained write speed appropriate for your camera and the type of photography you do. High-resolution photographs and continuous shooting can require more storage and faster write speeds.
Always check your camera manufacturer’s recommended specifications before purchasing a memory card.
4. Spare Battery
A spare battery can be extremely useful when photographing for several hours, traveling, or working in situations where charging is difficult.
Battery life varies between cameras and shooting conditions, so learn how your camera performs in real-world use before deciding how many spare batteries you need.
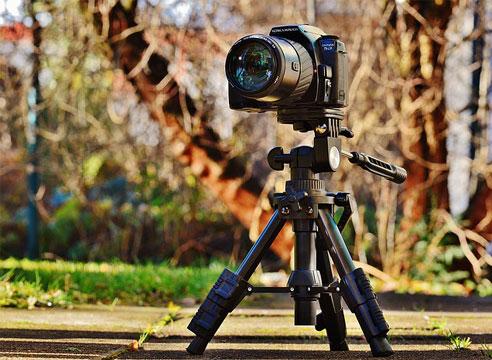
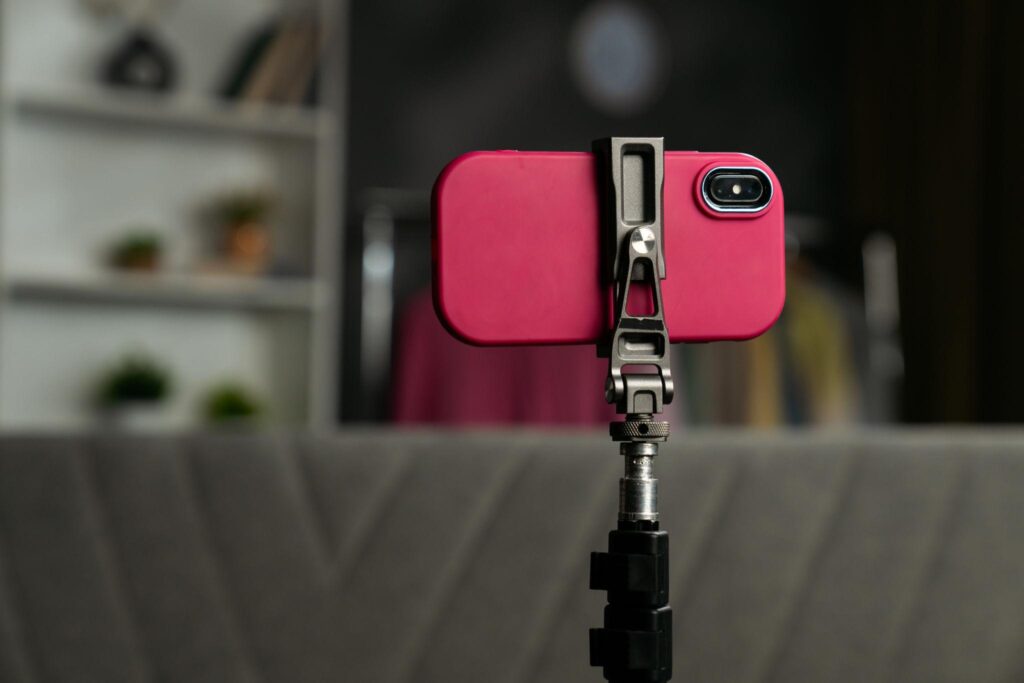
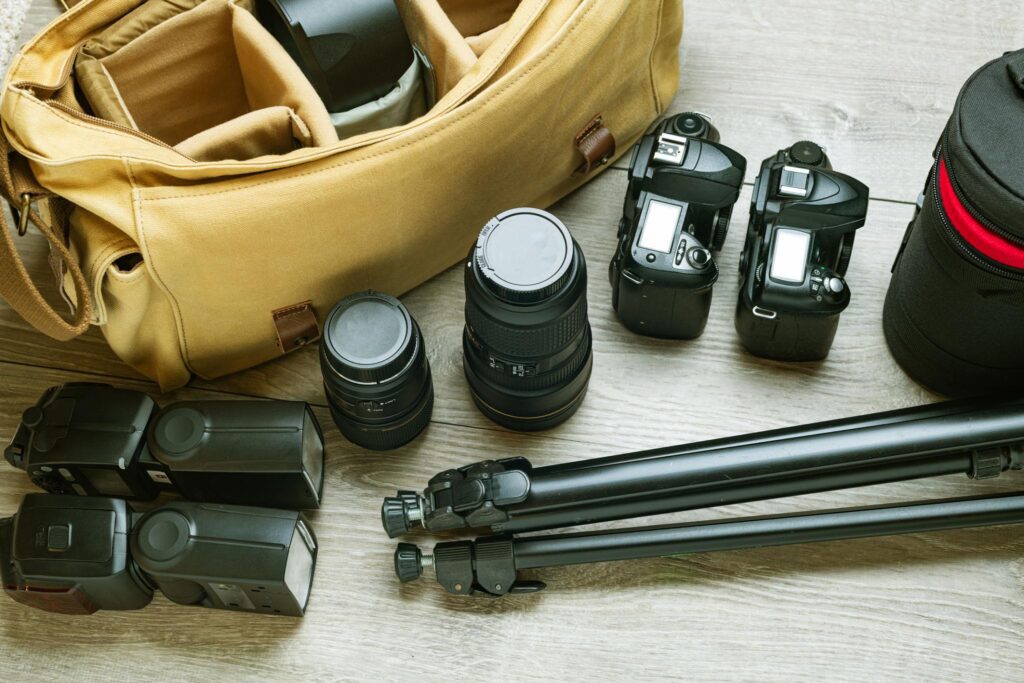
5. Tripod
A tripod isn’t necessary for every beginner, but it becomes valuable when you need a stable camera.
It is particularly useful for:
- Long-exposure photography
- Night photography
- Landscapes
- Product photography
- Self-portraits
- Video
- Architectural photography
Choose a tripod that can safely support your camera and lens while remaining practical enough for you to carry.
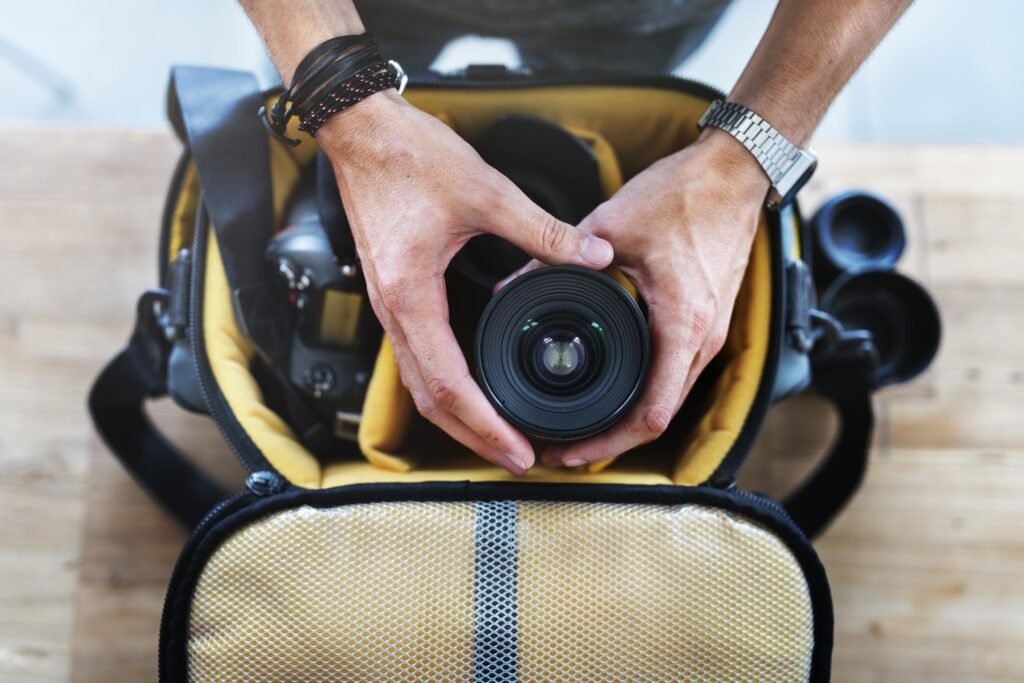
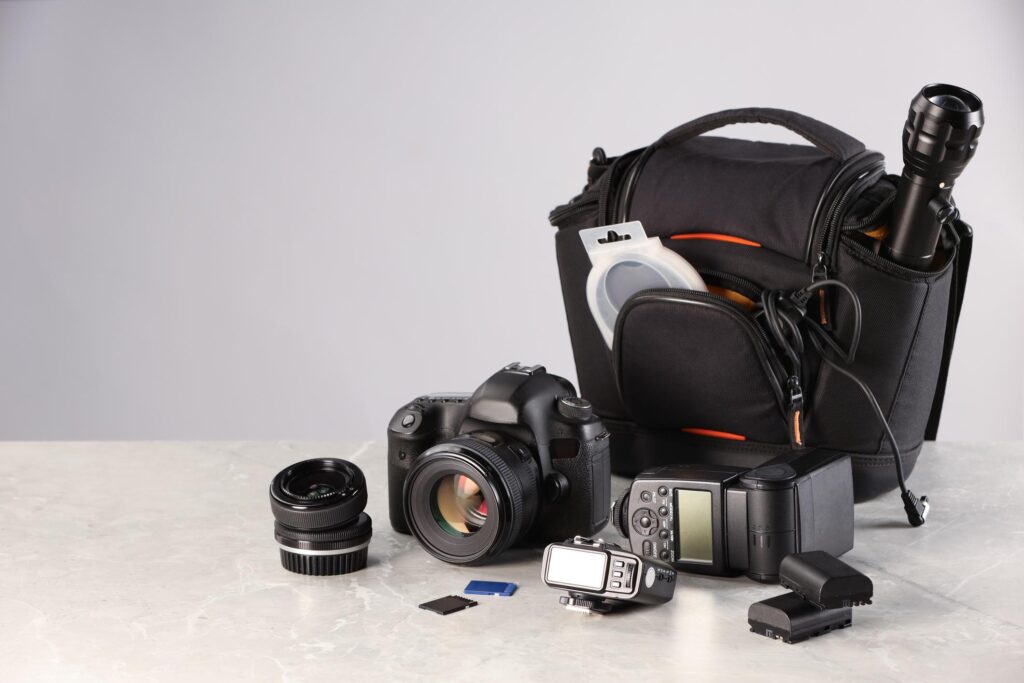
6. Camera Bag
A camera bag protects your equipment and makes transportation easier.
Choose one based on the gear you actually own rather than buying a large bag for equipment you may purchase someday.
A good bag should provide adequate protection while remaining comfortable to carry.
7. Lens and Sensor Cleaning Supplies
Dust, fingerprints, and other contaminants can affect your photographs and equipment.
Keep basic cleaning supplies designed specifically for camera equipment. Avoid using household cleaning products or rough materials on lenses and sensors.
For sensor cleaning, follow the camera manufacturer’s recommendations or use a qualified service when appropriate.
What Equipment Do You Actually Need?
For most beginners, a simple setup is enough:
Smartphone:
Smartphone + charging/power solution + basic editing app
Dedicated camera:
Camera body + versatile lens + memory card + battery
Add a tripod, additional lenses, lighting equipment, or other accessories only when you encounter a specific limitation in your current setup.
Don’t Let Equipment Delay Your Learning
Photography skills develop through observation, practice, experimentation, and reviewing your results.
A beginner with a basic camera who understands light and composition can often create stronger photographs than someone with expensive equipment who does not understand how to use it.
Learn with the equipment you have first. Upgrade when you can clearly explain what limitation the new equipment will solve.
Beginner Photography Kit Recommendation
Budget Setup
- Smartphone or entry-level camera
- Tripod
- Editing app
Intermediate Setup
- Mirrorless camera
- 50mm lens
- Tripod
- Lightroom
Advanced Setup
- Full-frame camera
- Multiple lenses
- Professional editing software

Understanding Camera Lenses
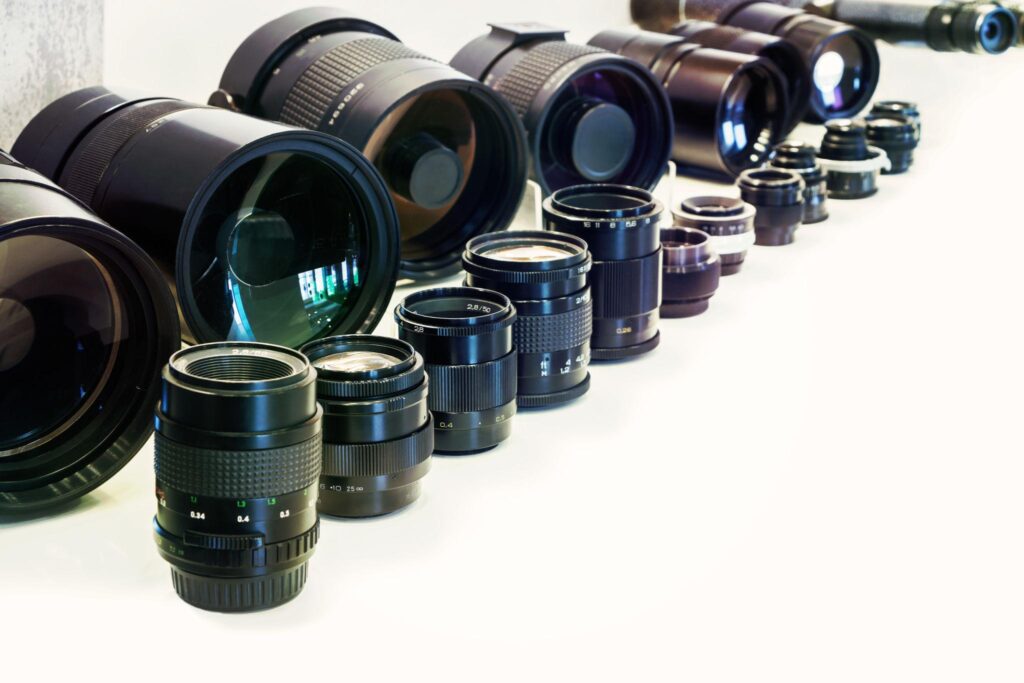
The lens determines how much of a scene your camera can capture, how large or small your subject appears, and how the background and perspective are rendered. For interchangeable-lens cameras, choosing the right lens can be just as important as choosing the camera body.
You don’t need a different lens for every type of photography. Start with a versatile lens, learn its strengths and limitations, and add specialized lenses only when your photography requires them.
Focal Length and Field of View
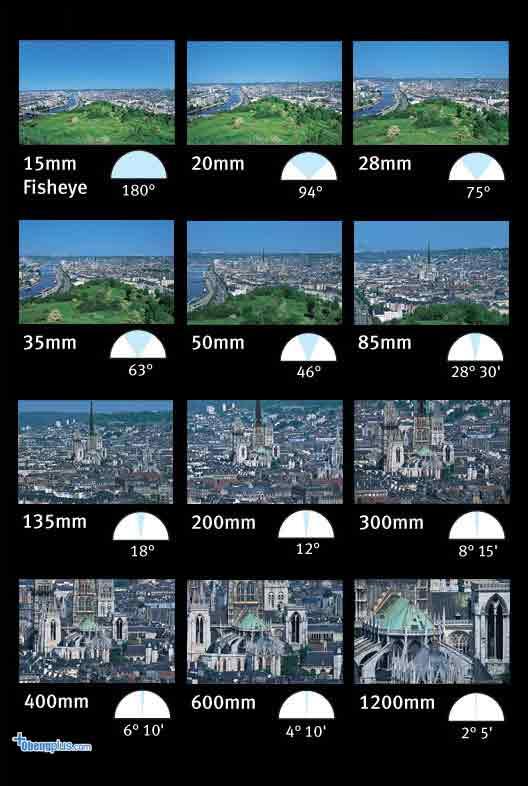
Focal length is measured in millimeters (mm) and is one of the main characteristics used to describe a lens.
In simple terms:
- Shorter focal lengths generally provide a wider field of view.
- Longer focal lengths generally provide a narrower field of view and greater magnification.
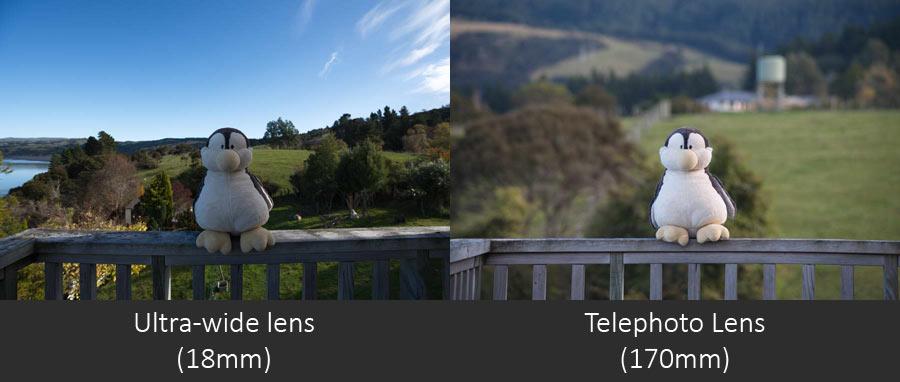
For example, a wide-angle lens can include a large landscape in the frame, while a telephoto lens can help you photograph a distant wildlife subject without physically moving closer.
The actual field of view also depends on the camera’s sensor size, so the same focal length can appear different on cameras with different sensor formats.
Prime vs Zoom Lenses
Prime Lenses
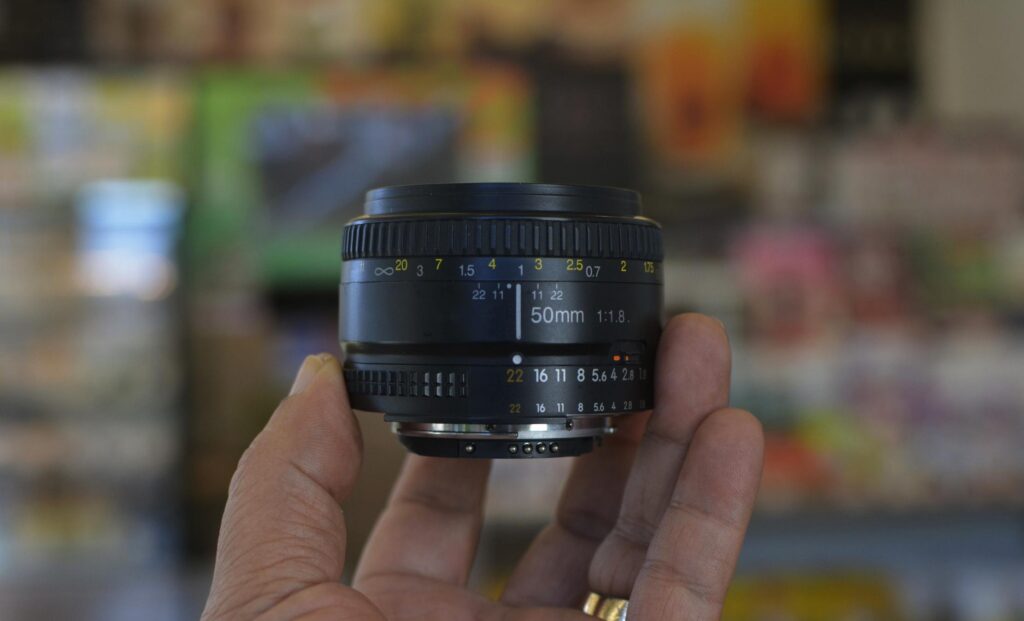
A prime lens has a fixed focal length, such as 35mm, 50mm, or 85mm.
Prime lenses can offer wide apertures, compact designs, and excellent image quality. Their fixed focal length also encourages you to move around and think more carefully about composition.
Good for: portraits, street photography, low-light photography, and learning composition.
Zoom Lenses
A zoom lens provides a range of focal lengths, such as 18–55mm or 70–200mm.
Zoom lenses are flexible because you can change your framing without physically moving closer or farther away from your subject.
Good for: travel, events, wildlife, sports, landscapes, and situations where changing lenses is inconvenient.
Common Lens Types
Wide-Angle Lenses
Wide-angle lenses capture a broader view of a scene.
They are useful for:
- Landscapes
- Architecture
- Interiors
- Travel
- Environmental portraits
However, placing a person very close to the edge of a wide-angle frame can exaggerate facial or body proportions.
Standard Lenses
Standard focal lengths provide a natural-looking perspective and are versatile for everyday photography.
They can work well for:
- Street photography
- Travel
- Everyday scenes
- Environmental portraits
Telephoto Lenses
Telephoto lenses provide a narrower field of view and allow you to photograph distant subjects.
They are particularly useful for:
- Wildlife
- Sports
- Events
- Portraits
- Distant details
Longer focal lengths can also make the background appear more visually compressed relative to the subject.
Macro Lenses
Macro lenses are designed for photographing small subjects at close distances while providing high levels of detail.
They are useful for:
- Flowers
- Insects
- Jewelry
- Small products
- Textures
How to Choose a Lens
Choose your lens based on what you photograph, not simply on specifications.
| Photography goal | Useful lens characteristics |
|---|---|
| Landscapes | Wide field of view |
| Portraits | Suitable focal length and wide aperture |
| Wildlife | Long focal length and fast autofocus |
| Sports | Long reach, fast autofocus, and fast aperture |
| Street | Compact design and versatile focal length |
| Product | Sharpness, close focusing, and controlled perspective |
| Travel | Versatility, manageable size, and useful focal range |
Aperture Also Matters
Lenses are also described by their maximum aperture, such as f/1.8, f/2.8, or f/4.
A lens with a wider maximum aperture can allow more light into the camera and make it easier to create a shallow depth of field. This can be especially useful for portraits and low-light photography.
However, a wider aperture does not automatically make a lens better. The best choice depends on your subject, shooting conditions, budget, size requirements, and desired results.
Beginner Takeaway
Don’t feel pressured to buy several lenses when you are starting.
A single versatile lens can teach you an enormous amount about composition, perspective, focal length, aperture, and subject distance.
Learn what you can achieve with your current lens first. When you repeatedly encounter a limitation that affects your photography, you’ll have a much clearer idea of which lens you actually need.

Camera Settings Every Beginner Should Know
You don’t need to memorize every camera setting before you start taking photographs. A beginner can make significant progress by understanding a small group of controls and learning how each one affects the final image.
The most important settings to learn first are aperture, shutter speed, ISO, white balance, focus mode, and shooting mode.
The Essential Settings at a Glance
| Camera setting | What it primarily controls |
|---|---|
| Aperture | Amount of light entering through the lens and depth of field |
| Shutter speed | How long the sensor is exposed to light and how motion appears |
| ISO | The camera’s signal amplification and resulting brightness/noise characteristics |
| White balance | The color temperature of the photograph |
| Focus mode | How the camera acquires and maintains focus |
| Shooting mode | How much control you have over exposure settings |
These settings work together rather than operating independently.
Aperture
Aperture is the opening inside the lens. It affects how much light enters the camera and how much of the scene appears acceptably sharp from front to back.
A wider aperture, such as f/1.8, can create a shallow depth of field and a blurred background.
A narrower aperture, such as f/8, generally produces greater depth of field.
Use aperture when you want to control: background blur, depth of field, and the amount of light entering the lens.
Shutter Speed
Shutter speed determines how long the camera captures light.
A fast shutter speed such as 1/1000 second can freeze fast movement.
A slower shutter speed such as 1/10 second can show movement as blur and may require camera stabilization.
Use shutter speed when you want to control: motion and exposure time.
ISO
ISO controls the level of amplification applied to the signal recorded by the camera sensor.
Increasing ISO can help you maintain a usable shutter speed in low light, but higher ISO settings can also make noise and reduce image quality.
Use ISO when you need to: adjust exposure after considering aperture and shutter speed, particularly when available light is limited.
White Balance
White balance controls how the camera interprets the color of light.
Different light sources have different color temperatures. For example, indoor incandescent lighting can make photographs look warm or orange, while some shaded environments can make them appear cooler or bluer.
Auto White Balance is a good starting point for beginners, while manual settings can provide more consistent results in controlled conditions.
Focus Mode
Your focus settings determine how the camera focuses on your subject.
A stationary subject may work well with a single-shot autofocus mode, while moving subjects generally benefit from continuous autofocus and subject tracking.
Modern cameras may also provide face and eye detection, which can be especially useful for people and animals.
Shooting Modes
Your camera’s shooting mode determines how much control you have over exposure.
Common options include:
- Auto: The camera makes most decisions for you.
- Program Auto (P): The camera selects aperture and shutter speed while allowing some additional control.
- Aperture Priority (A/Av): You choose the aperture while the camera automatically selects an appropriate shutter speed.
- Shutter Priority (S/Tv): You choose the shutter speed while the camera selects the aperture.
- Manual (M): You control the main exposure settings yourself.
Beginners do not need to jump directly into full Manual mode. Aperture Priority or Shutter Priority can be excellent ways to learn how individual settings affect photographs.
How These Settings Work Together
The three primary exposure controls—aperture, shutter speed, and ISO—form the foundation of exposure.
For example:
- Want more background blur? Open the aperture and adjust another exposure control if necessary.
- Want to freeze a fast subject? Increase shutter speed and compensate for the reduced light.
- Shooting in a dark environment? Open the aperture, slow the shutter speed when practical, or raise ISO depending on the situation.
This relationship is known as the exposure triangle, which we will explore in detail next.
Beginner Takeaway
Don’t try to master every setting at once.
Start by understanding aperture, shutter speed, and ISO, then add focus, white balance, and shooting modes as you become more comfortable.
The goal isn’t to remember a list of settings. The goal is to understand which setting to change when something in your photograph isn’t working.
How to Choose Your First Camera
Buying your first camera can be exciting, but beginners often make the mistake of choosing a camera based only on megapixels, specifications, or the latest model.
The better approach is to choose a camera based on what you photograph, how you shoot, and what you plan to learn.
You don’t need the most expensive camera to become a better photographer. You need a camera that gives you the controls and features you actually need and that you will be comfortable using regularly.
Start With Your Photography Goals
Before comparing camera models, decide what you want to photograph.
Ask yourself:
- Will I mainly photograph people?
- Do I want to photograph landscapes and travel?
- Will I photograph wildlife or sports?
- Do I need good video capabilities?
- Will I carry the camera frequently?
- Do I want interchangeable lenses?
- Am I comfortable learning manual controls?
Your answers can narrow down the type of camera that makes sense for you.
Important Features to Consider
Sensor Size
Sensor size can influence factors such as low-light performance, depth of field, dynamic range, and the effective field of view of a lens.
However, a larger sensor does not automatically guarantee better photographs. Lens choice, lighting, exposure, technique, and composition remain extremely important.
Autofocus
A reliable autofocus system can make photography considerably easier, particularly when photographing people, animals, sports, or other moving subjects.
Look for autofocus performance that matches the type of photography you plan to do.
Lens System
If you are considering a DSLR or mirrorless camera with interchangeable lenses, don’t look only at the price of the camera body.
Consider the entire system.
A camera may appear inexpensive initially but become much more expensive if the lenses you eventually need are costly or difficult to find.
Ergonomics and Controls
A camera should feel comfortable in your hands.
Pay attention to:
- Grip
- Button placement
- Dial controls
- Menu system
- Viewfinder
- Screen
- Weight
- Overall size
A camera that feels comfortable and intuitive is more likely to be used regularly.
Image Stabilization
Image stabilization can help reduce the effects of camera shake when shooting handheld, particularly at slower shutter speeds.
It can be useful for travel, low-light photography, video, and other situations where carrying a tripod isn’t practical.
Battery Life
Battery performance matters when photographing for long periods, traveling, or working at events.
If you regularly shoot for several hours, factor spare batteries into your overall equipment budget.
Video Features
If you plan to create both photographs and videos, consider video resolution, autofocus performance, stabilization, microphone support, recording limits, and how easily the camera fits into your workflow.
Don’t Choose a Camera Based Only on Megapixels
Megapixels describe the amount of image detail a camera can potentially capture, but more megapixels do not automatically mean better photographs.
Image quality also depends on:
- Lens quality
- Sensor performance
- Lighting
- Exposure
- Focus
- Camera processing
- Shooting technique
- Editing
For most beginners, learning how to use a camera effectively will produce a much greater improvement than simply moving to a higher-megapixel model.
Consider the Total Cost
Your camera body is only one part of the investment.
Your actual photography budget may also need to cover:
- Lenses
- Memory cards
- Batteries
- Camera bag
- Tripod
- Lighting equipment
- Editing software
- Backup and storage
A slightly less expensive camera paired with the right lens can be a better choice than spending the entire budget on a camera body.
Don’t Let the “Perfect Camera” Delay You
Camera technology changes constantly. New models appear, prices fluctuate, and specifications improve.
Instead of waiting for the perfect camera, choose equipment that meets your current needs and start learning.
The best camera for a beginner is not necessarily the newest or most expensive model. It is the one that fits your goals, budget, skills, and willingness to use it.
For specific current camera recommendations, use a dedicated camera-buying guide rather than relying on a fixed list of models or prices in this evergreen photography tutorial.
Recommended Beginner Cameras
Under ₹50,000
- Canon R100
- Nikon Z30
- Sony ZV-E10
Under ₹1,00,000
- Sony A6700
- Canon R10
- Nikon Z50
Common Photography Terms Every Beginner Should Know
Photography has its own terminology, and unfamiliar terms can make learning a camera feel more complicated than it really is. You don’t need to memorize every technical term at once. Start with the words you will encounter most often when using a camera, reading tutorials, or editing photographs.
Exposure
Exposure refers to the amount of light recorded when a photograph is captured.
A photograph can be:
- Underexposed — too dark
- Properly exposed — suitable brightness for the intended result
- Overexposed — too bright, with important highlight detail potentially lost
Aperture, shutter speed, and ISO are the main controls that influence exposure.
Aperture
Aperture is the adjustable opening inside a lens that controls how much light passes through it.
It is expressed using f-numbers such as f/1.8, f/4, f/8, and f/16.
Aperture also affects depth of field.
Shutter Speed
Shutter speed determines how long the camera’s sensor is exposed to light.
Fast shutter speeds can freeze movement, while slow shutter speeds can record movement as blur.
ISO
ISO controls the level of amplification applied to the signal recorded by the camera sensor.
Increasing ISO can help you photograph in darker conditions, but higher settings can also introduce more visible noise and reduce image quality.
Depth of Field
Depth of field refers to the range of distances in a photograph that appears acceptably sharp.
A shallow depth of field can isolate a subject against a blurred background, while a deep depth of field can keep more of a scene in focus.
Depth of field is influenced by factors including:
- Aperture
- Focal length
- Subject distance
- Sensor format
- Distance between the subject and background
Bokeh
Bokeh describes the visual appearance of out-of-focus areas in an image, particularly highlights and background blur.
Bokeh is influenced by the lens design, aperture, focusing distance, and the arrangement of elements in the background.
Focal Length
Focal length, measured in millimeters, describes an important optical characteristic of a lens.
In general, shorter focal lengths provide a wider field of view, while longer focal lengths provide a narrower field of view and greater magnification.
Field of View
Field of view refers to how much of a scene a camera and lens can capture.
A wide field of view includes more of the scene, while a narrow field of view includes less.
Field of view depends on both the lens’s focal length and the camera’s sensor format.
Dynamic Range
Dynamic range refers to the range of brightness levels a camera system can record between its darkest usable shadows and brightest usable highlights.
A camera with greater dynamic range can provide more flexibility when recovering detail from challenging lighting conditions, although lighting and exposure technique remain extremely important.
RAW
RAW is an image file format that preserves a large amount of the original image data recorded by the camera sensor for later processing.
RAW files are not simply “uncompressed” files. Depending on the camera and manufacturer, RAW data may be uncompressed, losslessly compressed, or processed using other forms of compression.
RAW gives photographers greater flexibility when adjusting exposure, white balance, highlights, shadows, and color during editing.
JPEG
JPEG is a processed image format that uses lossy compression to reduce file size.
Cameras typically apply processing such as sharpening, color adjustments, noise reduction, and tone adjustments before saving a JPEG.
JPEG files are convenient when you want photographs that are ready to share or use with minimal editing.
White Balance
White balance controls how the camera interprets the color of light in a scene.
It helps prevent photographs from appearing unnaturally warm or cool under different lighting conditions.
Autofocus
Autofocus (AF) is the camera’s system for automatically adjusting focus on a subject.
Modern cameras may provide different autofocus modes for stationary subjects, moving subjects, faces, eyes, animals, vehicles, and other subjects.
Manual Focus
Manual focus allows the photographer to control the focus position rather than relying on the camera’s autofocus system.
It can be useful for macro photography, landscapes, video, low-light situations, and scenes where autofocus struggles.
Exposure Compensation
Exposure compensation allows you to make a photograph brighter or darker when using an automatic or semi-automatic exposure mode.
It is particularly useful when the camera’s meter produces an exposure that doesn’t match your creative intention.
Histogram
A histogram is a graphical representation of the distribution of tones in a photograph.
The left side represents darker tones, while the right side represents brighter tones.
It can help you identify severe clipping in shadows or highlights, especially when the camera’s screen makes judging exposure difficult.
Crop Factor
Crop factor is a comparison between a camera sensor’s size and a chosen reference sensor format, commonly full frame.
It affects the field of view produced by a particular focal length. It does not mean that the lens itself has physically changed focal length.
Frames Per Second (FPS)
FPS, or frames per second, describes how many photographs a camera can capture during continuous shooting under specified conditions.
A higher shooting speed can be useful for sports, wildlife, action, and other fast-moving subjects.
Burst Mode
Burst mode allows the camera to capture multiple photographs rapidly while the shutter button is held down or activated.
It can increase the chance of capturing the decisive moment in fast-moving situations, although it also creates more files to review and organize.
Exposure Triangle
The exposure triangle is a commonly used way to explain the relationship between aperture, shutter speed, and ISO.
Changing one of these settings can affect exposure and may require adjustments to another.
You will explore this relationship in detail in the next section.
Beginner Takeaway
Don’t try to memorize this entire glossary before using your camera.
Instead, learn each term as you encounter it. Start with aperture, shutter speed, ISO, exposure, focus, white balance, and depth of field. These concepts form the foundation for understanding most beginner photography tutorials.
Your Photography Learning Roadmap
Photography becomes much easier to learn when you follow a clear progression instead of trying to master every camera setting and technique at the same time.
You don’t need to complete this roadmap at a fixed pace. Move forward when you feel comfortable with each stage, and spend extra time practicing the areas where you struggle.
Week 1: Learn Your Camera
Start by becoming familiar with the equipment you already have.
Learn how to:
- Change the main shooting modes.
- Adjust aperture, shutter speed, and ISO.
- Select autofocus modes and focus points.
- Change white balance.
- Review photographs and check exposure.
- Use your camera’s basic menu and controls.
Practice: Photograph the same subject using different settings and compare the results.
Week 2: Understand Exposure
Focus on the relationship between:
- Aperture
- Shutter speed
- ISO
Learn what happens when you change each setting and how one adjustment can affect the others.
Practice: Photograph the same subject at different apertures, then repeat the exercise with different shutter speeds and ISO settings.
Week 3: Learn Focus and Depth of Field
Understand how focusing works and how aperture, focal length, and subject distance affect depth of field.
Practice photographing:
- A stationary subject
- A moving subject
- A person
- A close-up subject
Practice: Take portraits using several apertures and compare how the background changes.
Week 4: Improve Composition
Start deliberately composing every photograph instead of simply pointing the camera at your subject.
Practice:
- Rule of thirds
- Leading lines
- Framing
- Negative space
- Symmetry
- Different camera angles
- Foreground and background relationships
Practice: Photograph one subject from at least five different positions and compare which composition communicates the subject best.
Month 2: Learn Lighting and Timing
Begin paying closer attention to the quality and direction of light.
Experiment with:
- Morning light
- Evening light
- Window light
- Backlighting
- Side lighting
- Soft light
- Hard light
- Golden hour
Practice: Photograph the same subject at different times of day and compare the changes in shadows, color, and mood.
Month 2: Explore Different Photography Genres
Try several genres instead of immediately committing to one.
Experiment with:
- Portrait photography
- Couple photography
- Landscape photography
- Street photography
- Product photography
- Wildlife photography
- Sports photography
- Mobile photography
You will begin to discover which subjects and styles you enjoy most.
Month 3: Learn Photo Editing
Once you are comfortable capturing photographs, develop a simple editing workflow.
Learn how to:
- Select your best photographs.
- Crop and straighten images.
- Correct exposure.
- Adjust white balance.
- Control highlights and shadows.
- Improve color.
- Reduce noise when necessary.
- Apply appropriate sharpening.
- Export photographs for different uses.
Start with basic adjustments rather than applying heavy effects.
Month 3: Develop Your Visual Style
Your photography style develops through repeated practice and intentional choices.
Review your photographs regularly and look for patterns.
Ask yourself:
- What subjects do I enjoy photographing?
- What lighting do I naturally prefer?
- Do I prefer bright or darker images?
- What compositions appear repeatedly in my work?
- Which photographs am I most proud of?
- What do I want viewers to feel when they see my images?
Don’t try to force a style too early. Give yourself time to experiment.
A Simple Photography Practice Routine
You can improve significantly by practicing consistently rather than taking thousands of random photographs.
Try this routine:
Learn → Practice → Review → Identify a problem → Practice again
For example, if your photographs are frequently blurry, don’t immediately buy a new camera. First determine whether the problem comes from shutter speed, autofocus, camera movement, subject movement, or technique.
Keep a Photography Progress Folder
Save some of your photographs from each stage of your learning journey.
Every few weeks, compare your newer photographs with older ones.
You may notice improvements in composition, exposure, focus, timing, and editing that are difficult to recognize when you only look at your most recent work.
Beginner Takeaway
You don’t have to become an expert in a few weeks.
Focus on one skill at a time, practice it repeatedly, and build on what you already understand.
The fastest way to improve photography is not to learn more information—it is to turn what you learn into practical experience.
Related Articles:
- Photography Poses for Beginners
- Natural Poses for Photos
- Creative Lighting Ideas for Home Photoshoot
- Best Camera Under ₹30,000
- Best Camera Under ₹1 Lakh
- Best Camera for Instagram and Reels
- Best Camera for YouTube Beginners
- DIY Photoshoot Ideas at Home
- Product Photography Setup at Home
- Photography Pricing Guide


Understanding the Exposure Triangle
The exposure triangle is one of the most important concepts for anyone learning photography.
It describes the relationship between three camera controls:
- Aperture
- Shutter speed
- ISO
Together, these settings influence the brightness of your photograph while also affecting creative characteristics such as background blur, motion, and visible image noise.
Once you understand the exposure triangle, you can move beyond simply choosing settings and start making deliberate decisions about how your photographs should look.
The Three Parts of the Exposure Triangle
Aperture: Controls Light and Depth of Field
Aperture is the opening inside the lens.
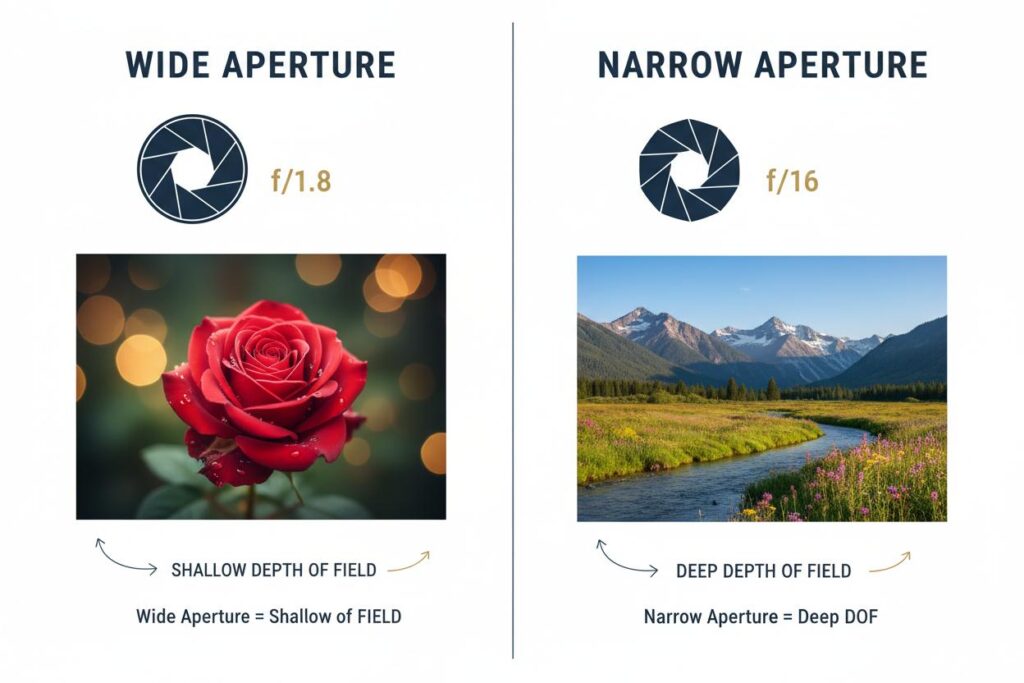
A wider aperture, such as f/1.8, allows more light to reach the sensor and can produce a shallower depth of field. This can help separate a subject from a distracting background.
A narrower aperture, such as f/8, allows less light through and generally produces greater depth of field.
Main creative effect: Depth of field and background blur.
Shutter Speed: Controls Light and Motion
Shutter speed determines how long the camera’s sensor is exposed to light.
A fast shutter speed, such as 1/1000 second, can freeze rapid movement.
A slower shutter speed, such as 1/10 second, allows more light to reach the sensor but can also create motion blur.
Main creative effect: How movement appears in the photograph.
ISO: Controls Signal Amplification
ISO controls the level of amplification applied to the signal recorded by the camera sensor.
A lower ISO generally produces cleaner images with less visible noise.
A higher ISO can help you maintain a usable shutter speed when there isn’t enough light, but it can also increase visible noise and reduce image quality.
Main creative effect: Balancing exposure in difficult lighting while managing image noise.
How the Three Settings Work Together
The three controls are connected.
When you change one setting, you may need to adjust another to maintain the exposure you want.
For example, imagine you are photographing a person outdoors.
You choose f/2.8 because you want the background to appear soft. Opening the aperture lets more light into the camera, so you may need to increase the shutter speed to prevent the photograph from becoming too bright.
Now imagine the light becomes darker.
You might keep the same aperture and shutter speed but increase ISO to maintain a usable exposure.
This is why photography is not about memorizing one “correct” setting.
It is about understanding the trade-offs between the settings.
Three Practical Exposure Examples
Example 1: Portrait With Background Blur
Goal: Keep the subject sharp while creating a soft background.
Start with:
- Wider aperture, such as f/1.8–f/2.8
- Shutter speed fast enough to prevent subject or camera movement
- Lowest practical ISO for the available light
If the photograph becomes too bright, increase the shutter speed or reduce the aperture.
Example 2: Fast-Moving Subject
Goal: Freeze movement.
Start with:
- Fast shutter speed, such as 1/500 second or faster
- Aperture selected according to the desired depth of field and available light
- ISO adjusted as needed to maintain the required shutter speed
For very fast sports or wildlife, you may need shutter speeds around 1/1000 second or faster.
Example 3: Low-Light Scene
Goal: Capture enough light without introducing unnecessary blur or noise.
Depending on the scene, you might:
- Open the aperture.
- Reduce the shutter speed if the subject and camera can remain sufficiently stable.
- Increase ISO when a faster shutter speed is necessary.
There is no single correct combination. The best settings depend on whether the subject is moving, how much depth of field you need, and whether camera movement is a concern.
A Simple Way to Think About the Exposure Triangle
When deciding which setting to change, ask:
Do I want to control background blur?
Start with aperture.
Do I want to control motion?
Start with shutter speed.
Do I need more exposure in difficult light?
Consider ISO, after considering what aperture and shutter speed you need.
This approach makes the exposure triangle much easier to use in real-world photography.
The Exposure Triangle Is Not About Perfect Balance
The term “triangle” can make exposure seem like all three settings must always be balanced equally. They don’t.
Your creative goal should determine which setting receives priority.
A sports photographer may prioritize shutter speed.
A portrait photographer may prioritize aperture.
A landscape photographer may prioritize depth of field and image quality.
The remaining settings are then adjusted to produce the required exposure.
Beginner Exercise
Choose one stationary subject and photograph it several times.
First, change only the aperture.
Then change only the shutter speed.
Finally, change only the ISO.
Review the photographs and identify how each setting changed the image.
This simple exercise will help you understand the exposure triangle much faster than memorizing definitions.
Beginner Takeaway
Remember these three questions:
Aperture → How much depth of field do I want?
Shutter speed → How should movement look?
ISO → How much signal amplification do I need for the available light?
Once you can answer those questions, choosing exposure settings becomes far more intuitive.

Aperture and Depth of Field
Aperture is one of the most important camera controls to understand because it affects both exposure and depth of field.
The aperture is the adjustable opening inside a lens. It determines how much light passes through the lens and reaches the camera sensor.
Aperture is expressed using f-numbers, such as f/1.8, f/2.8, f/4, f/5.6, f/8, and f/16.
One of the confusing things for beginners is that a smaller f-number represents a wider physical opening, while a larger f-number represents a narrower opening.
Wide vs Narrow Aperture
A wide aperture such as f/1.8 or f/2.8:
- Allows more light into the camera.
- Can create a shallower depth of field.
- Can help separate a subject from its background.
- Can be useful in low-light situations.
A narrow aperture such as f/8 or f/11:
- Allows less light into the camera.
- Generally produces greater depth of field.
- Can keep more of a scene acceptably sharp.
- Is often useful for landscapes, architecture, and scenes where greater depth is desired.
What Is Depth of Field?
Depth of field is the range of distances in a photograph that appears acceptably sharp.
A shallow depth of field may keep your subject sharp while making areas in front of and behind the subject appear blurred.
A deep depth of field can keep a larger portion of the scene acceptably sharp.
Depth of field is affected by several factors, not just aperture.
Factors That Affect Depth of Field
Aperture
A wider aperture generally produces a shallower depth of field.
For example, photographing a person at f/2 can produce much stronger background separation than photographing the same person at f/11, assuming other factors remain comparable.
Focal Length
Longer focal lengths can make it easier to achieve a shallow depth of field, particularly when you maintain an appropriate subject framing and shooting distance.
This is one reason telephoto lenses are often popular for portraits and wildlife photography.
Subject Distance
The closer you are to your subject, the easier it can be to create a shallow depth of field.
This effect is especially noticeable in close-up and macro photography.
Background Distance
A subject positioned farther away from the background can appear more separated from it, particularly when using a wider aperture.
This means you can sometimes create stronger background separation simply by changing the position of your subject.
Choosing Aperture for Different Situations
There is no single aperture that is correct for every photograph.
Portraits
A wider aperture can help separate your subject from a distracting background.
However, extremely wide apertures can produce a very shallow depth of field. With a close portrait, for example, one eye may be sharp while the other falls outside the desired focus range.
Choose an aperture that gives you enough depth of field for the photograph you want.
Landscapes
Landscape photographers often use narrower apertures such as f/8–f/11 when they want a larger portion of the scene to appear sharp.
The best aperture depends on the lens, scene, focus distance, and desired result.
Street Photography
A moderate aperture can provide enough depth of field to make focusing easier while still allowing flexibility in changing light.
Product Photography
Product photography often requires greater depth of field so that important parts of the product remain sharp.
A narrower aperture may help, although photographers may also use focus stacking when very deep focus is required.
Low-Light Photography
A wider aperture can allow more light into the camera, which may help you maintain a faster shutter speed or lower ISO.
However, don’t choose the widest aperture automatically. Consider how much depth of field your subject requires.
Aperture and Background Blur
Beginners often assume that simply selecting the widest possible aperture will always create the best background blur.
That’s not necessarily true.
Background blur depends on the combination of:
- Aperture
- Focal length
- Subject distance
- Background distance
- Lens characteristics
- Sensor format
For stronger subject separation, try moving your subject farther away from the background while keeping an appropriate camera-to-subject distance.
Aperture and Lens Performance
A lens may not produce its best overall optical performance at its widest possible aperture. Depending on the lens, stopping down slightly can improve areas such as sharpness or reduce certain optical imperfections.
This doesn’t mean you should avoid wide apertures. Use them when their creative or practical benefits are important.
Photography is about choosing the aperture that suits the photograph—not simply choosing the smallest f-number available.
Beginner Aperture Exercise
Find a stationary subject with a reasonably distant background.
Take several photographs without changing your composition:
f/1.8 → f/2.8 → f/4 → f/5.6 → f/8 → f/11
Compare the images.
Look for changes in:
- Background blur
- Subject sharpness
- Depth of field
- Overall brightness
Then repeat the exercise while moving your subject closer to the background.
You’ll begin to see how aperture and subject/background distance work together.
Beginner Takeaway
Remember:
Wide aperture → more light + shallower depth of field
Narrow aperture → less light + greater depth of field
But aperture is only one part of the equation. Focal length, subject distance, and background distance also influence depth of field.
Choose your aperture based on the creative result you want, not simply on a rule that says one f-number is always better than another.
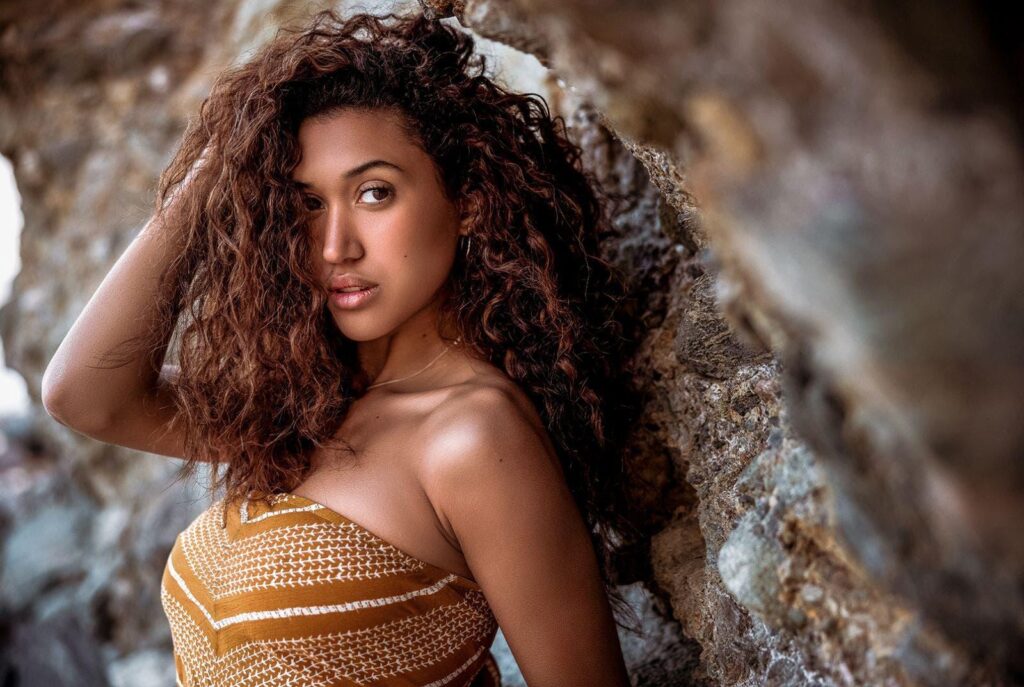
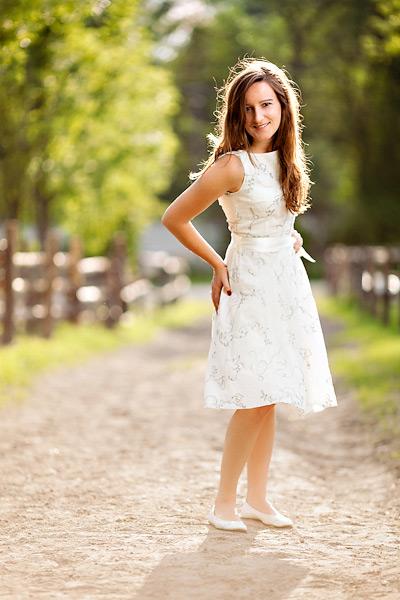
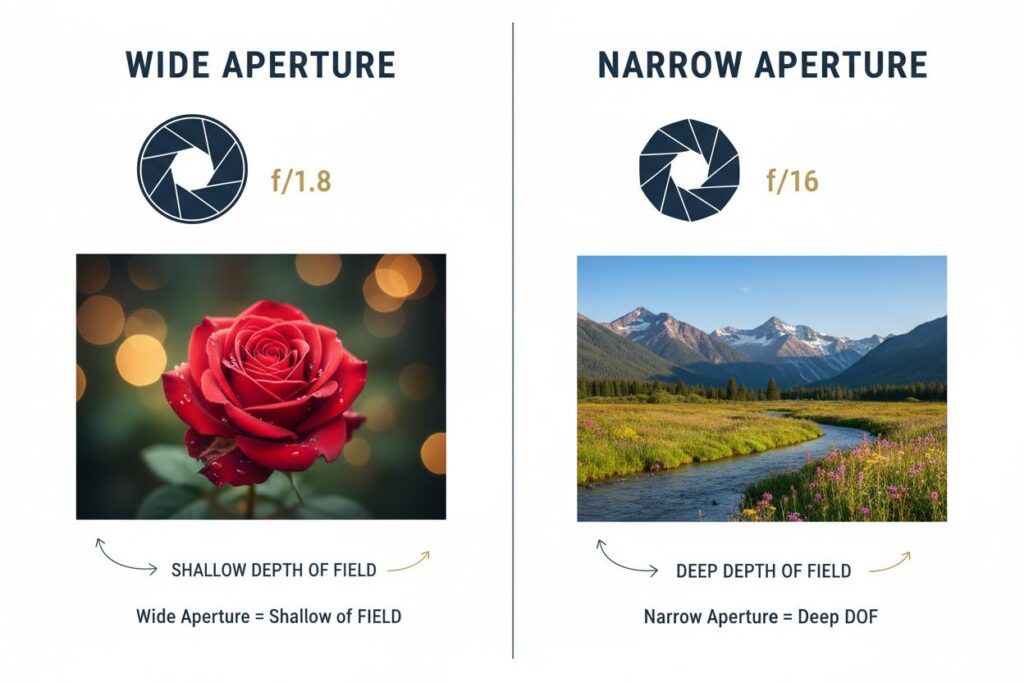

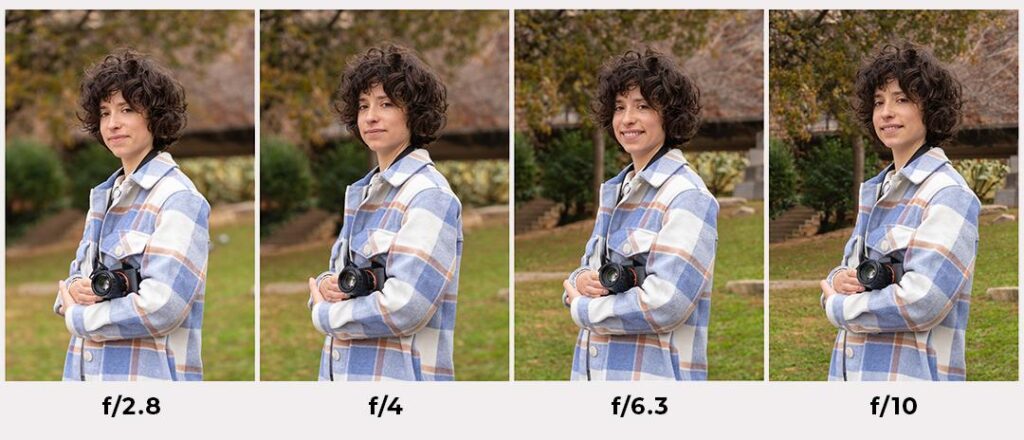
Small Aperture (f/11)
Benefits:
- Greater depth of field
- More of the image remains sharp
Best For:
- Landscape photography
- Travel photography
- Architecture


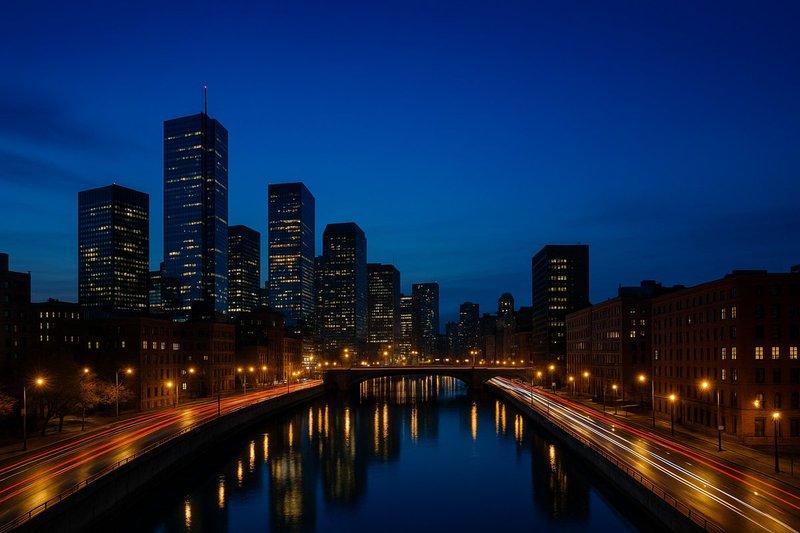

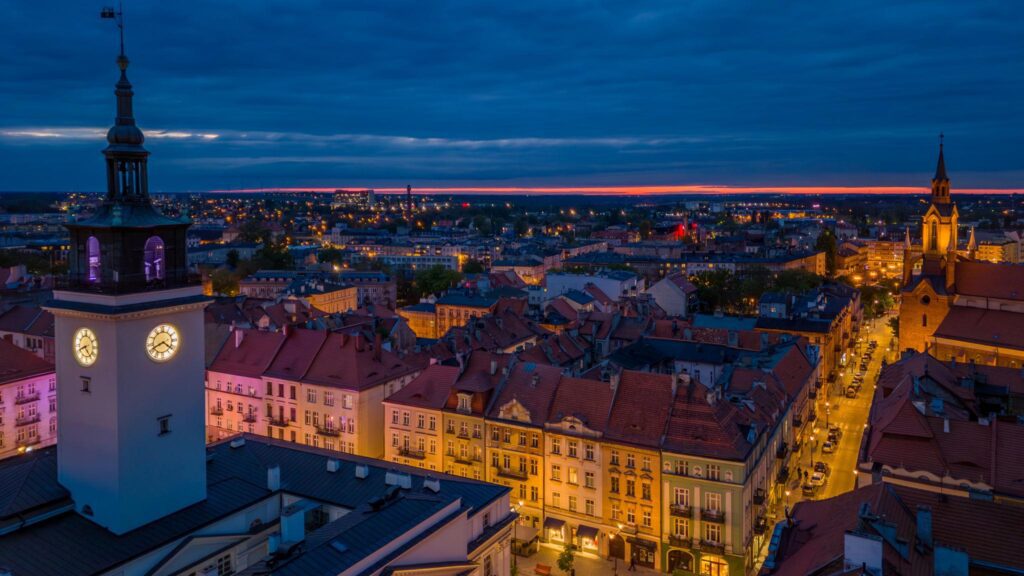
What Is Depth of Field?
Depth of field refers to how much of your image appears sharp.
Shallow Depth of Field
Only the subject remains sharp.
Background becomes blurry.
Commonly used in:
- Portrait photography
- Product photography
- Couple photography
Deep Depth of Field
Most of the scene remains sharp.
Commonly used in:
- Landscapes
- Travel photography
- Cityscapes
Shutter Speed Explained
Shutter speed determines how long the camera sensor is exposed to light.
Measured in:
- 1/1000
- 1/500
- 1/250
- 1/60
- 1/30
- 1 second
- 10 seconds
Fast shutter speeds freeze motion.
Slow shutter speeds capture motion.
Fast Shutter Speed
Examples:
- 1/1000
- 1/2000
Best For:
- Sports photography
- Wildlife photography
- Children
- Running subjects
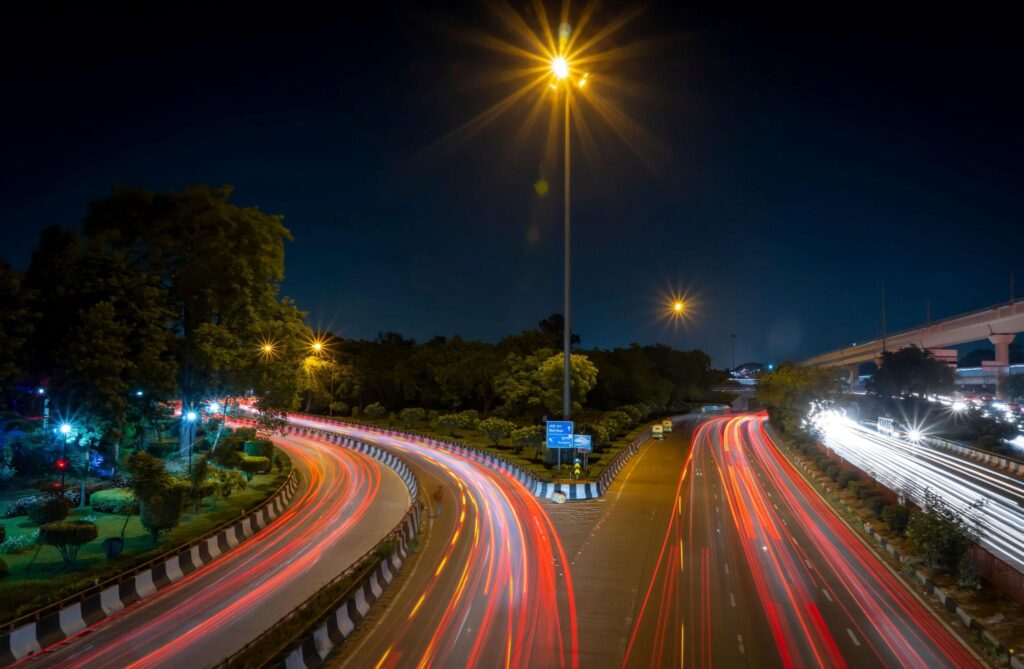
Slow Shutter Speed
Examples:
- 1 second
- 5 seconds
- 30 seconds
Best For:
- Waterfalls
- Light trails
- Night photography



Aperture and Depth of Field
Aperture is one of the most important camera controls to understand because it affects both exposure and depth of field.
The aperture is the adjustable opening inside a lens. It determines how much light passes through the lens and reaches the camera sensor.
Aperture is expressed using f-numbers, such as f/1.8, f/2.8, f/4, f/5.6, f/8, and f/16.
One of the confusing things for beginners is that a smaller f-number represents a wider physical opening, while a larger f-number represents a narrower opening.
Wide vs Narrow Aperture
A wide aperture such as f/1.8 or f/2.8:
- Allows more light into the camera.
- Can create a shallower depth of field.
- Can help separate a subject from its background.
- Can be useful in low-light situations.
A narrow aperture such as f/8 or f/11:
- Allows less light into the camera.
- Generally produces greater depth of field.
- Can keep more of a scene acceptably sharp.
- Is often useful for landscapes, architecture, and scenes where greater depth is desired.
What Is Depth of Field?
Depth of field is the range of distances in a photograph that appears acceptably sharp.
A shallow depth of field may keep your subject sharp while making areas in front of and behind the subject appear blurred.
A deep depth of field can keep a larger portion of the scene acceptably sharp.
Depth of field is affected by several factors, not just aperture.
Factors That Affect Depth of Field
Aperture
A wider aperture generally produces a shallower depth of field.
For example, photographing a person at f/2 can produce much stronger background separation than photographing the same person at f/11, assuming other factors remain comparable.
Focal Length
Longer focal lengths can make it easier to achieve a shallow depth of field, particularly when you maintain an appropriate subject framing and shooting distance.
This is one reason telephoto lenses are often popular for portraits and wildlife photography.
Subject Distance
The closer you are to your subject, the easier it can be to create a shallow depth of field.
This effect is especially noticeable in close-up and macro photography.
Background Distance
A subject positioned farther away from the background can appear more separated from it, particularly when using a wider aperture.
This means you can sometimes create stronger background separation simply by changing the position of your subject.
Choosing Aperture for Different Situations
There is no single aperture that is correct for every photograph.
Portraits
A wider aperture can help separate your subject from a distracting background.
However, extremely wide apertures can produce a very shallow depth of field. With a close portrait, for example, one eye may be sharp while the other falls outside the desired focus range.
Choose an aperture that gives you enough depth of field for the photograph you want.
Landscapes
Landscape photographers often use narrower apertures such as f/8–f/11 when they want a larger portion of the scene to appear sharp.
The best aperture depends on the lens, scene, focus distance, and desired result.
Street Photography
A moderate aperture can provide enough depth of field to make focusing easier while still allowing flexibility in changing light.
Product Photography
Product photography often requires greater depth of field so that important parts of the product remain sharp.
A narrower aperture may help, although photographers may also use focus stacking when very deep focus is required.
Low-Light Photography
A wider aperture can allow more light into the camera, which may help you maintain a faster shutter speed or lower ISO.
However, don’t choose the widest aperture automatically. Consider how much depth of field your subject requires.
Aperture and Background Blur
Beginners often assume that simply selecting the widest possible aperture will always create the best background blur.
That’s not necessarily true.
Background blur depends on the combination of:
- Aperture
- Focal length
- Subject distance
- Background distance
- Lens characteristics
- Sensor format
For stronger subject separation, try moving your subject farther away from the background while keeping an appropriate camera-to-subject distance.
Aperture and Lens Performance
A lens may not produce its best overall optical performance at its widest possible aperture. Depending on the lens, stopping down slightly can improve areas such as sharpness or reduce certain optical imperfections.
This doesn’t mean you should avoid wide apertures. Use them when their creative or practical benefits are important.
Photography is about choosing the aperture that suits the photograph—not simply choosing the smallest f-number available.
Beginner Aperture Exercise
Find a stationary subject with a reasonably distant background.
Take several photographs without changing your composition:
f/1.8 → f/2.8 → f/4 → f/5.6 → f/8 → f/11
Compare the images.
Look for changes in:
- Background blur
- Subject sharpness
- Depth of field
- Overall brightness
Then repeat the exercise while moving your subject closer to the background.
You’ll begin to see how aperture and subject/background distance work together.
Beginner Takeaway
Remember:
Wide aperture → more light + shallower depth of field
Narrow aperture → less light + greater depth of field
But aperture is only one part of the equation. Focal length, subject distance, and background distance also influence depth of field.
Choose your aperture based on the creative result you want, not simply on a rule that says one f-number is always better than another.
ISO in Photography
ISO is one of the three main exposure controls alongside aperture and shutter speed.
It affects the level of amplification applied to the signal recorded by the camera sensor. In practical photography, changing ISO can help you achieve a usable exposure when the available light or your chosen aperture and shutter speed make that difficult.
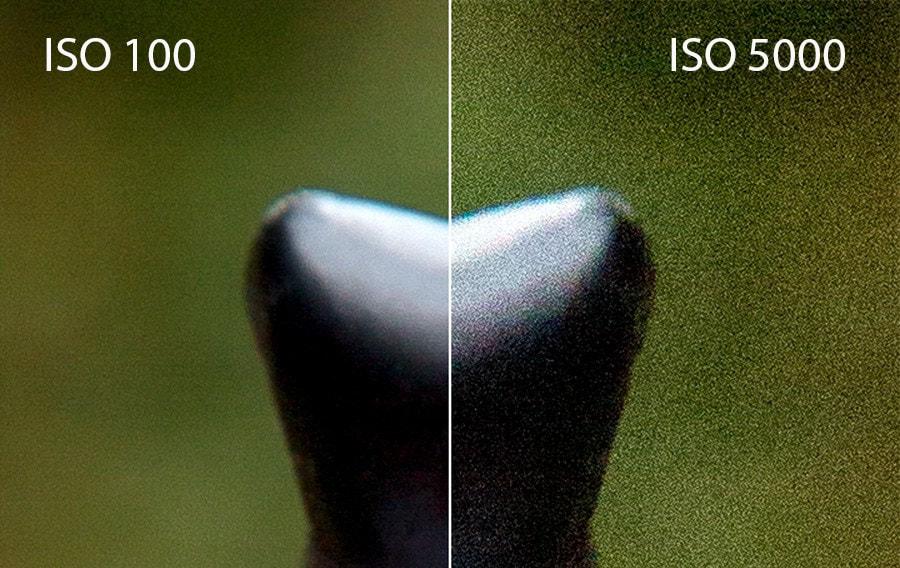
However, increasing ISO can also make image noise more noticeable and may reduce the amount of clean detail in a photograph.
How ISO Works
Common ISO settings include:
ISO 100 → ISO 200 → ISO 400 → ISO 800 → ISO 1600 → ISO 3200 → ISO 6400
Depending on the camera, much higher settings may also be available.
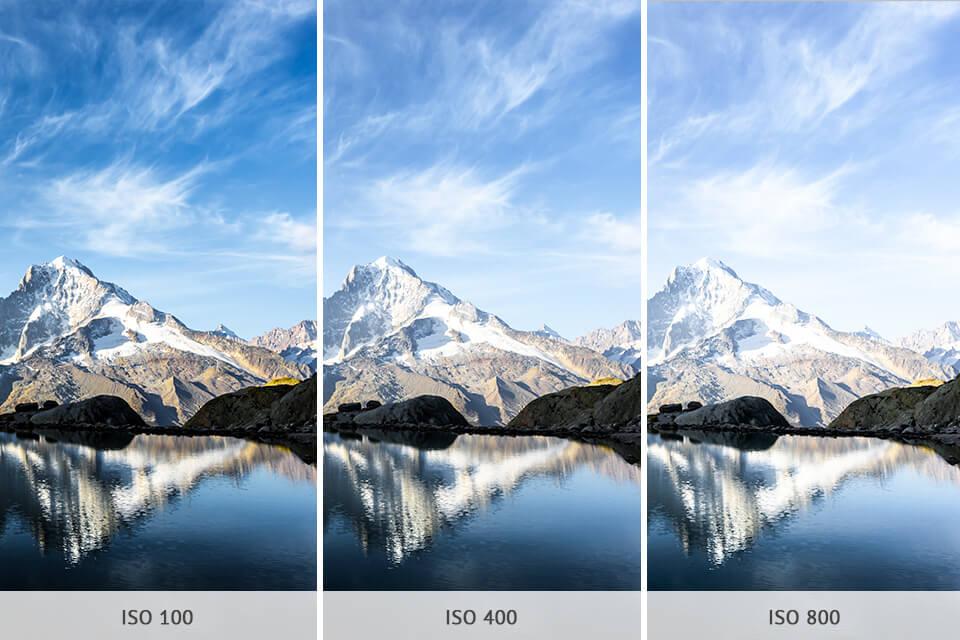
As ISO increases, the camera can produce a brighter-looking image at the same aperture and shutter speed, but the image may contain more visible noise.
Low ISO
A lower ISO is generally preferable when you have sufficient light.
For example:
- ISO 100
- ISO 200
- ISO 400
Lower ISO settings can help produce cleaner images with less visible noise and greater image quality.
They are particularly useful in:
- Bright outdoor conditions
- Landscapes
- Studio photography
- Product photography
- Tripod-based photography
High ISO
Higher ISO settings can be useful when there isn’t enough light to use your preferred aperture and shutter speed.
For example:
- ISO 800
- ISO 1600
- ISO 3200
- ISO 6400 or higher
Higher ISO can be helpful for:
- Indoor photography
- Night photography
- Events
- Concerts
- Weddings
- Wildlife in low light
- Handheld photography
The amount of noise produced at a particular ISO varies significantly between cameras.
ISO and Noise
One of the most noticeable effects of increasing ISO can be image noise.
Noise may appear as:
- Grain-like patterns
- Colored speckles
- Loss of fine detail
- Reduced tonal quality
Modern cameras can often produce surprisingly usable photographs at high ISO settings, and modern editing software can also reduce noise effectively.
Don’t avoid high ISO simply because you have heard that “high ISO is bad.”
A correctly exposed photograph at a higher ISO is often much better than a blurry photograph captured at a low ISO.
ISO vs Shutter Speed
Suppose you’re photographing indoors.
You want to use:
- f/2.8 for sufficient light and background separation
- 1/500 second to freeze movement
But the photograph is too dark.
You have several choices.
You could:
- Open the aperture further, if your lens allows it.
- Reduce the shutter speed, if the subject can tolerate slower movement capture.
- Increase ISO.
If the subject is moving quickly, increasing ISO may be the better choice because it allows you to maintain the shutter speed needed to freeze the action.
ISO vs Aperture
A wider aperture lets more light reach the sensor.
If you’re already using the widest aperture your lens provides and the image is still too dark, increasing ISO can help.
For example, a photographer shooting a dimly lit event may use a relatively wide aperture and a fast enough shutter speed to avoid motion blur, then raise ISO to achieve the required exposure.
ISO vs Shutter Speed vs Aperture
Remember that there is no single “correct” ISO.
Your decision depends on what matters most in the photograph.
Need to freeze movement?
Prioritize shutter speed.
Need more or less depth of field?
Prioritize aperture.
Need additional exposure after choosing the other settings?
Adjust ISO.
This is the practical relationship between ISO and the other two exposure controls.
ISO Starting Points
These are useful starting points rather than strict rules:
| Situation | Possible ISO starting point |
|---|---|
| Bright sunlight | ISO 100–200 |
| Overcast outdoor conditions | ISO 200–800 |
| Indoor daylight | ISO 400–1600 |
| Indoor events | ISO 800–3200+ |
| Night photography on tripod | ISO 100–800 |
| Night handheld photography | ISO 800–6400+ |
| Wildlife in low light | ISO 800–6400+ |
Your camera, lens, available light, and desired shutter speed will determine the final setting.
Should You Always Use the Lowest ISO?
No.
Using the lowest possible ISO is not always the best choice.
Imagine you’re photographing a moving subject indoors at ISO 100. To maintain that low ISO, you may need to use a slow shutter speed, resulting in motion blur.
Increasing ISO to ISO 800 or ISO 1600 could allow you to use a faster shutter speed and capture a sharper photograph.
A slightly noisy sharp photograph is often more useful than a clean but blurry one.
Auto ISO
Many modern cameras offer Auto ISO, which automatically adjusts ISO according to the lighting and your other exposure settings.
Auto ISO can be particularly useful when lighting changes quickly.
Some cameras also allow you to set:
- Maximum ISO
- Minimum shutter speed
- ISO range
These controls can help prevent the camera from selecting settings that don’t suit your photography.
Beginner ISO Exercise
Find a stationary subject in a controlled environment.
Take photographs at:
ISO 100 → 400 → 800 → 1600 → 3200 → 6400
Keep your aperture and shutter speed as consistent as practical.
View the photographs at 100% magnification and compare:
- Noise
- Fine detail
- Shadow quality
- Color
- Overall image quality
Then repeat the exercise with a moving subject and see how increasing ISO allows you to use faster shutter speeds.
Beginner Takeaway
Think of ISO as a tool that helps you balance exposure when aperture and shutter speed alone aren’t enough.
Lower ISO → generally cleaner image
Higher ISO → more exposure flexibility but potentially more noise
Don’t be afraid of high ISO. Use the lowest ISO that makes sense for the photograph you are trying to create, rather than treating low ISO as a rule that must always be followed.


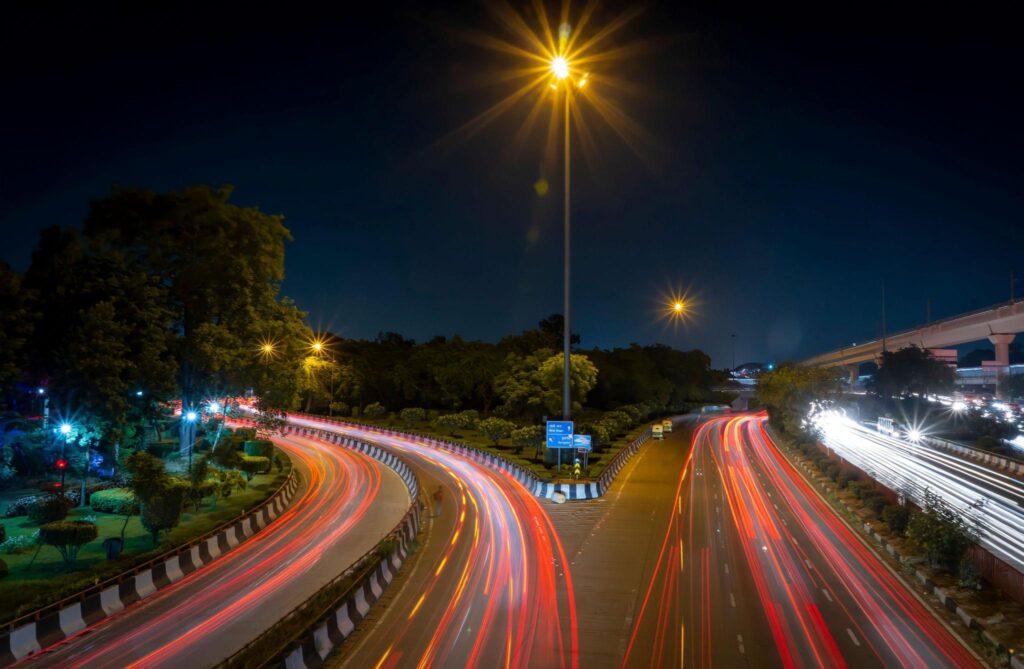


How Aperture, Shutter Speed, and ISO Work Together
Understanding aperture, shutter speed, and ISO individually is important. The next step is learning how to use them together.
These three settings form the foundation of exposure. Changing one can affect the amount of light recorded by the camera, so you often need to adjust another setting to maintain the exposure you want.
But exposure isn’t the only consideration.
Each setting also changes the appearance of the photograph.
- Aperture affects depth of field.
- Shutter speed affects motion.
- ISO affects image noise and overall exposure flexibility.
This means there can be several technically usable exposure combinations for the same scene, but only some will produce the creative result you want.
Start With Your Creative Priority
Before adjusting settings, ask yourself:
What is most important in this photograph?
If you want a blurred background, start by choosing your aperture.
If you need to freeze movement, start by choosing your shutter speed.
If you’ve selected the aperture and shutter speed you need but don’t have enough light, adjust ISO.
This simple approach makes exposure decisions much easier.
Example 1: Portrait Photography
Imagine you’re photographing a person outdoors.
Your goal is to create a portrait with a soft background.
You might choose:
Aperture: f/2.8
Shutter speed: 1/500 sec
ISO: 100
The wide aperture helps create background separation, while the fast shutter speed helps reduce subject and camera movement.
If the light becomes brighter and the photograph becomes overexposed, you could:
- Increase shutter speed.
- Reduce the aperture.
- Lower ISO if your camera allows it.
The best choice depends on the creative result you want.
Example 2: Sports Photography
Now imagine you’re photographing a football match.
Your priority is to freeze fast-moving players.
You might choose:
Shutter speed: 1/1000 sec
Aperture: f/2.8–f/4
ISO: Adjust according to available light
Because the fast shutter speed reduces the amount of light reaching the sensor, you may need to increase ISO.
In this situation, accepting some additional noise may be preferable to using a slower shutter speed that produces motion blur.
Example 3: Landscape Photography
Suppose you’re photographing a landscape and want much of the scene to remain sharp.
You might start with:
Aperture: f/8
ISO: 100
Shutter speed: Adjust according to the available light
If the shutter speed becomes too slow for handheld shooting, you could increase ISO or use a tripod.
If you’re using a tripod and the scene is stationary, a slower shutter speed may be perfectly acceptable.
Example 4: Low-Light Street Photography
Imagine you’re photographing people on a city street after sunset.
You want enough shutter speed to reduce movement blur while maintaining reasonable image quality.
You might start with:
Aperture: f/2–f/2.8
Shutter speed: Around 1/125–1/250 sec
ISO: Adjust as needed
If the scene is still too dark, increasing ISO may be preferable to slowing the shutter speed too much.
Example 5: Waterfall With Motion Blur
Suppose you want to show the movement of flowing water.
Instead of freezing the water with a fast shutter speed, you intentionally choose a slower exposure.
You might use:
Aperture: f/8
Shutter speed: 1/2–2 seconds
ISO: 100
A tripod would generally be useful because the camera needs to remain stable during the longer exposure.
Here, motion blur is not a problem—it is the creative goal.
Exposure Compensation
When using Aperture Priority, Shutter Priority, or another automatic/semi-automatic mode, you can often use exposure compensation to make the resulting photograph brighter or darker.
For example, if your camera makes a bright subject against a dark background too bright, you might use negative exposure compensation.
If your subject appears too dark against a bright background, positive exposure compensation may help.
The exact behavior depends on the camera’s metering and shooting mode.
Don’t Chase the “Perfect” Exposure
A technically balanced exposure isn’t necessarily the best photograph.
Sometimes you may intentionally:
- Let a background become very dark.
- Preserve bright highlights at the expense of shadows.
- Allow motion blur.
- Use high ISO.
- Underexpose slightly for a moodier image.
- Overexpose certain elements for a high-key effect.
The correct settings depend on your creative intention.
A Simple Decision-Making Method
When you’re unsure which setting to change, use this sequence:
Step 1: Decide the Depth of Field
Ask:
How much of the scene needs to be sharp?
Choose your aperture.
Step 2: Decide How You Want Movement to Look
Ask:
Do I need to freeze movement or intentionally show it?
Choose your shutter speed.
Step 3: Adjust ISO
If the selected aperture and shutter speed don’t provide the exposure you need, adjust ISO.
Step 4: Check the Result
Review the photograph and look for:
- Motion blur
- Focus errors
- Clipped highlights
- Excessive shadows
- Distracting noise
- Insufficient depth of field
Then adjust your settings accordingly.
A Practical Exposure Exercise
Choose the same subject and create three different photographs.
Photograph A — Background Blur
Prioritize aperture.
Photograph B — Frozen Movement
Prioritize shutter speed.
Photograph C — Low-Light Exposure
Balance aperture, shutter speed, and ISO according to the scene.
Compare all three photographs.
Instead of asking only “Which one is brighter?”, ask:
- Which one has the best depth of field?
- Which one controls motion best?
- Which one has the cleanest image quality?
- Which settings produced the desired creative effect?
That is the real purpose of understanding exposure.
Beginner Takeaway
Don’t think of aperture, shutter speed, and ISO as three independent settings.
Think of them as a decision-making system.
Aperture → controls depth of field
Shutter speed → controls motion
ISO → provides exposure flexibility
Choose the setting that controls the visual characteristic that matters most, then use the other two to complete the exposure.
Once this becomes instinctive, you can start spending less time thinking about camera settings and more time thinking about your subject, composition, light, and timing.
Camera Modes Explained for Beginners
Modern cameras provide several shooting modes that determine how much control you have over exposure settings. You don’t need to use Manual mode all the time to be a good photographer.
In fact, semi-automatic modes can be excellent learning tools because they allow you to control one important setting while the camera manages the others.
The most common modes are Auto, Program (P), Aperture Priority (A/Av), Shutter Priority (S/Tv), and Manual (M).
Auto Mode
In Auto mode, the camera makes most of the important decisions for you.
Depending on the camera, it may automatically select:
- Aperture
- Shutter speed
- ISO
- Autofocus behavior
- White balance
- Flash settings
- Other image-processing options
Best for: complete beginners, quick snapshots, or situations where you need to capture a moment without adjusting settings.
Auto mode is convenient, but it gives you less creative control.
Program Auto (P)
Program mode automatically selects an aperture and shutter speed combination while still giving you access to additional controls.
Many cameras allow you to shift between different aperture/shutter combinations while maintaining a similar exposure.
Best for: beginners who want more control than Auto without manually selecting every exposure setting.
Aperture Priority (A/Av)
Aperture Priority allows you to choose the aperture while the camera automatically selects a suitable shutter speed.
You may also be able to control ISO and other settings depending on your camera.
This mode is particularly useful when depth of field is your main creative priority.
For example:
Portrait: Choose a wider aperture for background separation.
Landscape: Choose a narrower aperture when you want greater depth of field.
Low light: Choose a wider aperture to allow more light into the camera.
The camera then selects a shutter speed based on its metering.
Shutter Priority (S/Tv)
Shutter Priority allows you to choose the shutter speed while the camera selects an appropriate aperture.
This is useful when motion is your main concern.
For example:
Sports: Choose a fast shutter speed to freeze movement.
Wildlife: Choose a fast shutter speed for moving animals.
Creative motion blur: Choose a slower shutter speed when you intentionally want movement to appear blurred.
If the available light becomes insufficient for the selected shutter speed and the lens reaches its aperture limit, the camera may not be able to produce the exposure you want. Increasing ISO can help when Auto ISO or manual ISO adjustment is available.
Manual Mode (M)
Manual mode allows you to control the main exposure settings yourself.
You can select:
- Aperture
- Shutter speed
- ISO
You may also manually control focus and other camera functions when appropriate.
Manual mode gives you maximum control, but that does not mean it is automatically the best mode for every situation.
It is particularly useful when you want consistent exposure across a series of photographs or when the camera’s automatic metering doesn’t match your creative intention.
When Should a Beginner Use Each Mode?
| Mode | Main control | Useful for |
|---|---|---|
| Auto | Camera controls most settings | Quick snapshots |
| P | Camera controls exposure; photographer has additional control | Everyday photography |
| A/Av | Aperture | Portraits, landscapes, depth of field |
| S/Tv | Shutter speed | Sports, wildlife, motion |
| M | Aperture + shutter speed + ISO | Consistent or fully controlled exposure |
Which Mode Should Beginners Learn First?
A practical progression is:
Auto → Program → Aperture Priority → Shutter Priority → Manual
You don’t have to follow this order strictly, but it can make learning less overwhelming.
Aperture Priority is particularly useful for learning how depth of field works, while Shutter Priority is useful for understanding motion.
Once you understand the exposure triangle, Manual mode becomes much easier to use.
Don’t Feel Pressured to Use Manual Mode
There is a common misconception that professional photographers always use Manual mode.
That’s not true.
Experienced photographers choose the mode that best suits the situation.
A wedding photographer may use Aperture Priority or Manual depending on the lighting and workflow. A sports photographer may prioritize shutter speed. A street photographer may use a semi-automatic mode to react quickly to changing conditions.
The goal isn’t to prove that you can use Manual mode. The goal is to consistently create the photograph you want.
Beginner Exercise
Choose a stationary subject and photograph it using Aperture Priority.
Take several photographs while changing only the aperture.
Observe how the camera changes the shutter speed to maintain exposure.
Then photograph a moving subject using Shutter Priority.
Change the shutter speed and observe how the appearance of movement changes.
Finally, try Manual mode and reproduce one of the exposures yourself.
This exercise will help you understand what each shooting mode actually does.
Beginner Takeaway
Choose your camera mode based on what you need to control.
Want to control depth of field? → Aperture Priority
Want to control motion? → Shutter Priority
Want complete exposure control? → Manual
Want speed and simplicity? → Auto or Program
There is no prize for using the most complicated mode. Use the mode that gives you the right amount of control for the photograph you are trying to create.
White Balance
White balance controls how your camera interprets the color of light in a scene.
Different light sources have different color temperatures. As a result, the same white object can appear warm, cool, yellow, or blue depending on the lighting.
White balance helps your camera produce colors that look more natural—or lets you intentionally change the color of an image for creative effect.
Why White Balance Matters
Your eyes are remarkably good at adapting to different lighting conditions. A white wall may look white to you under sunlight, indoor lighting, or shade.
A camera sensor does not automatically interpret every light source in exactly the same way.
For example:
- Tungsten/incandescent light can make photographs appear orange or yellow.
- Shade can make photographs appear noticeably cooler or bluer.
- Cloudy conditions can produce warmer-looking images.
- Fluorescent lighting can introduce unusual color casts depending on the light source.
Incorrect white balance can make skin tones look unnatural and can change the overall mood of a photograph.
Common White Balance Settings
Most cameras provide several white balance presets.
Auto White Balance (AWB)
Auto White Balance allows the camera to estimate the appropriate color temperature automatically.
It is a good starting point for beginners and works well in many changing-light situations.
However, the camera may make different decisions between photographs when the lighting or composition changes.
Daylight
The Daylight setting is designed for direct sunlight and produces a relatively neutral color balance under those conditions.
It can also be useful when you want consistent color across a series of photographs taken in similar daylight.
Cloudy
Cloudy mode generally adds warmth to compensate for the cooler appearance that can occur under overcast conditions.
It can also be used creatively when you want a slightly warmer image.
Shade
Shade is typically cooler than direct sunlight, so the Shade setting generally adds warmth to compensate.
It can be useful for portraits taken in open shade.
Tungsten / Incandescent
This setting is designed for traditional tungsten or incandescent lighting, which tends to be warm.
It adds a cooler correction to counteract the orange or yellow appearance.
Fluorescent
Fluorescent lighting can produce different color casts depending on the type of fluorescent source.
A fluorescent preset can help compensate for some of these conditions, although modern lighting can vary considerably.
Flash
The Flash setting is designed for the color characteristics of many camera flashes.
The exact result depends on the flash and surrounding lighting.
Kelvin White Balance
Many cameras allow you to select white balance using a Kelvin (K) value.
The Kelvin scale lets you specify a color temperature directly.
As a general concept:
Lower Kelvin values → warmer/oranger light
Higher Kelvin values → cooler/bluer light
The exact Kelvin value you need depends on the actual light source and your creative intention.
RAW vs JPEG and White Balance
White balance is particularly important when photographing JPEG files because the camera processes the selected white balance into the image.
RAW files provide much greater flexibility for changing white balance during editing because the original sensor data is retained for processing.
This doesn’t mean white balance is irrelevant when shooting RAW. A correct or intentionally chosen white balance can still help you preview and evaluate your images more effectively.
Auto White Balance vs Manual White Balance
For beginners, Auto White Balance is often the easiest place to start.
Manual or fixed white balance can become more useful when:
- Lighting remains consistent.
- You want consistent color across many photographs.
- You’re photographing products.
- You’re working in a studio.
- You’re creating a series of images that need matching color.
For example, if you’re photographing a product from several angles under the same lights, keeping the white balance consistent can make editing much easier.
White Balance for Portraits
Skin tones are particularly sensitive to color casts.
If a portrait looks unusually orange, yellow, blue, or green, check the lighting and white balance before assuming there is a problem with the camera.
Mixed lighting can be especially challenging.
For example, a person standing near a window while also being illuminated by indoor lighting may receive light with different color temperatures on different parts of their body.
In such situations, correcting white balance alone may not completely solve the problem.
White Balance as a Creative Tool
White balance doesn’t always have to be perfectly neutral.
A warmer white balance can create a feeling of:
- Warmth
- Comfort
- Nostalgia
- Sunset atmosphere
A cooler white balance can create a feeling of:
- Calm
- Night
- Distance
- Cooler atmosphere
The “correct” white balance depends partly on the mood you want the photograph to communicate.
Simple White Balance Exercise
Photograph the same subject under different light sources.
Try:
- Auto White Balance
- Daylight
- Cloudy
- Shade
- Tungsten
- Different Kelvin values, if your camera supports them
Compare the photographs.
Pay particular attention to:
- Skin tones
- White objects
- Neutral gray objects
- Overall warmth or coolness
This exercise will help you understand what white balance actually changes rather than simply memorizing preset names.
Beginner Takeaway
Think of white balance as color correction for different types of light.
Warm-looking photograph → consider a cooler white balance.
Cool-looking photograph → consider a warmer white balance.
Start with Auto White Balance, then experiment with fixed presets or Kelvin settings as you become more comfortable.
Most importantly, don’t treat neutral color as an absolute rule. Use white balance to make colors believable—or deliberately change them when that supports the mood of your photograph.
Autofocus and Focus Modes for Beginners
Getting the focus right is one of the most important parts of creating a sharp photograph. Modern cameras can focus extremely quickly, but understanding how autofocus works will help you get better results and know what to do when the camera focuses on the wrong part of the scene.
Autofocus systems vary between cameras, but most provide different focus modes and focus-area options for different subjects.
What Is Autofocus?
Autofocus (AF) is the camera’s system for automatically adjusting the lens so that a selected subject or area appears in focus.
Modern cameras may use features such as:
- Face detection
- Eye detection
- Subject recognition
- Tracking autofocus
- Multiple focus points
- Single-point autofocus
- Continuous autofocus
The best option depends on what you’re photographing.
Single Autofocus
Single autofocus is designed for subjects that remain relatively still.
Depending on the camera manufacturer, you may see this mode called:
- AF-S
- One-Shot AF
- Single AF
The camera focuses when you half-press the shutter button or activate autofocus, then generally maintains that focus until you capture the image or refocus.
Useful for:
- Landscapes
- Architecture
- Products
- Still life
- Stationary portraits
Continuous Autofocus
Continuous autofocus is designed for moving subjects.
Depending on the camera, it may be called:
- AF-C
- AI Servo
- Continuous AF
The camera continually adjusts focus as the subject moves, helping maintain focus while you track the subject.
Useful for:
- Sports
- Wildlife
- Children
- Birds
- Vehicles
- Moving people
- Action photography
Focus Area Modes
Your camera may also allow you to control where it looks for the subject.
Single-Point AF
You select one focus point or a small area.
This gives you greater control over exactly where the camera focuses.
It can be useful for:
- Portraits
- Products
- Landscapes
- Macro photography
- Subjects with distracting backgrounds
Zone or Area AF
The camera uses a larger group of autofocus points.
This can be useful when your subject moves within a predictable area and you want the camera to have more room to maintain focus.
Wide or Automatic Area AF
The camera chooses where to focus based on its algorithms and subject-recognition capabilities.
This can be convenient for everyday photography, particularly when the subject is obvious.
However, the camera may sometimes focus on a background object instead of your intended subject.
Face and Eye Detection
Many modern cameras can detect faces and, in some cases, the eyes of people or animals.
Eye detection can be particularly useful for portraits because the eyes are often the most important area to keep sharp.
However, don’t assume eye detection will always make the correct decision.
Check your camera’s focus behavior and understand how to override or reposition the focus area when necessary.
Autofocus for Different Photography Genres
Portrait Photography
For portraits, face and eye detection can be extremely useful.
If you’re photographing a person without reliable eye detection, position the focus point over the eye that you want to appear sharp.
When using a very wide aperture, be especially careful because the depth of field can be extremely shallow.
Wildlife Photography
Wildlife often moves unpredictably.
Continuous autofocus combined with subject detection or tracking can be useful.
A suitable focus-area mode can help the camera maintain focus while the animal moves through the frame.
Sports Photography
Sports photography often requires continuous autofocus and a focus area that can follow fast-moving subjects.
Your shutter speed also matters. A subject can be perfectly focused but still appear blurred if the shutter speed is too slow.
Landscape Photography
Landscape photography often involves relatively stationary subjects.
Single autofocus or manual focus can work well, particularly when the scene is carefully composed.
Product Photography
Product photography generally involves stationary subjects.
A single focus point can give you precise control over where the camera focuses.
For very close subjects or complex products, consider how much depth of field you actually need.
Why Your Photos May Look Out of Focus
When a photograph isn’t sharp, autofocus isn’t always the problem.
Possible causes include:
The camera focused on the wrong subject:
Try a more precise focus area or select the subject manually.
The subject moved:
Use continuous autofocus and a faster shutter speed.
The camera moved:
Increase shutter speed, improve your technique, or use stabilization.
Depth of field was too shallow:
Use a narrower aperture if more of the subject needs to be sharp.
The lens or subject was too close:
Check the lens’s minimum focusing distance.
Low contrast made focusing difficult:
Try focusing on an area with clearer texture or contrast.
Identifying the cause is more useful than simply switching autofocus modes randomly.
Autofocus vs Manual Focus
Autofocus is usually the fastest and most convenient choice for everyday photography, but manual focus still has important uses.
Manual focus can be useful for:
- Macro photography
- Landscapes
- Astrophotography
- Video
- Studio photography
- Low-contrast subjects
- Situations where autofocus repeatedly chooses the wrong area
Modern cameras often provide focus aids such as focus peaking and magnified live view to make manual focusing easier.
A Simple Autofocus Exercise
Choose a stationary subject and photograph it using:
- Single-point autofocus
- Automatic area autofocus
- Face/eye detection, if available
Compare where the camera focuses.
Then photograph a moving subject using continuous autofocus.
Review the images and check:
- Did the camera maintain focus?
- Did it focus on the intended subject?
- Were the eyes or important details sharp?
- Was the shutter speed fast enough?
This exercise will help you understand your camera’s autofocus behavior.
Beginner Takeaway
Choose autofocus based on your subject’s movement and how precisely you need to control the focus area.
Stationary subject → Single AF
Moving subject → Continuous AF
People/animals → Face or eye detection when appropriate
Precise control → Single-point or small-area AF
And remember: sharp focus and sharp photographs are not exactly the same thing. Focus determines which part of the image is sharp, while shutter speed, camera movement, subject movement, lens quality, and technique also affect overall sharpness.
Understanding the Histogram in Photography
A histogram is a graphical representation of the brightness levels in a photograph. It can help you evaluate exposure when the camera screen or viewfinder makes it difficult to judge brightness accurately.
Instead of looking at the photograph itself, the histogram shows how tones are distributed from dark to bright.
Understanding it can help you recognize potential problems such as severely clipped shadows or highlights.
How to Read a Histogram
A basic histogram is read from left to right:
Left → Dark tones and shadows
Middle → Midtones
Right → Bright tones and highlights
The height of the graph represents how much image information exists at each brightness level.
A histogram with a large amount of information toward the left contains many dark tones.
A histogram with a large amount of information toward the right contains many bright tones.
What Does a “Good” Histogram Look Like?
There is no single histogram shape that represents a correctly exposed photograph.
This is important.
A night photograph should naturally contain many dark tones, so its histogram may lean heavily toward the left.
A bright, high-key photograph may contain many bright tones, so its histogram may lean toward the right.
The histogram should be interpreted according to the scene and your creative intention.
Understanding Clipping
One of the most useful things a histogram can reveal is potential clipping.
Highlight Clipping
When the histogram reaches the extreme right edge and important areas are clipped, some bright areas may contain little or no recoverable detail.
This can happen with:
- Bright skies
- Reflections
- White clothing
- Bright lights
- Sunlit surfaces
If important highlights are clipped, you may need to reduce exposure.
Shadow Clipping
When important information is pushed against the extreme left edge, dark areas may lose detail.
This can happen in:
- Night scenes
- High-contrast landscapes
- Backlit subjects
- Dark interiors
However, some photographs intentionally contain completely black areas.
The goal is not to eliminate every dark or bright pixel.
The goal is to preserve important information where you need it.
Histogram and Exposure
Suppose you’re photographing a landscape and the sky is extremely bright while the foreground is dark.
Your histogram may show information extending toward both extremes.
This tells you that the scene has a high dynamic range.
Depending on the situation, you might:
- Adjust your exposure.
- Change your composition.
- Use graduated filters.
- Capture multiple exposures for blending.
- Use HDR techniques.
- Recover available detail during RAW processing.
The histogram helps you recognize the problem, but it doesn’t automatically tell you which solution is best.
Histogram for Portraits
When photographing a portrait, you generally want important facial details—particularly skin highlights—to retain useful information.
If the brightest parts of the face are severely clipped, reducing exposure may help.
However, a bright background or specular highlight may legitimately reach the right side of the histogram.
Always evaluate the histogram alongside the actual photograph.
Histogram for Low-Light Photography
Night photographs often have a histogram concentrated toward the left.
That isn’t automatically an exposure problem.
If the subject and important highlights are correctly exposed, a dark histogram may be exactly what you want.
Don’t brighten every night photograph simply because the histogram looks “too dark.”
RGB Histograms
Some cameras provide separate red, green, and blue histograms.
These can provide more information than a simple brightness histogram.
An image may appear correctly exposed overall while one color channel is clipped.
RGB histograms can be particularly useful when working with highly saturated colors or bright subjects.
Histogram vs Camera Screen
Your camera’s LCD screen can be affected by:
- Screen brightness
- Ambient light
- Viewing angle
- Reflections
- Display settings
This can make it difficult to judge exposure accurately.
A histogram provides a more objective way to inspect the distribution of tones.
However, it still doesn’t replace your visual judgment.
A Simple Histogram Exercise
Photograph several different scenes:
- A bright outdoor scene
- A portrait
- A dark indoor scene
- A night scene
- A high-contrast scene
Review the histogram for each photograph.
Ask yourself:
- Where are the shadows?
- Where are the highlights?
- Are important areas clipped?
- Does the histogram match the type of scene?
- Is the exposure appropriate for my creative intention?
After practicing, you’ll begin to understand the histogram intuitively.
Beginner Takeaway
Think of the histogram as an exposure diagnostic tool, not a scorecard.
Left → dark tones
Middle → midtones
Right → bright tones
A histogram does not need to form a perfect mountain in the center.
What matters is whether the photograph contains the tonal information you need for the image you are trying to create.
Use the histogram to identify potential clipping and exposure problems, then combine that information with your own visual judgment.
Metering Modes in Photography
Your camera’s metering system helps it estimate how bright a scene is so it can recommend or calculate an appropriate exposure.
Understanding metering becomes especially useful when your subject and background have very different brightness levels.
Most cameras provide several metering modes, although the exact names and behavior can vary between manufacturers.
The most common options include:
- Evaluative / Matrix / Multi metering
- Center-weighted metering
- Spot metering
- Partial metering on some cameras
Evaluative or Matrix Metering
This mode evaluates brightness across multiple areas of the frame and uses the camera’s algorithms to estimate an appropriate exposure.
Depending on the manufacturer, it may be called:
- Evaluative
- Matrix
- Multi
- Multi-segment
It is generally the best starting point for everyday photography because it considers a relatively large portion of the scene.
Useful for:
- Travel photography
- Street photography
- Landscapes
- Everyday photography
- General portraits
For most beginners, leaving the camera in this mode is perfectly reasonable while learning other fundamentals.
Center-Weighted Metering
Center-weighted metering gives greater importance to the central portion of the frame while still considering surrounding areas.
It can be useful when the main subject is near the center and you want the camera’s exposure decision to be influenced more heavily by that area.
Useful for:
- Traditional portraits
- Subjects positioned centrally
- Situations where the background is significantly brighter or darker
However, modern cameras often provide more flexible ways to control exposure than simply relying on center-weighted metering.
Spot Metering
Spot metering measures a very small area of the scene.
This gives you precise control over which part of the image influences the exposure calculation.
It can be useful when the subject occupies a small portion of the frame or when the scene contains extreme differences in brightness.
Useful for:
- Backlit subjects
- Stage performances
- High-contrast scenes
- Bright subjects against dark backgrounds
- Dark subjects against bright backgrounds
Spot metering can be powerful, but it requires you to understand exactly what part of the scene you’re measuring.
Partial Metering
Some cameras offer a partial metering mode that measures a larger area than spot metering but still focuses on a relatively small portion of the frame.
Its availability and exact behavior depend on the camera manufacturer.
It can be useful in high-contrast situations where you want more control over which part of the scene influences exposure.
Why Your Camera Sometimes Gets Exposure “Wrong”
Your camera doesn’t actually know what your subject is supposed to look like.
It measures light and makes an exposure decision based on its metering system.
Consider a person standing in front of a bright window.
The camera sees a large amount of bright light from the window and may reduce exposure.
The result could be a correctly exposed window but a very dark person.
You could respond by:
- Using exposure compensation.
- Changing your metering approach.
- Adding fill light.
- Changing the subject’s position.
- Repositioning the camera.
- Using manual exposure.
The best solution depends on the scene and your creative goal.
Metering and Exposure Compensation
When using a semi-automatic mode such as Aperture Priority, exposure compensation can be a quick way to tell the camera to make the resulting image brighter or darker than its default metering decision.
For example:
+1 EV → approximately one stop brighter
−1 EV → approximately one stop darker
The exact behavior can vary by camera and shooting mode.
Exposure compensation is especially useful when the camera consistently interprets a scene differently from how you want it to look.
Metering for Snow and Bright Scenes
Bright scenes can confuse camera meters because the camera often tries to produce a balanced middle exposure.
A large area of white snow can therefore appear gray rather than bright white.
You may need to use positive exposure compensation to make the snow appear closer to the intended brightness while checking for highlight clipping.
Metering for Dark Scenes
The opposite can happen with scenes containing large amounts of black or dark tones.
The camera may increase exposure because it is trying to bring the overall scene toward its metering target.
The result can make the scene brighter than your intended mood.
In such cases, negative exposure compensation may help.
Again, there is no universal compensation value. Judge the actual photograph and histogram.
Metering vs Focus
Metering and focusing are different functions.
Autofocus determines where the camera focuses.
Metering determines how the camera evaluates brightness for exposure.
Modern cameras can connect these systems in sophisticated ways, especially when face or subject detection is active, but you should still understand them as separate concepts.
A Simple Metering Exercise
Find a high-contrast scene with:
- A bright background
- A relatively dark subject
Take three photographs using:
- Evaluative/Matrix metering
- Center-weighted metering
- Spot metering
Compare the exposure of your subject and background.
Then try exposure compensation and observe how the final image changes.
This will show you why the camera may produce different exposure decisions depending on the metering method.
Beginner Takeaway
For most everyday photography, start with Evaluative, Matrix, or Multi metering.
Learn Center-weighted and Spot metering when you encounter situations where the camera’s default exposure isn’t matching your subject or creative intention.
Most importantly, remember:
The camera measures light. You decide what the photograph should look like.
Metering is simply one of the tools that helps you get there.
Beginner Camera Settings for Different Situations
Portrait Photography
- Aperture: f/1.8–f/2.8
- Shutter Speed: 1/200+
- ISO: 100–400
Landscape Photography
- Aperture: f/8–f/11
- Shutter Speed: Variable
- ISO: 100
Street Photography
- Aperture: f/5.6
- Shutter Speed: 1/250+
- ISO: Auto
Sports Photography
- Aperture: f/2.8–f/4
- Shutter Speed: 1/1000+
- ISO: Auto
Related Articles:
- Creative Lighting Ideas for Home Photoshoot
- Photography Poses for Beginners
- Product Photography Setup at Home
- Best Camera Under ₹30,000
- Best Camera Under ₹1 Lakh
- Best Camera for Instagram and Reels
- Best Camera for YouTube Beginners

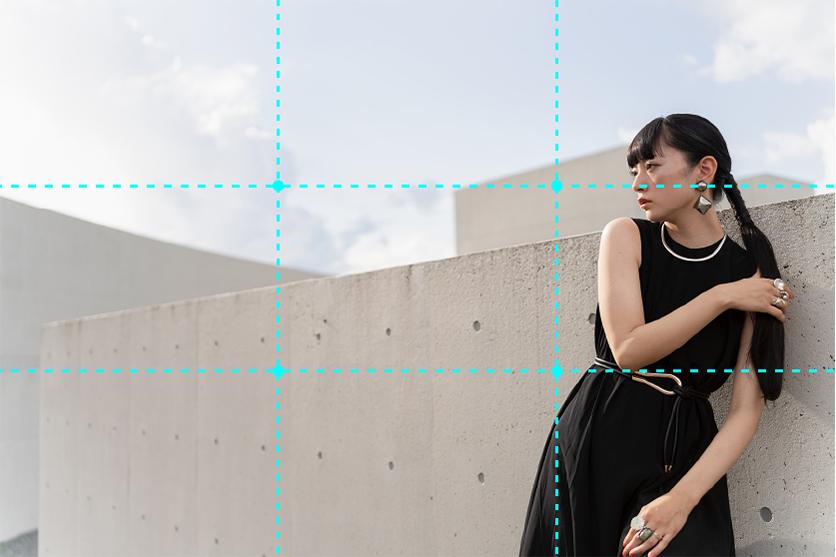

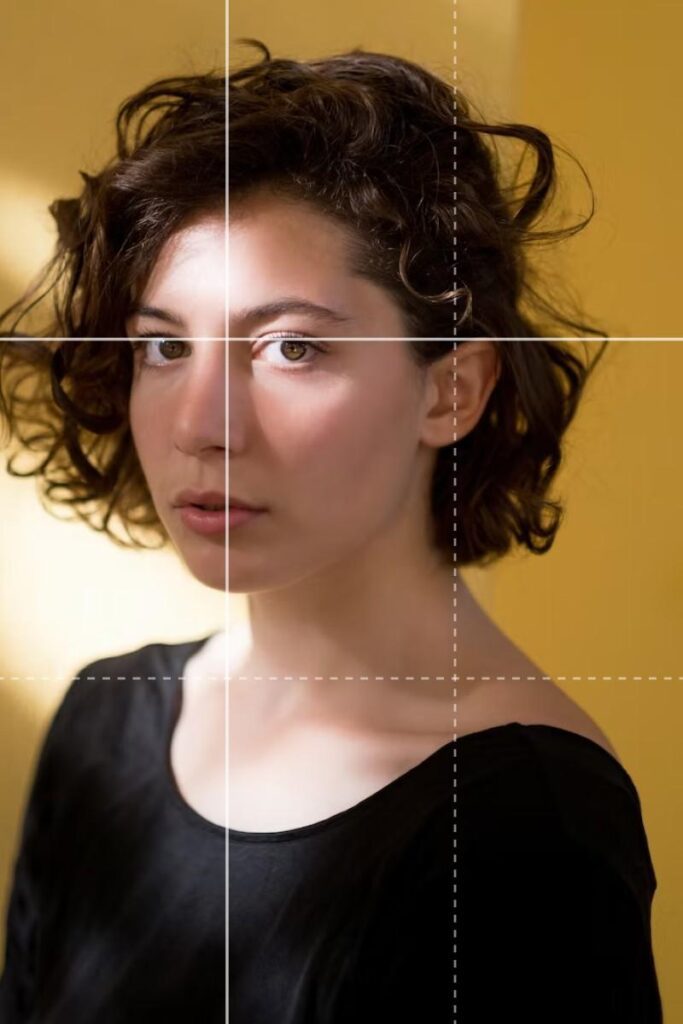

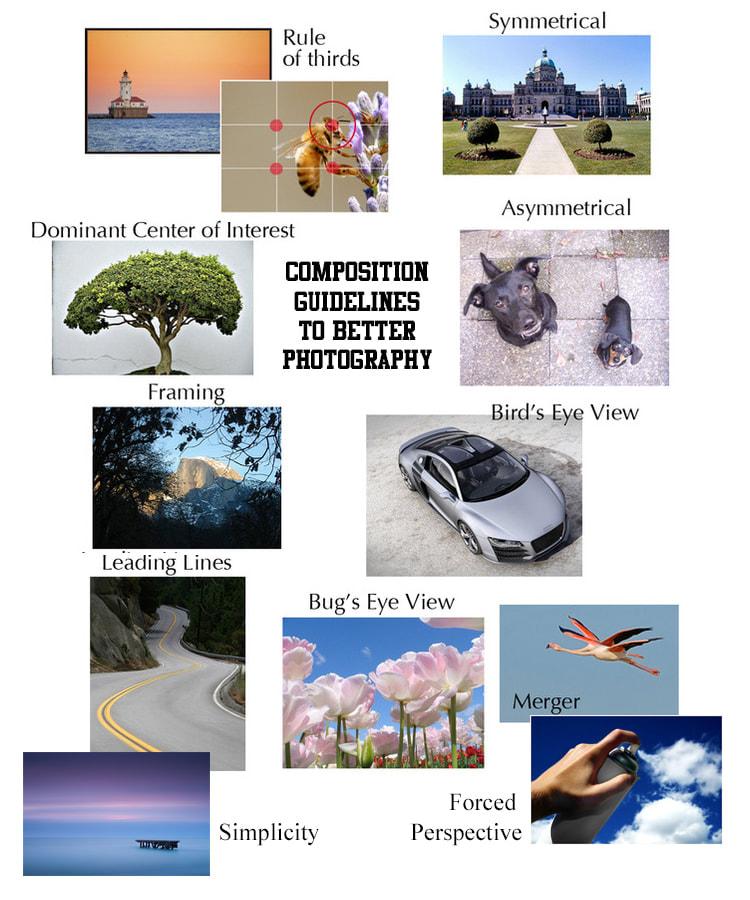
Composition Basics for Beginners
Technical camera settings can help you create a sharp, well-exposed photograph, but composition determines how the elements within the frame work together.
Good composition helps direct the viewer’s attention, create visual balance, and communicate the subject more effectively.
You don’t need to follow every composition rule in every photograph. Think of these techniques as tools you can use when they improve the image.
What Is Composition?
Composition is the way you arrange visual elements within the frame.
When composing a photograph, consider:
- Where your main subject is positioned.
- What appears in the foreground.
- What appears behind your subject.
- Where lines lead the viewer.
- How much empty space surrounds the subject.
- How light and shadow interact with the scene.
- Whether the frame feels balanced.
Before pressing the shutter, take a moment to look beyond your main subject.
Ask yourself:
“What else is inside my frame?”
That simple question can dramatically improve your photographs.
Rule of Thirds
The rule of thirds divides the frame into nine sections using two horizontal and two vertical lines.
Placing important elements along these lines or near their intersections can create a balanced and visually appealing composition.
For example, when photographing a person:
- Place the subject slightly to one side.
- Leave space in the direction they are looking.
- Avoid automatically placing every subject in the center.
The rule of thirds is a useful starting point, not a requirement.
Leading Lines
Leading lines are visual lines that guide the viewer’s attention toward a subject or another important part of the photograph.
Examples include:
- Roads
- Bridges
- Railings
- Paths
- Buildings
- Shadows
- Fences
- Rivers
Look for naturally occurring lines and position yourself so they contribute to the composition.
Framing
Framing uses elements within the scene to surround or partially surround your main subject.
Examples include:
- Doorways
- Windows
- Arches
- Trees
- Fences
- Architectural structures
Framing can help isolate your subject and create a sense of depth.
Negative Space
Negative space is the relatively empty area surrounding your main subject.
It can include:
- Sky
- Plain walls
- Water
- Open landscapes
- Uncluttered backgrounds
Negative space can make a subject stand out and create a feeling of simplicity.
It is particularly useful when you want a photograph to feel clean, minimal, or spacious.
Symmetry
Symmetry occurs when elements on opposite sides of the frame have similar visual characteristics.
Architecture, reflections, roads, and geometric structures can create strong symmetrical compositions.
Try placing the center of the frame deliberately when symmetry is the main visual idea.
Patterns and Repetition
Patterns naturally attract attention.
Look for repeated:
- Shapes
- Colors
- Objects
- Lines
- Textures
- Architectural details
You can photograph the pattern itself or break it intentionally by introducing one contrasting subject.
Perspective and Camera Angles
Changing your camera position can completely change a photograph.
Instead of always photographing from standing height, try:
- Getting lower
- Shooting from above
- Moving closer
- Moving farther away
- Shooting from the side
- Changing your distance from the subject
A different perspective can make an ordinary subject look much more interesting.
Foreground, Middle Ground, and Background
Adding depth can make photographs feel more three-dimensional.
Try thinking about the scene in three layers:
Foreground → Main subject or secondary element → Background
For example, a person standing in a landscape can become more visually interesting when you include an object in the foreground and distant scenery behind them.
Be careful, though. Foreground elements should support the photograph rather than distract from the subject.
Fill the Frame
Sometimes the strongest composition is simply getting closer.
Filling the frame with your subject can eliminate distractions and make details more prominent.
This can work particularly well for:
- Portraits
- Food
- Products
- Flowers
- Architecture
- Wildlife
Before moving closer, check the edges of your frame to make sure you aren’t accidentally cutting off important parts of the subject.
Watch the Background
One of the easiest ways to improve a photograph is to pay attention to what’s behind your subject.
Distracting backgrounds may contain:
- Poles appearing to grow from someone’s head
- Bright objects
- Random people
- Clutter
- Strong colors
- Unwanted signs
- Tangled lines
Before taking the photograph, try moving yourself or your subject to create a cleaner background.
Sometimes one step to the left or right can make a significant difference.
Use the Edges of the Frame
Beginners often concentrate only on the subject and forget about the edges.
Check all four sides of your frame before pressing the shutter.
Look for:
- Distracting objects
- Unwanted limbs
- Bright spots
- Cut-off subjects
- Empty areas that don’t contribute to the image
- Lines entering or leaving the frame awkwardly
This small habit can improve composition immediately.
Give Moving Subjects Space
When photographing a moving subject, leaving some space in front of the direction of movement can make the composition feel more natural.
Similarly, when photographing someone looking toward one side of the frame, leaving some visual space in the direction they’re looking can create a stronger sense of balance.
Break the Rules Intentionally
Composition “rules” are not laws.
Centering a subject can be powerful.
Breaking symmetry can create tension.
A photograph can deliberately contain empty space.
A subject can look directly into the edge of the frame.
The important question is not:
“Did I follow the rule?”
Instead ask:
“Does the composition communicate what I want?”
A Simple Composition Exercise
Choose one subject and photograph it ten different ways.
Try:
- Rule of thirds
- Centered composition
- Close-up
- Wide composition
- Low angle
- High angle
- Leading lines
- Negative space
- Framing
- Symmetry
Review all ten photographs.
Don’t simply choose the sharpest image. Ask which composition best communicates the subject.
Beginner Takeaway
Before pressing the shutter, develop the habit of asking:
What is my subject?
What is distracting from it?
Where should it sit within the frame?
Can I improve the photograph by changing my position?
You don’t need complicated composition techniques to create better photographs. Learning to see and deliberately arrange the elements already in front of you is one of the most valuable photography skills you can develop.
The Rule of Thirds – Photography Tutorials
The Rule of Thirds is the first composition technique every beginner should learn.
Imagine dividing your frame into nine equal sections using two horizontal and two vertical lines.
Important elements should be positioned along these lines or at their intersections.
Why It Works
The human eye naturally finds these positions more pleasing than placing everything in the center.
Best Uses
- Portrait photography
- Landscape photography
- Travel photography
- Street photography
Leading Lines – Photography Tutorials
Leading lines guide the viewer’s eye toward the subject.
Examples include:
- Roads
- Bridges
- Rivers
- Fences
- Railways
Why It Works
Leading lines create depth and visual flow.
Beginner Tip
Whenever you see a road or pathway, ask yourself:
“Can this line lead viewers to my subject?”

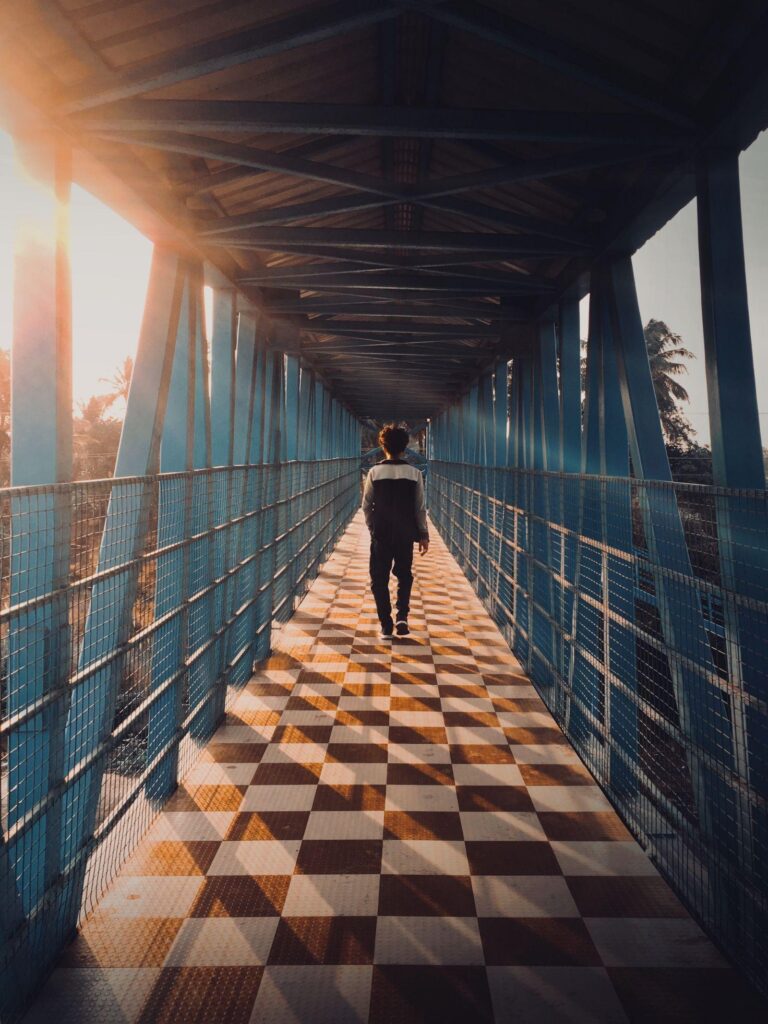

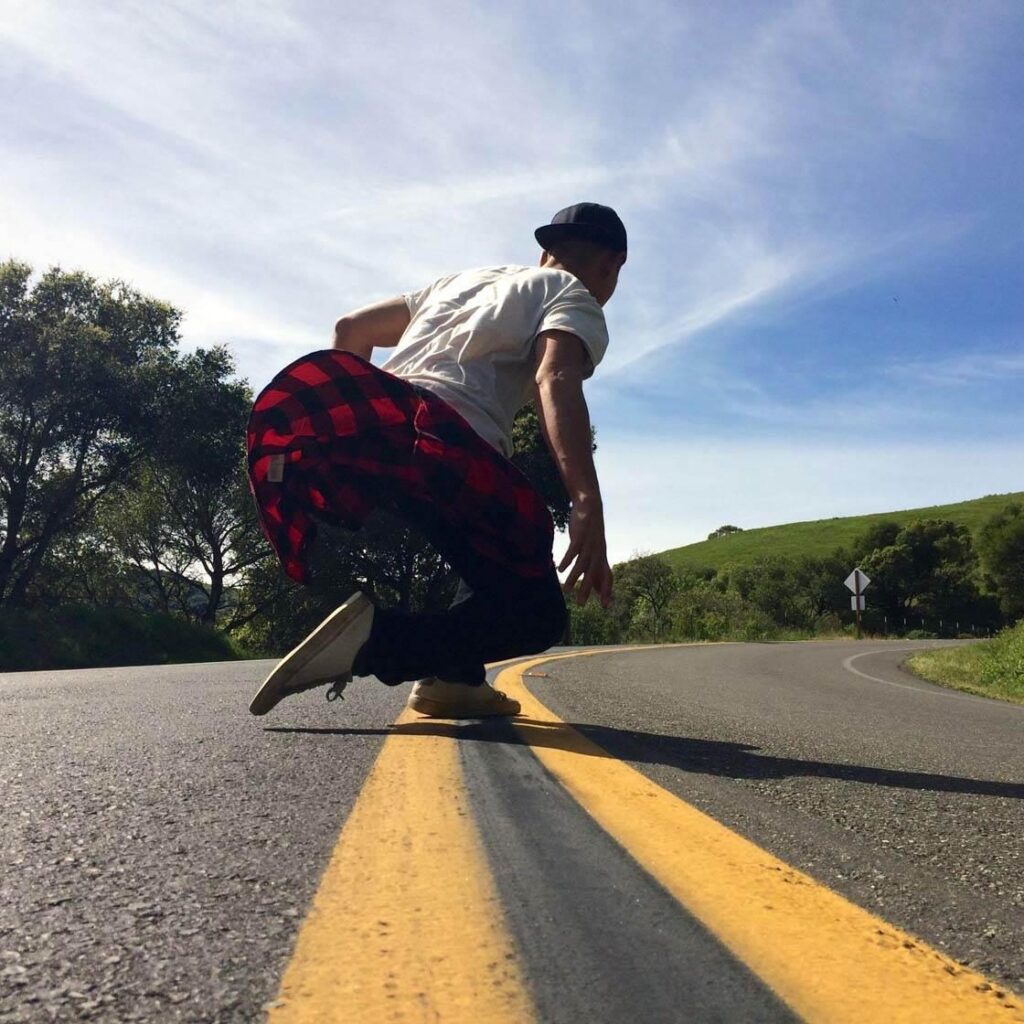
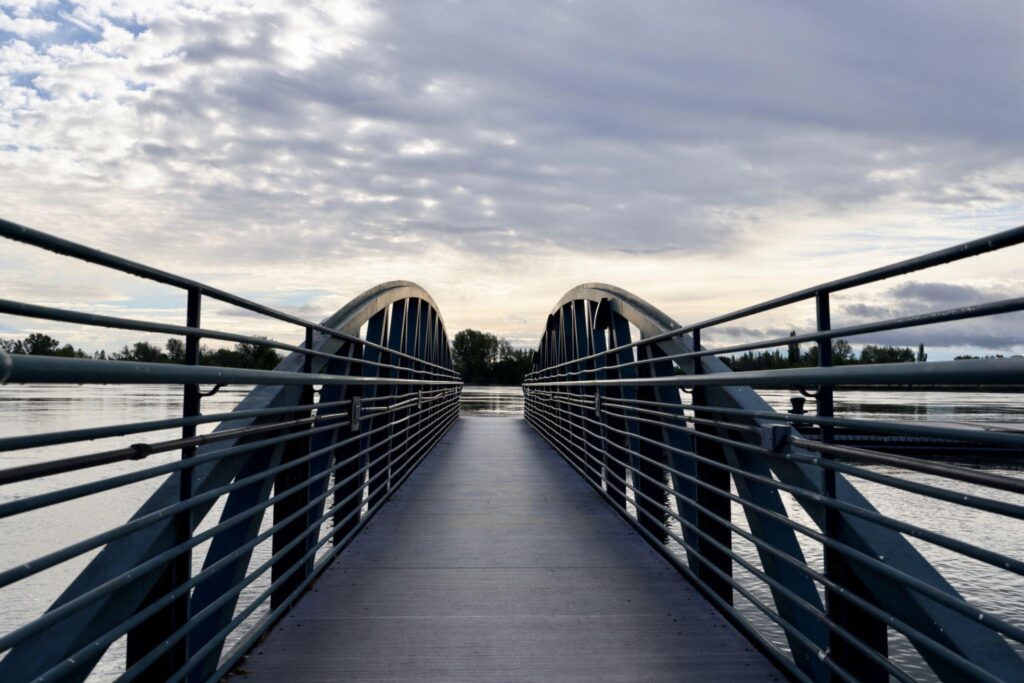

Framing – Photography Tutorials
Framing uses objects around your subject to create a natural border.
Examples:
- Windows
- Doorways
- Trees
- Arches
- Tunnels
Benefits
- Adds depth
- Creates focus
- Makes photos more interesting
Symmetry
Symmetry creates balance and harmony.
Examples:
- Reflections
- Buildings
- Bridges
- Architecture
Why It Works
Humans naturally appreciate balanced compositions.
Negative Space
Negative space refers to empty areas surrounding your subject.
Many beginners try to fill every part of the frame.
Professionals often do the opposite.
Benefits
- Cleaner composition
- Stronger storytelling
- Better social media visuals
Filling the Frame – Photography Tutorials
Move closer to your subject.
Eliminate distractions.
Allow the subject to dominate the image.
Best For
- Portraits
- Wildlife
- Product photography
Foreground, Midground, and Background
Professional images often include multiple layers.
Foreground
Objects nearest the camera.
Midground
Main subject.
Background
Scenery behind the subject.
Why It Works
Creates depth and realism.
Understanding Light in Photography
Photography literally means creating images with light, so learning to see and control light is just as important as learning camera settings.
A technically perfect photograph can still feel flat if the lighting doesn’t support the subject. On the other hand, beautiful light can make a simple subject look extraordinary.
As a beginner, don’t worry about buying expensive lighting equipment immediately. Start by learning how to recognize the direction, quality, intensity, and color of light around you.
Why Light Matters
Light affects:
- Brightness
- Contrast
- Shadows
- Colors
- Texture
- Depth
- Mood
- Subject separation
Before taking a photograph, look at where the light is coming from and how it is falling on your subject.
A small change in your position can completely change the appearance of the photograph.
Direction of Light
The direction from which light reaches your subject has a major effect on the image.
Front Lighting
Front lighting occurs when the primary light source is behind the photographer and illuminates the front of the subject.
It can produce relatively even illumination and make exposure easier.
However, front lighting may create less visible texture and depth than more directional lighting.
Useful for:
- Beginner portraits
- Everyday photography
- Bright, evenly lit subjects
Side Lighting
Side lighting illuminates the subject from one side.
It can create stronger shadows and reveal texture, shape, and depth.
Side lighting is particularly effective for:
- Portraits
- Still life
- Architecture
- Textured subjects
Backlighting
Backlighting occurs when the primary light source is behind the subject.
It can create:
- Silhouettes
- Glowing edges
- Atmospheric effects
- Strong subject separation
Backlighting can also make exposure more challenging because the camera may see a very bright background behind a relatively dark subject.
Depending on your goal, you may expose for the subject, preserve the bright background, or intentionally create a silhouette.
Quality of Light
Light can also be described as hard or soft.
Hard Light
Hard light creates stronger, more defined shadows.
Direct sunlight around the middle of the day is a common example.
Hard light can create dramatic images with strong contrast, but it can also produce harsh shadows on faces.
Soft Light
Soft light creates smoother transitions between light and shadow.
Examples include:
- Overcast skies
- Large windows
- Diffused light
- Light passing through a large softbox
Soft light is often flattering for portraits because it produces gentler transitions across facial features.
Golden Hour
Golden hour refers to the period around sunrise and sunset when the sun is relatively low in the sky.
The exact timing varies by location and season.
During this period, sunlight can appear warmer and more directional, producing long shadows and attractive highlights.
Golden-hour light is popular for:
- Portraits
- Couple photography
- Landscapes
- Travel photography
- Outdoor storytelling
Don’t feel that you can only create beautiful photographs during golden hour, though. Other lighting conditions can produce equally compelling results.
Blue Hour
Blue hour occurs around twilight near sunrise or sunset.
The sky can take on cooler blue tones while artificial lights may begin to stand out.
It can be particularly effective for:
- Cityscapes
- Architecture
- Landscapes
- Travel photography
- Evening portraits
The exact duration varies with location, season, and atmospheric conditions.
Window Light
A window can act as a large, soft light source.
Positioning your subject near a window can produce beautiful natural portraits without additional equipment.
Try changing the subject’s position relative to the window:
- Facing the window
- Side-on to the window
- Partially turned away
- With the window behind them
Observe how the shadows and highlights change.
A sheer curtain can also diffuse strong direct sunlight.
Overcast Light
Cloudy conditions often produce soft, diffused light.
This can be particularly useful for portraits because shadows are generally less harsh than under direct midday sunlight.
Overcast skies can also create a different mood for landscapes and outdoor scenes.
Don’t automatically consider cloudy weather “bad photography weather.”
Learn to use it.
Artificial Light
You don’t need professional studio equipment to begin experimenting with artificial light.
You can learn using:
- Household lamps
- LED lights
- Camera flash
- Continuous lights
- Reflectors
The key is understanding how the light affects your subject.
Experiment with changing the light’s:
- Direction
- Distance
- Size
- Intensity
- Color
Light and Shadows
Shadows aren’t necessarily a problem.
They can add:
- Depth
- Dimension
- Contrast
- Texture
- Mystery
- Visual interest
Instead of automatically trying to eliminate shadows, ask whether they improve the photograph.
For example, strong shadows can create dramatic street photography, while softer shadows may be preferable for a flattering portrait.
Using a Reflector
A reflector can redirect existing light toward your subject.
It can help reduce harsh shadows without requiring another powered light source.
Common reflector surfaces include:
- White
- Silver
- Gold
- Black
A white reflector generally produces softer, more subtle fill, while a silver reflector can provide stronger reflected light.
The Five Questions to Ask About Light
Before taking a photograph, ask:
Where is the light coming from?
Is the light hard or soft?
Which parts of my subject are illuminated?
Where are the shadows falling?
Does this light support the mood I want?
These questions will help you become more intentional with lighting.
Beginner Light Exercise
Photograph the same subject at different times and under different lighting conditions:
- Direct sunlight
- Open shade
- Overcast light
- Window light
- Backlight
- Side light
- Artificial light
Compare the photographs.
Pay attention to how the light changes:
- Contrast
- Shadows
- Skin tones
- Texture
- Mood
- Background separation
You will quickly see that changing the light can transform the photograph even when the camera and subject remain the same.
Beginner Takeaway
Don’t think of light simply as something that makes a photograph bright enough.
Light is one of your most powerful creative tools.
Learn to recognize its direction, quality, intensity, and color. Before investing heavily in lighting equipment, practice using the natural and artificial light that is already available to you.
Once you learn to see light, you’ll start seeing photographic opportunities almost everywhere.
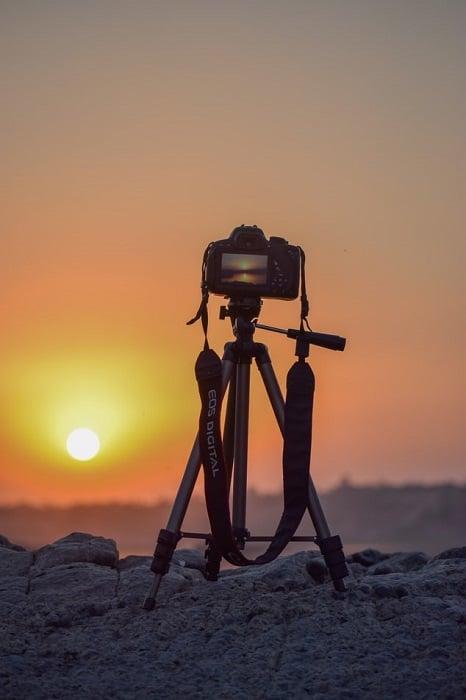
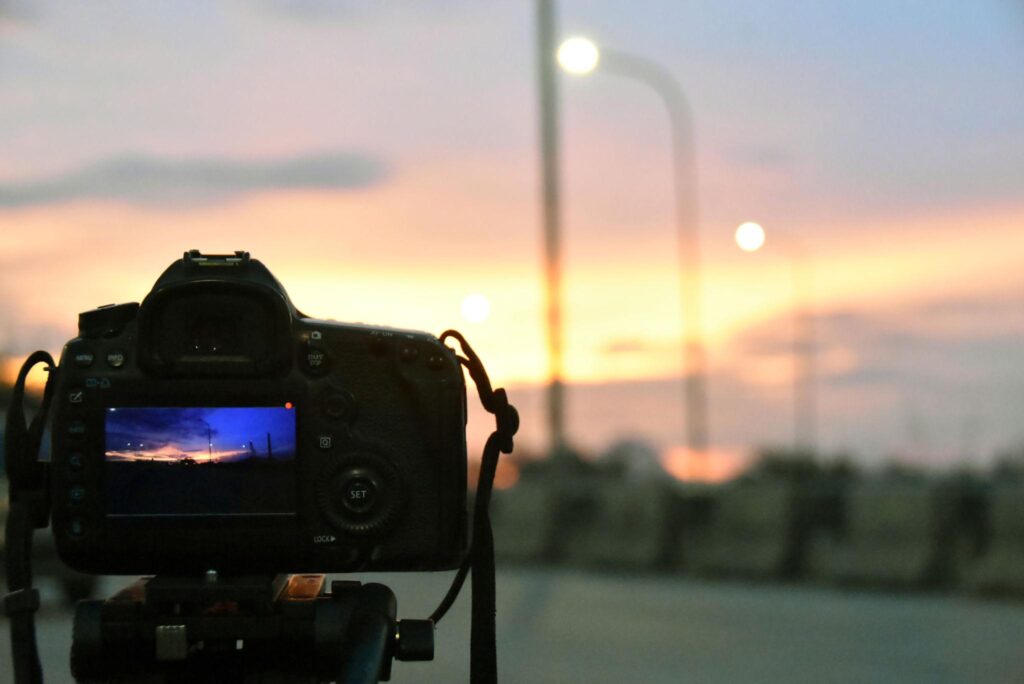
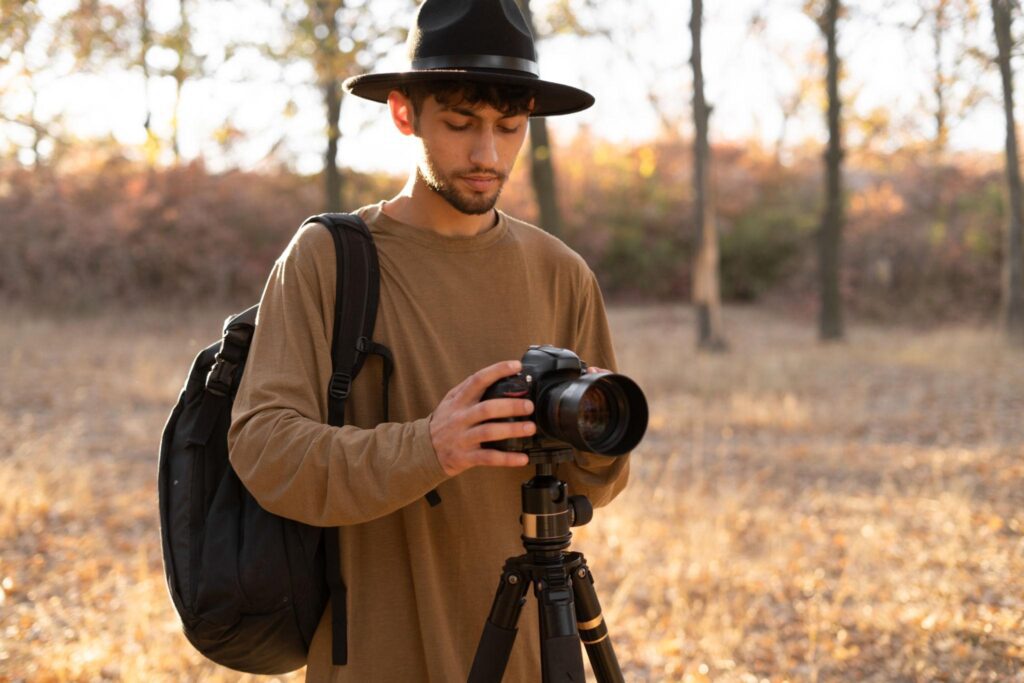
Blue Hour – Photography Tutorial
Blue hour occurs immediately before sunrise and after sunset.
Characteristics
- Cool blue tones
- Dramatic atmosphere
- Great city photography
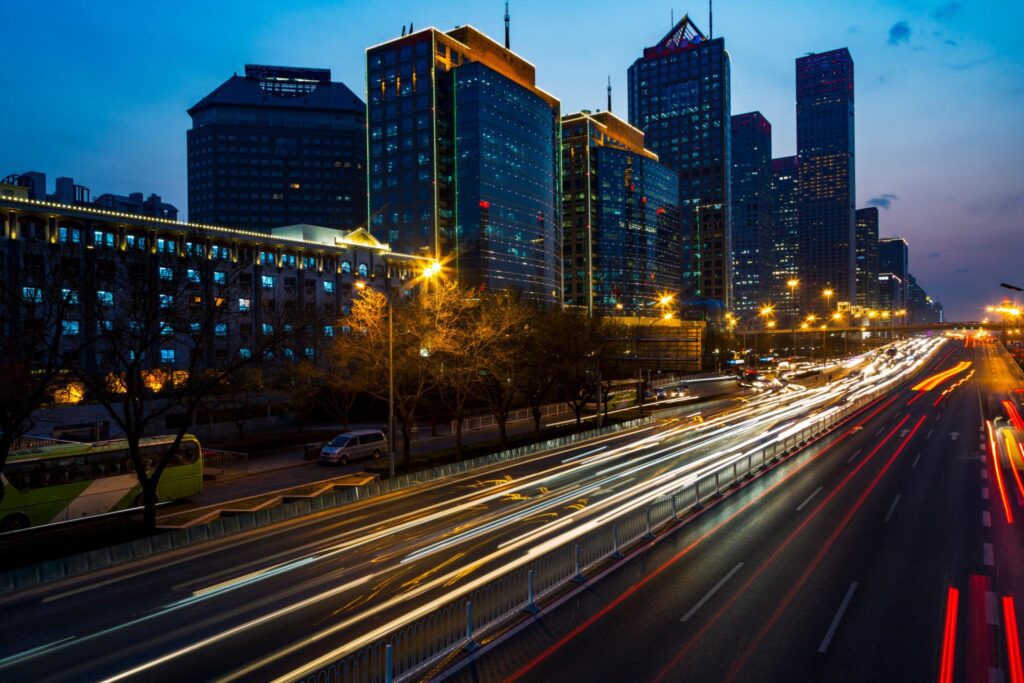


Harsh Midday Light – Photography Tutorials
Many beginners shoot only during midday.
Unfortunately, harsh sunlight creates:
- Strong shadows
- Squinting eyes
- Washed-out colors
Solution
Find shade whenever possible.
Portrait – Photography Tutorials
Portrait photography is one of the most popular photography genres.
The goal is simple:
Capture personality, emotion, and character.
Best Portrait Camera Settings
Outdoor Portraits
- Aperture: f/1.8–f/2.8
- Shutter Speed: 1/250+
- ISO: 100–400
Indoor Portraits
- Aperture: f/1.8–f/2.8
- Shutter Speed: 1/125+
- ISO: 400–1600
Portrait Posing Tips
Relax the Hands
Hands often reveal tension.
Encourage Movement
Movement creates natural expressions.
Focus on the Eyes
Eyes should usually remain sharp.
Use Eye Autofocus
Modern cameras make focusing easier.
Landscape Photography Tutorials
Landscape photography teaches patience and observation.
Unlike portraits, landscapes rarely move.
This allows photographers to focus heavily on composition.
Landscape Camera Settings
Recommended:
- Aperture: f/8–f/11
- ISO: 100
- Tripod: Yes
Landscape Photography Checklist
Before taking a photo:
✓ Check foreground
✓ Check horizon
✓ Check weather
✓ Look for leading lines
✓ Use a tripod
Mobile Photography Guide – Photography Tutorials
Many readers of The Candid Shoot use smartphones.
The good news:
Modern smartphones can produce outstanding photographs.
Mobile Photography Tips
Clean the Lens
A dirty lens reduces image quality dramatically.
Use Grid Lines
Enable the Rule of Thirds grid.
Tap to Focus
Always choose your focus point manually.
Avoid Digital Zoom
Move physically closer whenever possible.
Use Natural Light
Lighting matters more than camera specs.
Best Mobile Photography Apps
Adobe Lightroom Mobile
Excellent for editing.
Snapseed
Powerful free editor.
VSCO
Popular among content creators.
Google Photos
Easy beginner-friendly editing.
Photography Techniques Every Beginner Should Practice
Once you understand your camera settings, exposure, composition, and light, the next step is to put those concepts into practice.
Photography improves through intentional repetition. Instead of taking hundreds of random photographs, give yourself small challenges that force you to solve different photographic problems.
The following techniques are simple enough for beginners but useful throughout your photography journey.
1. Change Your Perspective
Don’t photograph everything from standing height.
Try:
- Getting closer to the ground.
- Photographing from above.
- Moving to the side.
- Shooting through an object.
- Stepping farther away.
- Changing your distance from the subject.
A different perspective can completely change an ordinary scene.
2. Use Leading Lines
Look for lines that naturally guide the viewer toward your subject.
Try:
- Roads
- Paths
- Railings
- Walls
- Bridges
- Shadows
- Architectural lines
Position yourself so the lines strengthen the composition rather than simply appearing somewhere in the frame.
3. Create Background Separation
A distracting background can weaken an otherwise strong photograph.
You can improve separation by:
- Using a wider aperture.
- Moving the subject farther from the background.
- Changing your camera position.
- Choosing a longer focal length when appropriate.
- Finding a simpler background.
Don’t rely only on background blur. A clean, well-chosen background can be just as effective.
4. Photograph Through Foreground Elements
Objects in the foreground can create depth and make the viewer feel closer to the scene.
Try photographing through:
- Leaves
- Flowers
- Doorways
- Windows
- Fences
- Curtains
Make sure the foreground element supports the subject rather than distracting from it.
5. Use Negative Space
Give your subject room to breathe.
Large areas of sky, walls, water, or other uncluttered space can make the main subject stand out.
Negative space can also communicate:
- Isolation
- Calmness
- Simplicity
- Scale
- Minimalism
6. Experiment With Motion Blur
Instead of always trying to eliminate movement, use it creatively.
Try slower shutter speeds to photograph:
- Moving water
- Vehicles
- People
- Light trails
- Moving crowds
Use a tripod when you want the stationary elements of the scene to remain sharp during a longer exposure.
7. Freeze Motion
The opposite technique is to use a fast shutter speed to capture a moment that the human eye may not normally notice.
Try photographing:
- Jumping subjects
- Water splashes
- Running people
- Birds
- Sports
- Moving vehicles
Start with a faster shutter speed and increase it further when necessary.
8. Look for Reflections
Reflections can add symmetry, depth, and visual interest.
Look for reflections in:
- Lakes
- Puddles
- Glass
- Mirrors
- Wet roads
- Polished surfaces
You don’t always need a perfectly symmetrical reflection. Partial reflections can create interesting abstract compositions.
9. Use Shadows Creatively
Shadows can become part of the subject.
Look for:
- Long shadows
- Window shadows
- Architectural shadows
- Silhouettes
- Repeating patterns
- Strong light-and-dark contrasts
Instead of asking how to remove a shadow, ask whether it can become a compositional element.
10. Try Silhouettes
Place your subject against a significantly brighter background and expose for the bright area.
This can turn the subject into a dark silhouette.
Silhouettes work particularly well with recognizable shapes and simple compositions.
11. Fill the Frame
Move closer to your subject and remove unnecessary background elements.
This technique works well for:
- Portraits
- Flowers
- Food
- Products
- Wildlife
- Architectural details
Always check the edges of the frame before taking the photograph.
12. Photograph the Same Subject Multiple Ways
One of the best beginner exercises is to stop looking for a single “perfect” photograph.
Choose one subject and create ten different compositions.
Change:
- Distance
- Angle
- Focal length
- Aperture
- Background
- Lighting
- Orientation
Then compare the results.
You’ll learn more from this exercise than from simply photographing dozens of unrelated subjects.
Practice With a Single Lens
If you have an interchangeable-lens camera, try spending an entire day using only one lens.
This forces you to solve compositional problems by moving yourself rather than immediately changing focal lengths.
You’ll begin to understand the visual characteristics of that focal length and become more deliberate about your positioning.
Practice in Different Lighting Conditions
Don’t only photograph when the light looks perfect.
Practice during:
- Bright sunlight
- Cloudy weather
- Open shade
- Indoor window light
- Blue hour
- Night
- Backlighting
Different lighting conditions teach you different skills.
Review Your Photographs
Taking photographs is only half of the learning process.
After each session, review your images and identify:
- What worked?
- What didn’t?
- Which photograph is strongest?
- Why is it stronger?
- Was the focus accurate?
- Was the shutter speed appropriate?
- Was the composition distracting?
- Could the light have been better?
- What would you change next time?
This turns every photography session into a learning opportunity.
The 30-Photo Challenge
Try this simple challenge:
Day 1: Photograph one subject from 10 different angles.
Day 2: Practice aperture.
Day 3: Practice shutter speed.
Day 4: Practice exposure compensation.
Day 5: Photograph using different lighting directions.
Day 6: Practice leading lines and framing.
Day 7: Photograph the same subject in a completely different way.
You don’t need to take thousands of photographs. Focus on making each photograph intentional.
Beginner Takeaway
The most valuable photography technique is intentional practice.
Don’t simply ask:
“What should I photograph?”
Ask:
“What photography skill can I practice today?”
That shift turns everyday photography into structured learning and helps you improve much faster.
Related Articles:
- Photography Poses for Beginners
- Photography Poses for Girls
- Photography Poses for Boys at Home
- Natural Poses for Photos
- Couple Pose Ideas
- Romantic Couple Poses
- Beach Couple Poses
- Couple Selfie Poses
Common Photography Mistakes Beginners Should Avoid
Every photographer takes bad photographs. Blurry images, distracting backgrounds, poor exposure, awkward compositions, and missed focus are all part of the learning process.
The goal isn’t to avoid every mistake. It’s to recognize why the mistake happened and know how to prevent it next time.
Here are some of the most common photography mistakes beginners make.
1. Using the Wrong Shutter Speed
A photograph can look blurry even when the camera successfully focused on the subject.
If the subject or camera moved during the exposure, the shutter speed may have been too slow.
Fix: Use a faster shutter speed when photographing moving subjects or when camera shake is visible.
2. Focusing on the Wrong Part of the Scene
Autofocus doesn’t always know which element you consider most important.
It may focus on:
- A nearby object
- The background
- The wrong person
- A high-contrast element
Fix: Use a more appropriate focus-area mode, face/eye detection, or manually select the focus point when necessary.
3. Shooting Everything at the Widest Aperture
Beginners often assume that the widest aperture always creates the best photograph.
It doesn’t.
A very shallow depth of field can leave important parts of a subject outside the focus range.
Fix: Choose aperture based on how much of the subject needs to be sharp.
4. Ignoring the Background
A great subject can be ruined by a distracting background.
Look for:
- Poles behind heads
- Bright objects
- Clutter
- Random people
- Distracting colors
- Tangled lines
Fix: Before taking the photograph, scan the entire frame and change your position or subject position when necessary.
5. Centering Every Subject
Center composition isn’t inherently bad, but placing every subject in the center can make your photographs feel repetitive.
Fix: Experiment with the rule of thirds, negative space, leading lines, symmetry, and intentional centered compositions.
6. Forgetting About the Edges of the Frame
Beginners often concentrate so heavily on their subject that they don’t notice what’s happening around the edges.
You may accidentally include:
- Unwanted objects
- Cut-off limbs
- Bright distractions
- Random people
- Empty areas
Fix: Check all four edges of the frame before pressing the shutter.
7. Using High ISO Without a Reason
High ISO isn’t automatically bad, but unnecessarily high ISO can introduce more visible noise than necessary.
Fix: Use the lowest ISO that makes sense for the aperture and shutter speed you need.
However, don’t sacrifice a sharp photograph simply to maintain a low ISO.
8. Using Too Slow a Shutter Speed to Protect ISO
The opposite mistake is also common.
A photographer may keep ISO very low and use a shutter speed that’s too slow for the subject.
The result can be a blurry photograph.
Fix: Prioritize the shutter speed when freezing movement is important, then adjust ISO as needed.
9. Relying Too Much on Editing
Editing can improve a photograph, but it cannot completely fix every problem.
Severely missed focus, extreme motion blur, poor composition, or completely clipped highlights may not be recoverable.
Fix: Aim to capture the strongest possible original photograph before editing.
10. Overediting Photographs
Heavy editing can make photographs look unnatural.
Common problems include:
- Excessive saturation
- Over-sharpening
- Extreme HDR effects
- Crushed shadows
- Blown highlights
- Unnatural skin tones
Fix: Make adjustments deliberately and compare the edited photograph with the original.
11. Buying Equipment Before Learning Technique
A more expensive camera doesn’t automatically solve problems with:
- Composition
- Lighting
- Focus
- Timing
- Exposure
- Subject selection
Fix: Learn to identify the actual limitation before buying new equipment.
Sometimes the solution is simply better technique or lighting.
12. Photographing From Only One Position
Standing in the same place and zooming in or out can produce repetitive compositions.
Fix: Move.
Try getting:
- Closer
- Farther away
- Lower
- Higher
- To the side
- Behind the subject
Changing your physical position often has a bigger compositional impact than changing camera settings.
13. Taking Too Many Photographs Without Reviewing Them
More photographs don’t automatically mean more improvement.
If you never analyze your results, you may repeat the same mistakes.
Fix: After every photography session, select a few images and determine what worked and what didn’t.
14. Ignoring Light
Beginners often focus heavily on camera settings while ignoring the quality and direction of light.
But changing the light can completely transform an image.
Fix: Before adjusting the camera, look at the light.
Ask:
Where is it coming from?
Is it hard or soft?
Where are the shadows?
Does the light improve the subject?
15. Chasing Perfect Settings
There is no universal set of camera settings that works for every photograph.
A setting that works beautifully for a landscape may be completely wrong for sports.
Fix: Choose settings based on:
- Subject
- Movement
- Light
- Depth of field
- Creative intention
16. Comparing Your Work Too Early
It’s easy to compare your first photographs with images created by photographers who have spent years developing their skills.
That comparison can be discouraging and isn’t particularly useful.
Instead, compare your current work with your own older work.
Look for improvements in:
- Composition
- Exposure
- Focus
- Lighting
- Timing
- Editing
Your progress becomes much easier to recognize when you measure it against yourself.
A Better Way to Learn From Mistakes
When a photograph doesn’t work, don’t simply delete it.
Ask:
What went wrong?
Then identify the specific cause.
For example:
Blurred subject → Was the shutter speed too slow?
Wrong focus → Did the camera select the wrong subject?
Too dark → Was exposure compensation needed? Was there insufficient light?
Distracting image → Could I have changed my position?
Flat photograph → Could the lighting or composition be improved?
This approach turns mistakes into practical lessons.
Beginner Takeaway
Don’t be afraid of bad photographs.
Bad photographs are feedback.
Every mistake tells you something about your camera, your technique, your composition, or your understanding of light.
The photographers who improve aren’t the ones who never make mistakes. They’re the ones who analyze those mistakes and avoid repeating them.
Basic Photo Editing for Beginners
Photography doesn’t necessarily end when you press the shutter.
Editing allows you to refine the photograph, correct technical issues, improve color, and emphasize the visual story you captured in-camera.
However, good editing should generally enhance a photograph rather than compensate for poor technique.
You don’t need complicated editing skills to get started. Learning a small number of fundamental adjustments can make a significant difference.
RAW vs JPEG for Editing
Before learning individual editing controls, understand the difference between the two common file types.
RAW files retain substantially more original image information for later processing and provide greater flexibility for adjusting exposure, white balance, highlights, shadows, and color.
JPEG files are already processed by the camera and use lossy compression. They are smaller and convenient for sharing, but generally provide less editing flexibility.
If you intend to do substantial editing, RAW is usually the better starting point when your camera supports it and storage/workflow requirements are manageable.
1. Crop and Straighten
Cropping is one of the simplest ways to improve composition after capturing an image.
You can use cropping to:
- Remove distractions.
- Improve framing.
- Change the aspect ratio.
- Strengthen the subject.
- Prepare an image for a specific platform.
Straightening is equally important.
A slightly tilted horizon can make an otherwise strong photograph feel unbalanced.
2. Adjust Exposure
If the original photograph is slightly too bright or dark, an exposure adjustment can help bring it closer to your intended result.
Avoid relying on exposure adjustments to rescue severely overexposed or underexposed photographs.
The more important details were preserved during capture, the more flexibility you generally have during editing.
3. Adjust Highlights and Shadows
Highlights control the brighter portions of the image, while shadows affect darker areas.
Reducing highlights can sometimes reveal detail in bright areas.
Lifting shadows can reveal information in darker areas.
Be careful not to push these controls too far.
Excessively lifted shadows can make an image look flat or introduce visible noise, while aggressively reduced highlights can produce an unnatural appearance.
4. Adjust Contrast
Contrast controls the difference between lighter and darker areas.
Increasing contrast can make an image feel more dramatic.
Reducing contrast can create a softer appearance.
Use contrast to support the photograph rather than applying the same setting to every image.
5. Correct White Balance
If the photograph looks too warm or too cool, adjust white balance.
You may be able to control:
- Temperature
- Tint
When editing portraits, pay particular attention to skin tones.
A technically neutral white balance isn’t always necessary, but unnatural skin color is usually a sign that the correction has gone too far.
6. Adjust Exposure and Color Carefully
Color adjustments can have a significant impact on the mood of a photograph.
You may adjust:
- Saturation
- Vibrance
- Individual color channels
- Hue
- Luminance
Beginners often make the mistake of increasing saturation too much.
Instead of asking:
“Does this look more colorful?”
Ask:
“Does this look believable and support the photograph?”
7. Sharpening
Sharpening can improve the perception of detail.
However, excessive sharpening can create:
- Harsh edges
- Halos
- Increased noise
- Unnatural textures
Apply sharpening carefully and evaluate the image at an appropriate viewing size.
8. Noise Reduction
Noise reduction can be useful for photographs captured at high ISO.
It can reduce visible luminance and color noise, but excessive noise reduction can remove fine detail and make the image appear overly smooth.
Use only as much as necessary.
9. Lens Corrections
Many editing applications can automatically correct certain lens characteristics, such as:
- Distortion
- Vignetting
- Chromatic aberration
These corrections can be particularly useful for wide-angle lenses and architectural photography.
10. Local Adjustments
Once you’re comfortable with global adjustments, learn how to edit specific areas of the image.
For example, you might:
- Brighten a subject’s face.
- Darken a distracting background.
- Enhance a particular object.
- Add contrast to important details.
Local adjustments allow you to guide the viewer’s attention without changing the entire photograph.
A Simple Beginner Editing Workflow
Instead of changing everything randomly, follow a consistent sequence.
Step 1 — Select
Remove technically poor images and keep your strongest photographs.
Step 2 — Crop and Straighten
Improve composition and correct obvious alignment issues.
Step 3 — Correct Exposure
Adjust overall brightness.
Step 4 — Balance Highlights and Shadows
Recover useful tonal detail where possible.
Step 5 — Correct White Balance
Make colors look appropriate for the scene.
Step 6 — Adjust Contrast and Color
Refine the overall visual character.
Step 7 — Apply Lens Corrections
Correct obvious optical issues when appropriate.
Step 8 — Sharpen and Reduce Noise
Apply these adjustments carefully based on the image and output size.
Step 9 — Export
Choose the appropriate file type, dimensions, quality, and color space for the intended destination.
Don’t Try to Fix Everything
Some problems are better solved during capture.
For example:
Missed focus → difficult or impossible to fully correct
Severe motion blur → difficult to remove completely
Completely clipped highlights → missing information cannot simply be recreated
Poor composition → cropping can help, but changing your position before capture is usually better
Editing works best when you start with a strong original photograph.
Editing Is About Intent
There is no universal editing style that makes every photograph better.
A portrait, landscape, product photograph, and night photograph may all require different treatments.
Before adjusting sliders, ask:
What do I want this photograph to communicate?
Then make adjustments that support that goal.
Beginner Editing Exercise
Take one RAW photograph and create three versions:
Version 1 — Natural
Make only basic corrections.
Version 2 — Dramatic
Use contrast, tonal adjustments, and color more intentionally.
Version 3 — Black and White
Convert the image to monochrome and focus on tones, shapes, and contrast.
Compare the three versions.
This exercise helps you understand that editing isn’t simply about making an image “better.” It is about making deliberate visual choices.
Beginner Takeaway
A strong editing workflow is simple:
Select → Crop → Exposure → Highlights/Shadows → White Balance → Color → Detail → Export
Don’t try to make every photograph look heavily edited.
The best edit is often the one that improves the photograph without making the editing itself obvious.
Free Photo Editing Software
Not everyone needs paid tools.
Snapseed
Best mobile editor.
Google Photos
Simple and beginner friendly.
Darktable
Free Lightroom alternative.
GIMP
Free Photoshop alternative.
Canva
Great for graphics and social media.
How to Develop Your Photography Style
Every photographer eventually develops a unique style.
Your style emerges through:
- Practice
- Editing choices
- Subject preferences
- Personal interests
Do not rush this process.
Experiment first.
Consistency develops naturally over time.
Photography Business Basics
Many beginners eventually want to earn money through photography.
The good news:
Photography can become a profitable side business or full-time career.
Popular Photography Niches
Portrait Photography
Individuals and families.
Wedding Photography
One of the highest-paying specialties.
Event Photography
Birthdays, corporate events, celebrations.
Product Photography
E-commerce businesses need quality images.
Real Estate Photography
Growing demand.
Social Media Content Creation
Businesses constantly need visual content.
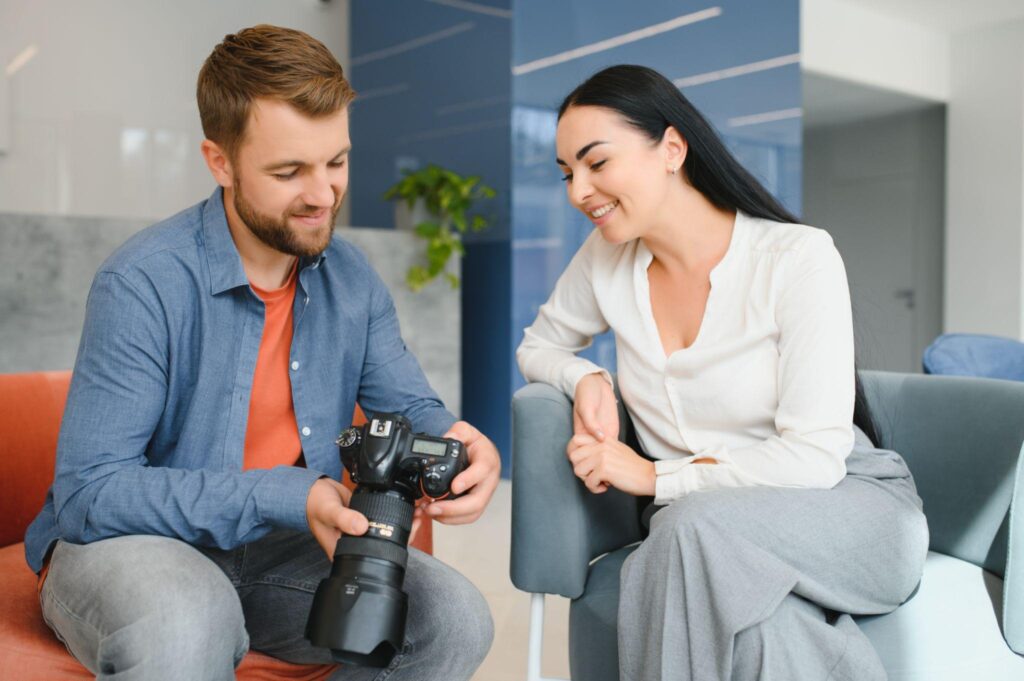

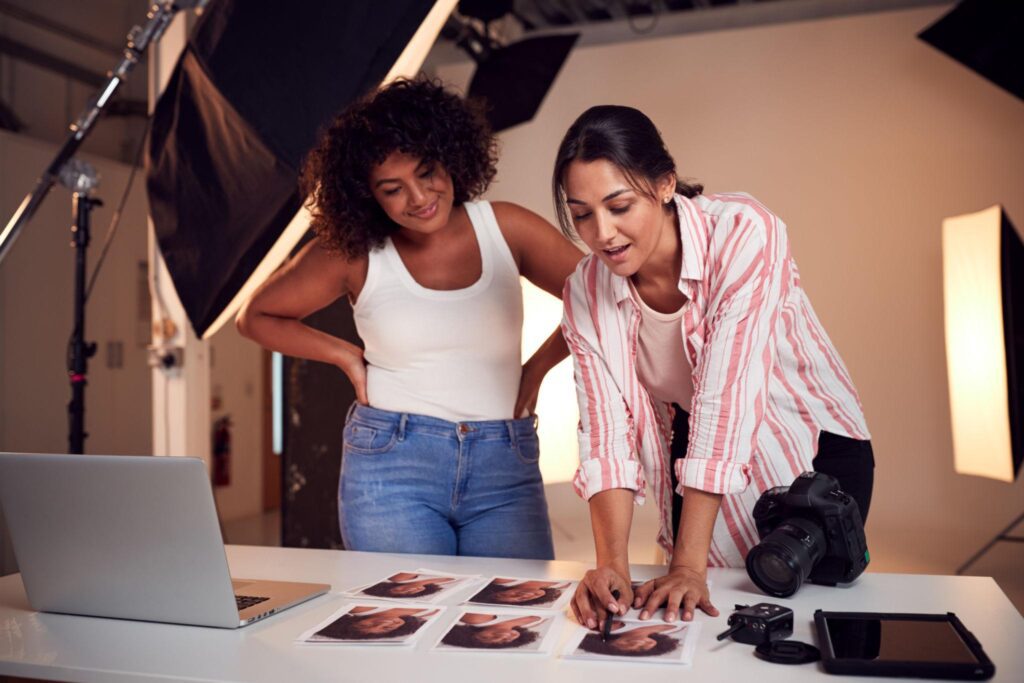
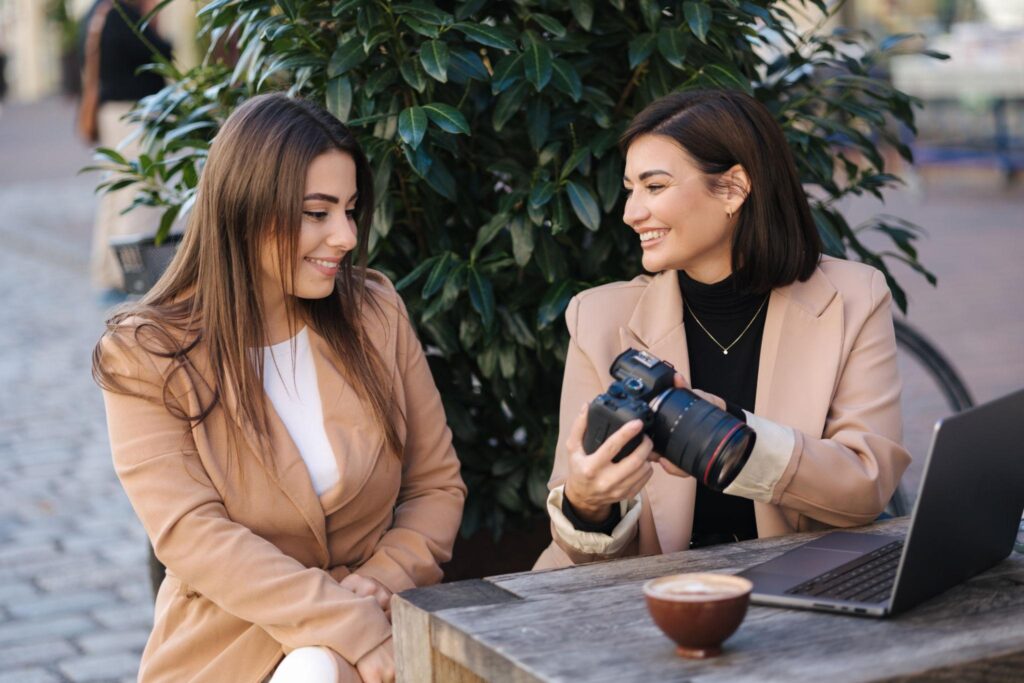

Photography Equipment Beginners Actually Need
You don’t need an expensive collection of photography gear to start taking good photographs.
A camera, lens, and a basic understanding of light and composition are enough to learn most photography fundamentals. Additional equipment should solve a specific problem rather than simply add more items to your camera bag.
Camera
Your camera is the foundation of your system, but don’t assume that a more expensive camera automatically produces better photographs.
When choosing a camera, consider:
- Sensor size
- Autofocus performance
- Low-light performance
- Lens availability
- Ergonomics
- Battery life
- Video features, if important to you
- Your budget and intended photography
For beginners, a camera that feels comfortable and encourages regular practice is often more valuable than a camera packed with features you’ll rarely use.
Lens
The lens can have a major effect on the appearance of your photographs.
Different focal lengths provide different fields of view and perspectives.
A wide-angle lens can be useful for:
- Landscapes
- Architecture
- Interiors
- Travel photography
A standard or normal-range lens can be versatile for:
- Street photography
- Everyday photography
- Travel
- Portraits
A telephoto lens can be useful for:
- Wildlife
- Sports
- Distant subjects
- Compressed perspectives
A macro lens is designed for close-up photography and can reveal details that are difficult to see with a standard lens.
Tripod
A tripod isn’t necessary for every type of photography, but it can be extremely useful when camera stability is important.
Consider a tripod for:
- Long exposures
- Night photography
- Landscapes
- Astrophotography
- Product photography
- Self-portraits
- HDR or multi-exposure work
A tripod allows you to use slower shutter speeds while keeping the camera stable.
Memory Cards
A reliable memory card is essential for digital photography.
Choose a card that:
- Is compatible with your camera.
- Has sufficient capacity.
- Provides an appropriate write speed for your camera and shooting style.
- Comes from a reputable source.
If you photograph important events, carrying a spare card can be a simple but valuable precaution.
Extra Batteries
An additional battery can prevent an otherwise avoidable interruption during a long photography session.
Extra batteries are particularly useful for:
- Weddings
- Travel
- Events
- Wildlife photography
- Cold-weather shooting
- Long outdoor sessions
Camera Bag
A good camera bag should protect your equipment while remaining comfortable enough to carry.
Choose based on your actual equipment rather than buying a large bag simply because it has more compartments.
Cleaning Supplies
Basic cleaning equipment can help you keep your gear in good condition.
A simple kit may include:
- Lens cloth
- Air blower
- Lens cleaning solution designed for optical surfaces
- Sensor-cleaning products appropriate for your camera, if you know how to use them
Avoid touching optical surfaces unnecessarily.
For sensor cleaning, follow the camera manufacturer’s recommendations or have the sensor professionally cleaned if you’re uncomfortable doing it yourself.
Reflector
A reflector can redirect existing light toward your subject without requiring another powered light.
It can be particularly useful for:
- Portraits
- Product photography
- Outdoor photography
A simple white reflector can already provide significant value.
External Flash
An external flash can provide much more flexibility than relying only on the camera’s built-in flash.
You can often:
- Bounce the light.
- Change its direction.
- Move it off-camera.
- Modify the light with accessories.
Learning how to control flash can significantly expand your photography options.
Filters
Filters are specialized tools rather than mandatory beginner equipment.
Common types include:
Circular Polarizer (CPL)
Can reduce certain reflections and enhance contrast in suitable conditions.
Neutral Density (ND) filter
Reduces the amount of light entering the lens, allowing longer exposures or wider apertures in bright conditions.
Graduated ND filter
Can help balance very bright skies against darker foregrounds in certain landscape situations.
Don’t buy filters simply because they’re considered “professional.” Buy them when you understand the problem they solve.
What Beginners Don’t Need Immediately
You can usually postpone buying equipment such as:
- Multiple expensive lenses
- Large studio lighting systems
- Specialized filters
- High-end camera bodies
- Large collections of accessories
Learn your current equipment first.
You may discover that better technique solves problems you initially thought required new gear.
A Practical Beginner Gear Setup
A simple setup could be:
Camera + versatile lens + spare battery + memory card + basic cleaning supplies
For landscape or long-exposure photography, add:
Tripod
For portraits or controlled lighting:
Reflector or external light
Build your kit according to the type of photography you actually enjoy.
Beginner Takeaway
The best photography equipment isn’t necessarily the most expensive equipment.
Buy gear to solve a specific photographic problem.
Before purchasing something new, ask:
What problem will this solve?
Can I solve that problem with technique instead?
Will I use this equipment regularly?
Learning to get the most from the equipment you already own will usually improve your photography more than constantly upgrading your gear.
How to Choose the Right Camera Settings
Knowing what aperture, shutter speed, ISO, autofocus, and white balance do is only the beginning. The real skill is knowing which settings to choose for a particular situation.
Instead of memorizing fixed settings, learn to make decisions based on your subject, lighting, movement, and creative goal.
There is no universal combination of camera settings that works for every photograph.
Start With the Subject
Before changing any setting, identify what you’re photographing.
Ask:
Is the subject moving or stationary?
Do I need a shallow or deep depth of field?
Is the available light bright or limited?
Do I want to freeze movement or show motion?
Your answers will determine which settings deserve priority.
Settings for Portrait Photography
For a portrait, you may want the person to be sharp while creating some separation from the background.
A useful starting approach is:
Aperture: f/1.8–f/4, depending on the lens and desired depth of field
Shutter speed: Fast enough to prevent subject or camera movement
ISO: As low as practical, then increase when necessary
Focus: Face/eye detection or a precise focus point
Don’t automatically use the widest aperture available. If you’re photographing more than one person, a slightly narrower aperture may provide enough depth of field to keep everyone sharp.
Settings for Landscape Photography
Landscape photography often benefits from greater depth of field.
A possible starting point is:
Aperture: Around f/8–f/11
Shutter speed: Based on available light and whether you’re using a tripod
ISO: Often low when conditions allow
Focus: Single AF or manual focus, depending on the scene
These aren’t mandatory settings. The correct aperture depends on the scene, lens, desired depth of field, and diffraction considerations.
Settings for Sports Photography
Sports require you to prioritize movement.
A useful starting approach is:
Shutter speed: Around 1/1000 sec or faster for many fast-moving subjects
Aperture: Wide enough to provide sufficient light and subject separation
ISO: Increase as needed
Focus: Continuous autofocus with an appropriate tracking or area mode
The exact shutter speed depends on the sport and the type of movement you want to freeze.
Settings for Wildlife Photography
Wildlife can move unpredictably, so autofocus and shutter speed are particularly important.
A starting approach might be:
Shutter speed: Fast enough to freeze the animal’s movement
Aperture: Wide enough to provide sufficient light and useful background separation
ISO: Adjust according to available light
Focus: Continuous AF with subject detection/tracking when appropriate
A high ISO is often preferable to an unusably slow shutter speed.
Settings for Street Photography
Street photography often requires quick reactions.
You might choose:
Aperture: Moderate to wide, depending on the desired depth of field
Shutter speed: Fast enough to reduce unwanted motion blur
ISO: Auto ISO can be useful when lighting changes rapidly
Focus: Continuous or single AF depending on the subject and camera
Some photographers also use manual exposure or zone-focusing techniques for greater consistency and speed.
Settings for Night Photography
Night photography can require a very different approach.
For a stationary scene using a tripod, you can often use:
ISO: Low
Aperture: Based on the desired depth of field and lens performance
Shutter speed: Slow enough to achieve the required exposure
Focus: Manual or carefully selected autofocus
For handheld night photography, you’ll usually need a faster shutter speed, wider aperture, and/or higher ISO.
The correct combination depends heavily on the subject.
Settings for Indoor Photography
Indoor lighting can vary dramatically.
A useful approach is:
Aperture: Wide enough to provide sufficient light and desired depth of field
Shutter speed: Fast enough for the subject
ISO: Increase when necessary
White balance: Auto or a fixed setting depending on lighting consistency
If you’re photographing people indoors, don’t allow the shutter speed to become so slow that movement creates blur simply to keep ISO low.
A Simple Camera-Setting Decision Tree
When you’re unsure what to change, follow this order.
Step 1 — Decide What Must Be Controlled
Need background blur?
→ Prioritize aperture.
Need to freeze movement?
→ Prioritize shutter speed.
Need more exposure after choosing the other settings?
→ Increase ISO.
Step 2 — Check the Light
Is the scene:
- Bright?
- Overcast?
- Indoors?
- Backlit?
- Very dark?
Your available light determines how much flexibility you have.
Step 3 — Check Your Shutter Speed
Even if the exposure looks correct, ask:
Is the shutter speed fast enough for this subject?
If not, increase shutter speed and compensate with aperture or ISO.
Step 4 — Check Depth of Field
Ask:
Is enough of the subject actually in focus?
If not, consider using a narrower aperture or changing your focus distance and composition.
Step 5 — Check ISO
Once your aperture and shutter speed are appropriate, use ISO to complete the exposure.
Don’t worry about using a higher ISO when the photograph requires it.
A Practical Example
Imagine you’re photographing a child running outdoors.
You want:
- Sharp movement
- Some background separation
- Correct exposure
You might start with:
Shutter speed → 1/1000 sec
Then choose an appropriate aperture, such as:
f/2.8–f/4
If the photograph is still too dark:
Increase ISO
Notice the decision-making process.
You didn’t start by asking:
“What ISO should I use?”
You started by asking:
“What does this photograph require?”
That’s the mindset you want to develop.
Don’t Memorize Settings—Understand Them
Camera-setting charts can be useful references, but they shouldn’t become rigid rules.
For example:
1/500 sec isn’t automatically the correct shutter speed for every portrait.
f/8 isn’t automatically the correct aperture for every landscape.
ISO 100 isn’t always better than ISO 1600.
Your settings should respond to the scene.
Beginner Camera Settings Cheat Sheet
| Situation | Priority | Useful starting approach |
|---|---|---|
| Portrait | Depth of field | Wider aperture + suitable shutter speed |
| Landscape | Depth of field | Moderate aperture + low ISO when practical |
| Sports | Freeze movement | Fast shutter speed + continuous AF |
| Wildlife | Freeze movement | Fast shutter speed + tracking AF |
| Street | Speed and flexibility | Suitable shutter speed + Auto ISO if useful |
| Night tripod | Long exposure | Low ISO + slower shutter speed |
| Indoor people | Avoid motion blur | Fast enough shutter + wider aperture + ISO as needed |
| Product | Detail and control | Suitable aperture + controlled lighting + low ISO |
These are starting points, not fixed recipes.
Beginner Takeaway
The best photographers don’t memorize one perfect setting for every situation.
They ask:
What does this photograph require?
Then they choose settings accordingly.
Aperture controls depth of field.
Shutter speed controls motion.
ISO provides exposure flexibility.
Once you start making camera-setting decisions this way, photography becomes much less about guessing numbers and much more about controlling the final image.
30-Day Photography Practice Plan for Beginners
Reading about photography is useful, but practice is what turns camera knowledge into photographic skill.
You don’t need an expensive camera, exotic locations, or hours of free time. A few intentional photographs each day can teach you more than repeatedly reading the same theory.
Use this 30-day plan to practice one core skill at a time.
Week 1 — Learn Your Camera
Day 1 — Camera Controls
Find and identify:
- Aperture control
- Shutter speed control
- ISO control
- Exposure compensation
- Autofocus controls
- White balance
- Shooting modes
Don’t worry about mastering everything today. The goal is simply to know where the controls are.
Day 2 — Aperture
Photograph the same subject using several different apertures.
Compare:
- Background blur
- Depth of field
- Sharpness
- Exposure
Notice how changing aperture affects more than brightness.
Day 3 — Shutter Speed
Photograph a moving subject using several shutter speeds.
Try both:
- Fast shutter speeds
- Slow shutter speeds
Compare frozen movement with intentional motion blur.
Day 4 — ISO
Photograph the same subject at different ISO settings.
Compare the images at 100% magnification.
Look for:
- Noise
- Fine detail
- Color
- Shadow quality
Day 5 — Exposure Triangle
Choose a subject and deliberately change one exposure setting at a time.
Practice compensating with the other settings.
The goal is to understand how aperture, shutter speed, and ISO interact.
Day 6 — Autofocus
Test different autofocus modes.
Try:
- Single AF
- Continuous AF
- Single-point AF
- Face/eye detection, if available
Photograph both stationary and moving subjects.
Day 7 — Review Day
Review everything you photographed during the first week.
Choose:
- Your three strongest photographs
- Three photographs that didn’t work
- One mistake you want to avoid next week
Don’t just look at the images. Ask why they worked or failed.
Week 2 — Master Composition
Day 8 — Rule of Thirds
Create photographs using the rule of thirds.
Then deliberately create a few centered compositions.
Compare the results.
Day 9 — Leading Lines
Find at least five leading lines around you.
Use them to guide the viewer toward your subject.
Day 10 — Negative Space
Create photographs where your subject occupies only a small part of the frame.
Experiment with different amounts of empty space.
Day 11 — Framing
Photograph subjects through:
- Doorways
- Windows
- Trees
- Objects
- Architectural structures
Look for natural frames.
Day 12 — Perspective
Photograph the same subject from:
- Eye level
- Low angle
- High angle
- Side angle
- Close distance
- Farther distance
Compare how perspective changes the photograph.
Day 13 — Backgrounds
Photograph the same subject against several different backgrounds.
Try to identify which background best supports the subject.
Day 14 — Composition Review
Choose your five strongest compositions from the week.
For each one, identify what makes the composition effective.
Week 3 — Learn to See Light
Day 15 — Front Light
Photograph a subject using light coming from behind your camera.
Observe the shadows and contrast.
Day 16 — Side Light
Move the subject or yourself so the light comes from the side.
Look for changes in texture and dimension.
Day 17 — Backlight
Place your subject between yourself and a bright light source.
Experiment with both:
- Subject exposure
- Silhouette
Day 18 — Soft Light
Photograph in:
- Open shade
- Overcast conditions
- Near a large window
Compare the quality of the shadows.
Day 19 — Hard Light
Photograph in stronger direct light.
Instead of avoiding harsh shadows, try using them intentionally.
Day 20 — Golden Hour or Twilight
Photograph during the period around sunrise or sunset.
Pay attention to:
- Direction of light
- Color
- Shadows
- Background brightness
Day 21 — Light Review
Choose photographs from the week and compare how different lighting conditions changed the same or similar subjects.
Week 4 — Put Everything Together
Day 22 — Portrait Challenge
Create five portraits.
For each one, deliberately control:
- Background
- Light
- Aperture
- Focus
- Composition
Day 23 — Landscape Challenge
Photograph a landscape while considering:
- Foreground
- Middle ground
- Background
- Leading lines
- Light
- Horizon placement
Day 24 — Motion Challenge
Photograph a moving subject twice:
First: freeze the movement.
Second: intentionally show movement.
Day 25 — Low-Light Challenge
Photograph indoors or outdoors after dark.
Experiment with:
- Aperture
- Shutter speed
- ISO
- Available light
Your goal is to create a usable photograph rather than simply keep ISO as low as possible.
Day 26 — One-Lens Challenge
If you have an interchangeable-lens camera, use only one lens for the entire session.
Solve composition problems by moving yourself rather than changing lenses.
Day 27 — One-Subject Challenge
Choose one ordinary object.
Create at least ten different photographs of it.
Change:
- Perspective
- Lighting
- Composition
- Distance
- Background
- Aperture
- Shutter speed
This is one of the most useful exercises in the entire plan.
Day 28 — Editing Challenge
Choose three photographs from your month.
Create a simple editing workflow:
Crop → Exposure → Highlights/Shadows → White Balance → Color → Detail
Avoid overediting.
Day 29 — Recreate an Old Photograph
Choose one photograph you took earlier in the month.
Try to recreate it.
Then improve it using everything you’ve learned.
Compare the two versions.
Day 30 — Final Photography Project
Create a small collection of 5–10 photographs around one subject or theme.
Use everything you’ve practiced:
- Exposure
- Focus
- Composition
- Lighting
- Perspective
- Editing
Don’t simply choose your photographs because they’re technically correct.
Choose images that communicate something.
How to Get the Most From This Practice Plan
Don’t rush through the exercises just to finish the 30 days.
For every photograph, ask:
What was I trying to achieve?
Did the photograph achieve it?
What worked?
What failed?
What would I change next time?
Keep your strongest photographs from each exercise.
After 30 days, compare your first photographs with your final project.
You may be surprised by how much your ability to recognize light, composition, focus, and exposure has improved.
Beginner Takeaway
You don’t need to practice everything at once.
Learn one concept → practice it → review the results → identify the mistake → try again.
That cycle is far more valuable than simply taking hundreds of photographs without analyzing them.
The camera is only the tool.
Your ability to observe, make decisions, and practice intentionally is what makes you a better photographer.
How to Improve Your Photography Skills
Learning photography is an ongoing process. Once you understand exposure, focus, composition, and light, the next challenge is learning how to make better decisions consistently.
You don’t need to master everything at once. Focus on one skill, practice it repeatedly, and review your results.
Learn to See Before You Shoot
One of the biggest differences between beginners and experienced photographers is not necessarily camera knowledge.
It’s observation.
Before raising your camera, look at:
- The direction of light
- Shadows
- Background distractions
- Subject position
- Leading lines
- Colors
- Shapes
- Available space
Then decide where you should stand and how you want to frame the subject.
Don’t let the camera decide the photograph for you.
Study Photographs You Admire
Look at photographs created by photographers whose work you enjoy.
Instead of simply thinking, “That’s a beautiful photograph,” analyze it.
Ask:
Where is the light coming from?
What focal length might have been used?
Why was the subject positioned there?
How is the background handled?
Where does my eye go first?
How does the composition create balance?
This develops your visual understanding without requiring you to own additional equipment.
Recreate Photographs for Practice
Choose a photograph you admire and try to recreate its visual characteristics.
You don’t need to copy it exactly.
Study:
- Lighting direction
- Camera position
- Subject placement
- Perspective
- Depth of field
- Color
- Composition
Then create your own version.
This is an excellent way to turn visual analysis into practical experience.
Photograph the Same Subject Repeatedly
Don’t always look for new subjects.
Photographing the same subject repeatedly forces you to find new solutions.
Try changing:
- Camera height
- Distance
- Focal length
- Aperture
- Shutter speed
- Background
- Lighting
- Composition
You’ll begin noticing possibilities that you would previously have overlooked.
Limit Your Gear Occasionally
Having too many choices can sometimes make learning harder.
Try spending a photography session with:
One camera + one lens
This encourages you to solve compositional problems through movement and positioning.
You’ll also develop a better understanding of how that lens renders perspective and depth.
Review Your Best and Worst Photographs
Don’t only save your favorite photographs.
Your unsuccessful images can teach you just as much.
For every weak photograph, identify the main problem.
Was it:
- Poor focus?
- Camera shake?
- Subject movement?
- Distracting background?
- Poor light?
- Incorrect exposure?
- Weak composition?
- Poor timing?
Then determine what you would do differently.
Learn From Your EXIF Data
When reviewing your photographs, check the metadata when available.
Look at:
- Aperture
- Shutter speed
- ISO
- Focal length
- Exposure compensation
If a photograph worked particularly well, ask yourself why those settings were appropriate.
If it failed, determine whether changing one of those settings would have helped.
This turns your photo library into a personal photography textbook.
Improve One Skill at a Time
Trying to improve everything simultaneously can become overwhelming.
Instead, dedicate a photography session to one subject.
For example:
Week 1: Shutter speed
Week 2: Composition
Week 3: Lighting
Week 4: Portraits
Week 5: Exposure
After several weeks, these individual skills begin working together naturally.
Learn to Use Your Camera Without Thinking
Eventually, changing basic settings should become relatively quick.
Practice finding:
- Aperture control
- Shutter speed control
- ISO
- Focus mode
- Exposure compensation
- Shooting mode
without constantly looking at the camera manual.
The less attention you need to spend searching for controls, the more attention you can give to your subject and surroundings.
Don’t Depend on Presets or Recipes
Photography settings found online can be useful starting points, but copying someone else’s settings doesn’t guarantee the same result.
The original photograph may have been created with:
- Different lighting
- Different camera
- Different lens
- Different subject distance
- Different focal length
- Different creative intention
Learn the principle behind the setting instead.
For example, don’t memorize:
“Portraits require f/2.8.”
Understand:
“A wider aperture can create shallower depth of field, but I need enough depth of field to keep the important parts of my subject sharp.”
That knowledge works in many different situations.
Build a Personal Photography Style
You don’t need to develop a unique style immediately.
Your style will gradually emerge from the choices you repeatedly make.
You may discover that you consistently prefer:
- Soft natural light
- Strong contrast
- Minimal compositions
- Warm colors
- Black-and-white images
- Shallow depth of field
- Environmental portraits
- Dramatic shadows
Pay attention to those patterns.
Your style should develop naturally rather than being forced.
Learn From Other Photographers
Photography communities, workshops, books, courses, exhibitions, and constructive critiques can expose you to ideas you may not discover alone.
When asking for feedback, don’t simply ask:
“Is this photo good?”
Ask a more specific question:
“Is the background distracting?”
“Does the composition lead your eye toward the subject?”
“Does the lighting flatter the subject?”
Specific questions produce much more useful feedback.
Don’t Let Gear Stop You
You can improve photography with almost any modern camera—or even a smartphone.
If you already have equipment, learn its limitations and strengths before deciding that you need an upgrade.
A new camera may improve certain technical capabilities, but it won’t automatically improve:
- Composition
- Timing
- Observation
- Lighting decisions
- Storytelling
Skills transfer between cameras.
Create Personal Projects
Instead of photographing random subjects indefinitely, create small projects.
For example:
“30 Days of Street Photography”
“People in Natural Light”
“Local Architecture”
“Everyday Objects”
“One Lens, One Month”
A project gives your photography a purpose and encourages consistency.
Measure Progress Over Time
Don’t judge your progress from one photograph.
Look at your work over several months.
Compare:
- Composition
- Exposure
- Focus
- Lighting
- Subject selection
- Editing
- Consistency
You may notice improvements that aren’t obvious from day to day.
Beginner Takeaway
Improving your photography isn’t about constantly learning new camera settings.
It’s about developing better observation, decision-making, and visual judgment.
A simple cycle works:
Learn → Practice → Review → Identify the problem → Try again
Keep repeating that process.
The more deliberately you practice, the faster camera settings become second nature and the more attention you can devote to what actually matters: creating photographs that communicate something.
Essential Photography Tutorials Tools
These tools help photographers improve productivity and image quality.
Camera Equipment
Essential
- Camera Body
- Standard Lens
- Memory Cards
- Tripod
- Camera Bag
Recommended Upgrades
- Prime Lens
- Telephoto Lens
- External Flash
- ND Filters
Editing Tools – Photography Tutorials
Adobe Lightroom
Best overall editing software.
Adobe Photoshop
Advanced retouching.
Canva
Graphics and thumbnails.
Snapseed
Mobile editing.
Planning Tools
Google Keep
Shot lists.
Notion
Project organization.
Google Calendar
Scheduling shoots.
Storage Tools
Google Drive
Cloud backup.
Dropbox
Client delivery.
External SSD
Fast storage.
Complete Photography Tutorials Roadmap
Beginner Stage
Learn:
- Camera basics
- Exposure Triangle
- Composition
- Lighting
Intermediate Stage
Learn:
- Editing
- Portrait photography
- Landscape photography
- Storytelling
Advanced Stage
Learn:
- Flash photography
- Commercial photography
- Business systems
- Marketing
More Related Articles:
Photography Basics
- Photography Poses for Beginners
- Natural Poses for Photos
- Photography Poses for Girls
- Photography Poses for Boys at Home
- Standing Poses for Photoshoot
Couple Photography
- Couple Pose Ideas
- Romantic Couple Poses
- Beach Couple Poses
- Couple Selfie Poses
- Pre-Wedding Photoshoot Ideas
Home Photography
- DIY Photoshoot Ideas at Home
- Indoor Photoshoot Ideas at Home
- Creative Lighting Ideas for Home Photoshoot
- Product Photography Setup at Home
Social Media Photography
- Aesthetic Photo Ideas for Instagram
- Viral Photography Ideas
- Instagram Poses for Boys
- Instagram Poses for Girls
Camera Guides
- Best Camera Under ₹30,000
- Best Camera Under ₹1 Lakh
- Best Camera for Instagram and Reels
- Best Camera for YouTube Beginners
- Panasonic S5 II Review
- Nikon D850 Review
- Leica Q2 Review
Photography Business
- Photography Pricing Guide
- How Much Does a Professional Photoshoot Cost in India?
- How Do Photographers Decide Their Pricing?
- How Can I Start a Photography Business?
- How Do Beginner Photographers Get Their First Clients?
- What Are the Most Profitable Photography Niches?
Photography Courses
- Best Online Photography Course with Certificate
- Free Photography Course for Beginners
- DSLR Photography Course Online
- Professional Photography Classes Online
- Photography Certification Courses
Conclusion – Photography Tutorials
Photography is a skill that anyone can learn with patience and consistent practice. Expensive gear may improve convenience, but understanding light, composition, exposure, and storytelling has a far greater impact on image quality.
Start with the fundamentals covered in this guide. Practice regularly. Experiment with different subjects. Analyze your results. Over time, your confidence and creativity will grow naturally.
Remember that every professional photographer was once a beginner. The difference is that they continued learning, shooting, and improving.
The camera is only a tool.
Your vision is what creates great photographs.
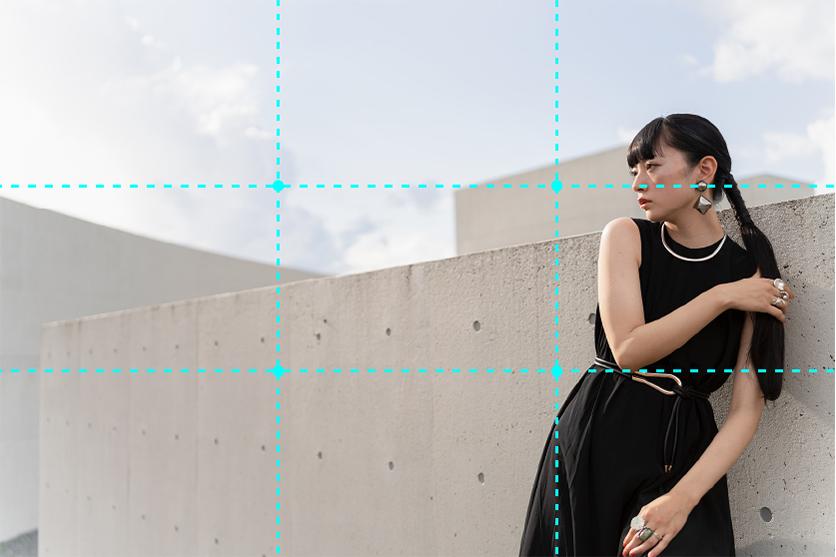


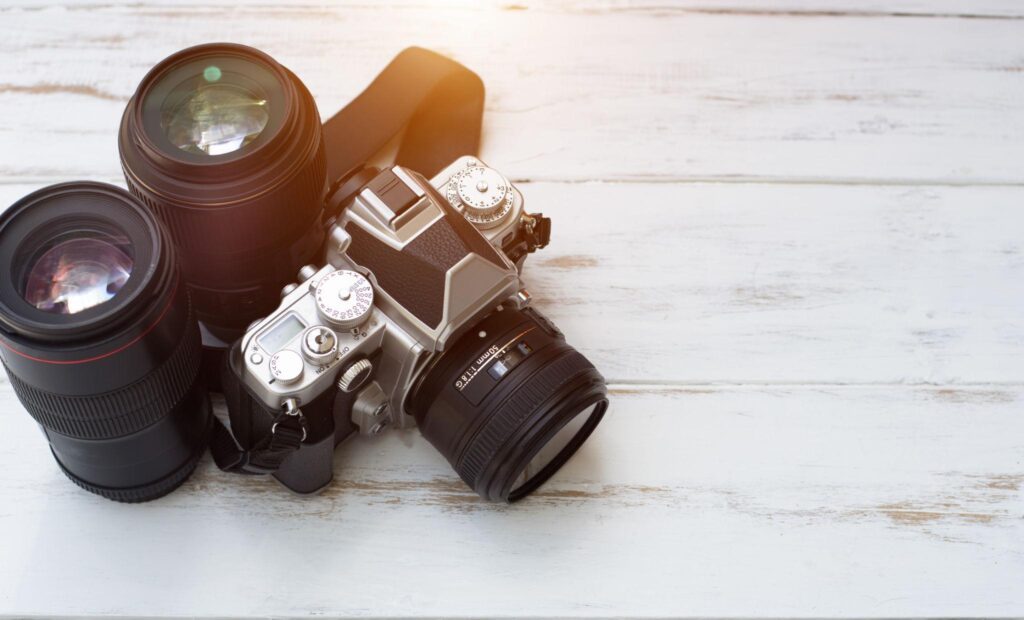

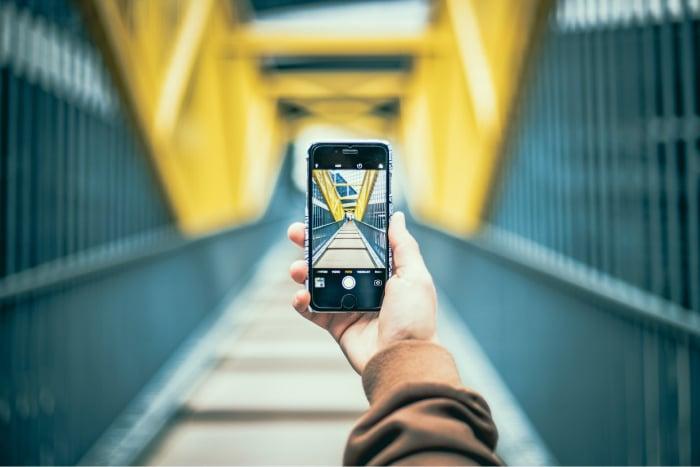
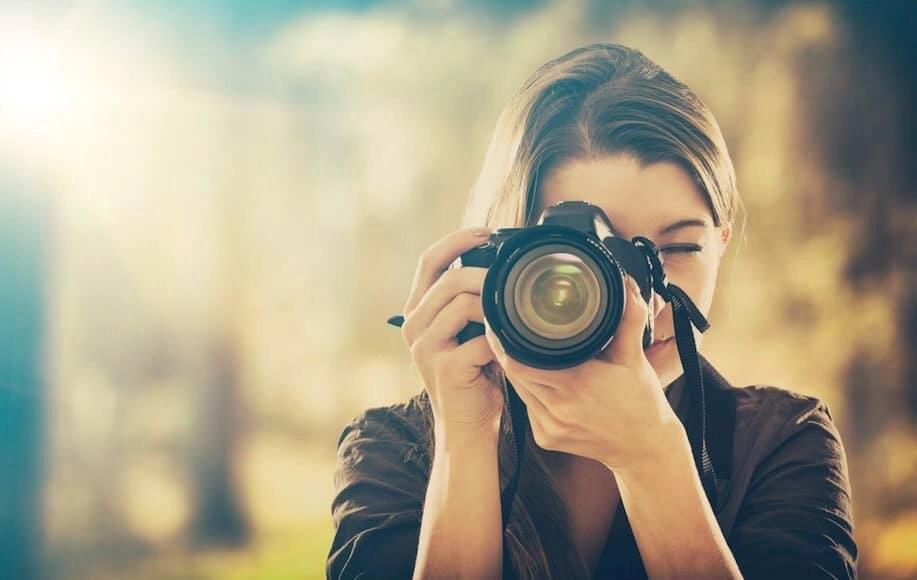

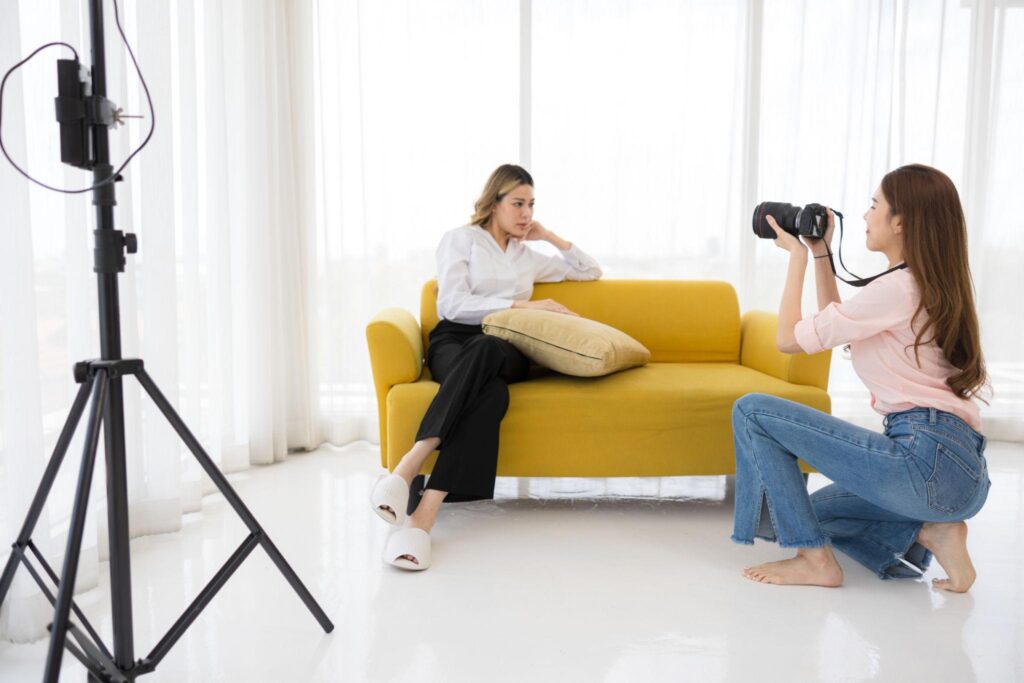

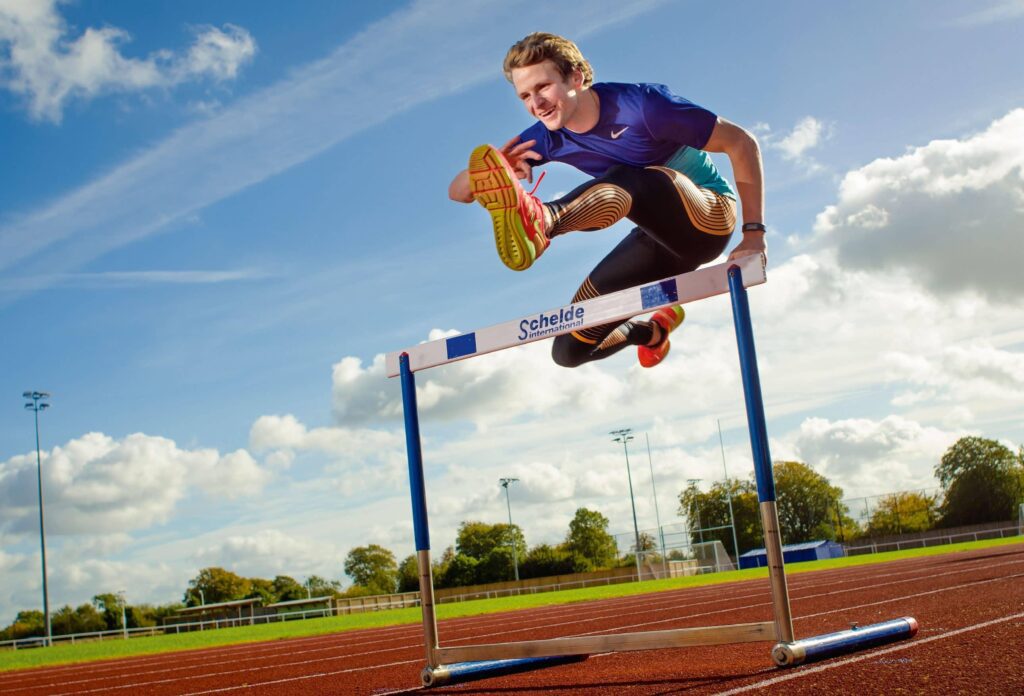
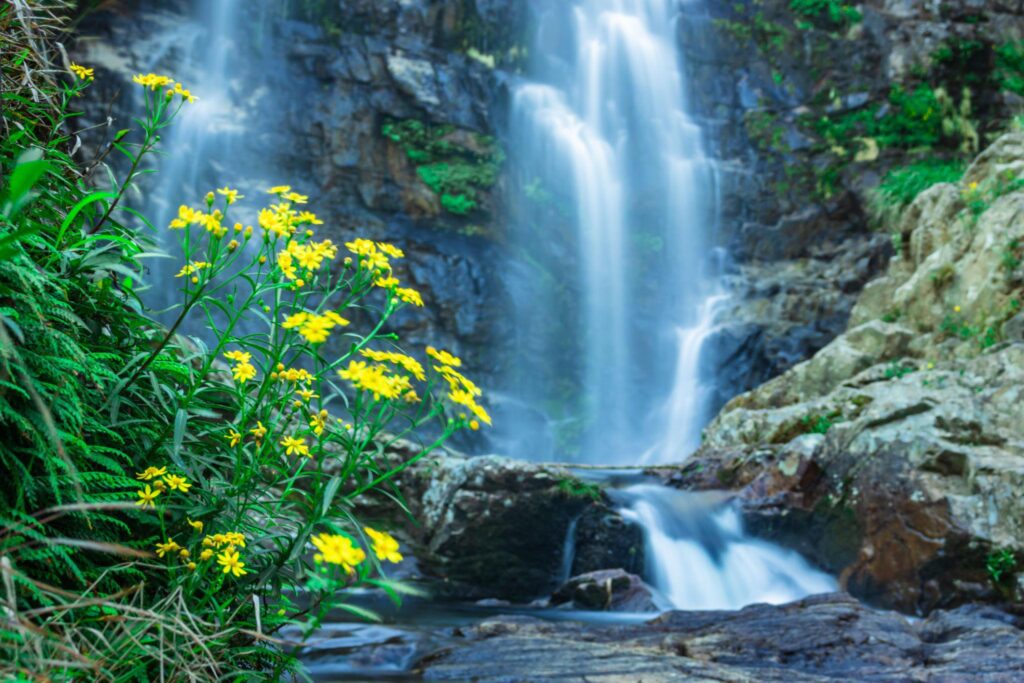

Why Trust The Candid Shoot?
At The Candid Shoot, we believe photography is best learned through consistent practice, experimentation, and real-world experience—not just theory. Every tutorial published on this website is designed to simplify complex photography concepts into practical, easy-to-follow guidance that photographers can apply with confidence.
Our content is carefully researched using official camera manufacturer documentation, photography industry resources, and hands-on testing wherever applicable. Rather than recommending expensive gear or unnecessary techniques, we focus on helping photographers understand the fundamentals that lead to consistently better photographs.
Whether you’re learning exposure for the first time, improving composition, choosing camera equipment, or exploring modern AI-powered photography tools, our goal is to provide accurate, practical, and regularly updated information that supports photographers at every stage of their journey.
Our Editorial Standards
- Every tutorial is reviewed for factual accuracy before publication.
- Technical information is verified against official manufacturer documentation and trusted photography resources whenever possible.
- Articles are updated to reflect changes in camera technology, photography software, and industry best practices.
- We prioritize practical, beginner-friendly explanations without sacrificing technical accuracy.
- Product recommendations are based on research, features, real-world usability, and value rather than promotional claims.
Our Commitment to Readers
Photography continues to evolve with new cameras, editing software, and AI-powered tools. We regularly review and update our content to ensure it remains relevant, accurate, and useful for modern photographers.
If you discover outdated information, notice an error, or have suggestions that could improve this guide, we welcome your feedback through our contact page. Our objective is to make The Candid Shoot a trusted learning resource for photographers worldwide.
Call to Action
Ready to take your photography skills to the next level?
Explore The Candid Shoot for in-depth photography tutorials, camera reviews, posing guides, lighting techniques, editing tips, and practical advice designed to help beginners become confident photographers.
Whether you’re using a smartphone, DSLR, or mirrorless camera, you’ll find resources that help you capture better photos and build your photography journey.
FAQs:
How can I start learning photography as a complete beginner?
Start by learning the fundamentals instead of trying to master every camera feature at once. Understand exposure, focus, composition, and light first. Then practice each skill with your camera and review your photographs to identify what worked and what needs improvement.
Can I learn photography without an expensive camera?
Yes. You can learn photography with an entry-level camera, an older interchangeable-lens camera, or even a smartphone. Composition, lighting, timing, and observation often have a greater impact on a photograph than the price of the camera. Upgrade your equipment when you have identified a specific limitation that your current gear cannot solve.
What should I learn first in photography?
Start with four fundamentals: exposure, focus, composition, and lighting. Learn how aperture, shutter speed, and ISO affect exposure, then practice focusing accurately and composing your subjects. Once these basics become familiar, move into editing, specialized photography techniques, and storytelling.
What camera mode should a beginner use?
Aperture Priority (A or Av) is a useful starting point for beginners who want to learn exposure while controlling depth of field. Shutter Priority (S or Tv) can be useful when controlling movement is more important. Manual mode provides complete control, but you don’t need to use it immediately to become a good photographer.
How do I know which camera settings to change?
Think about what you want to control. Use aperture when depth of field matters, shutter speed when movement matters, and ISO when you need additional exposure flexibility. Your subject, available light, and creative goal should determine the settings rather than a fixed list of numbers.
Why are my photos not sharp even when they look focused?
Lack of sharpness can result from several problems, including camera shake, subject movement, incorrect focus, an unsuitable shutter speed, or an extremely shallow depth of field. Check whether the subject moved, whether the camera moved, and whether the focus point was actually placed on the intended subject.
How can I take better photos without buying new equipment?
Start by improving your use of light, composition, perspective, and timing. Move around your subject, look for cleaner backgrounds, experiment with different lighting directions, and deliberately choose your camera settings. Reviewing your unsuccessful photographs can also reveal problems that have nothing to do with equipment.
Should I learn photography with a smartphone or a camera?
Either can be an effective starting point. A smartphone is convenient and removes much of the technical complexity, while a dedicated camera gives you greater control over lenses, exposure, depth of field, and other photographic decisions. The best choice depends on what you want to learn and what equipment you already have.
Should I shoot RAW or JPEG as a beginner?
JPEG is convenient when you want smaller files that are ready to share with minimal editing. RAW is generally preferable when you want greater flexibility during post-processing. If you’re learning editing and your camera supports RAW, practicing with RAW files can help you understand exposure, white balance, highlights, shadows, and color adjustments more deeply.
How often should I practice photography to improve?
Consistency matters more than the number of hours you practice. Even short, focused sessions can be valuable if you practice a specific skill and review the results afterward. Instead of taking random photographs, set small challenges involving composition, lighting, exposure, focus, or movement.
How long does it take to become good at photography?
There is no fixed timeline because photography involves both technical knowledge and visual judgment. You can learn the basic camera controls relatively quickly, but developing strong composition, lighting, timing, and personal style takes continued practice. Regularly photographing, reviewing, and correcting your mistakes will accelerate your progress.
What should I photograph when I have nothing interesting to shoot?
You don’t need an unusual subject to practice photography. Choose an everyday object, person, room, street, or outdoor scene and photograph it from different angles. Change the lighting, perspective, composition, distance, and camera settings. Learning to create interesting photographs from ordinary subjects is an excellent way to develop your visual skills.
Is editing necessary to create good photographs?
Editing is not required to make every photograph successful, but it can help refine exposure, color, composition, and overall presentation. The strongest workflow is to capture the best photograph possible in-camera and then use editing to enhance it rather than trying to rescue every technical mistake.
What is the best way to improve photography skills?
Use a simple learning cycle: learn one concept, practice it, review your photographs, identify mistakes, and try again. Study photographs you admire, experiment with different lighting and compositions, and occasionally limit yourself to one camera and one lens. Consistent deliberate practice is more valuable than constantly buying new equipment.
Photography Tutorials Resources
- Adobe Photography Discover Hub
- Adobe Lightroom Learning Center
- Adobe Photoshop Tutorials
- Digital Photography School
- Photography Life
- PetaPixel Photography News & Tutorials
Camera Manufacturer Learning Resources
- Canon Photography Tips & Techniques
- Nikon Learn & Explore
- Sony Alpha Universe
- Fujifilm X Stories
- OM System Learn Center
Composition & Photography Theory
- National Geographic Photography Tips
- Google Arts & Culture Photography Collection
- The Metropolitan Museum of Art Photography Collection





Leave a Reply