
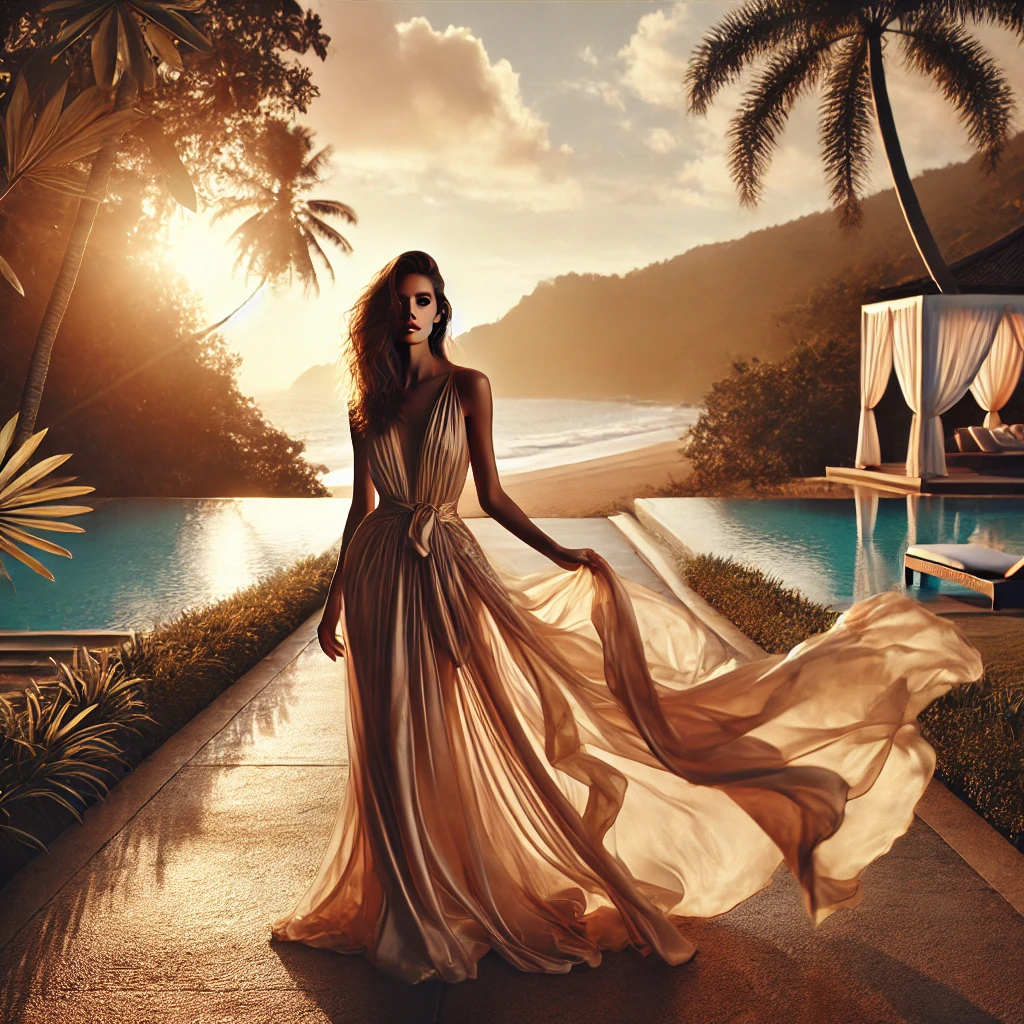
A sarong is one of the most versatile fashion accessories, making it an ideal choice for photoshoots. Its fluid nature, vibrant colors, and lightweight fabric allow it to complement different environments beautifully. Whether wrapped around the waist, draped over the shoulders, or used as a flowing dress, a sarong adds movement and elegance to photographs. However, choosing the right location plays a crucial role in setting the tone for your shoot. In this guide, we explore the best locations for sarong photoshoots, including beaches, poolside spots, tropical gardens, and even indoor settings, ensuring you get stunning and artistic results.
Why Trust The Candid Shoot?
At The Candid Shoot, we publish practical photography guides based on real-world shooting techniques, camera knowledge, lighting setups, and post-processing workflows. Our goal is to simplify photography concepts so beginners, hobbyists, creators, and professionals can capture better images with confidence.
Every guide is carefully reviewed and updated to reflect current photography trends, camera technology, AI-powered editing tools, and industry best practices. Whenever relevant, we reference trusted photography resources and official manufacturer documentation to ensure our recommendations remain accurate and reliable.
Whether you’re photographing products for an online store, social media, Amazon listings, or personal projects, our tutorials are designed to help you improve image quality while making informed equipment and workflow decisions.
Quick Answer
Product photography is the process of creating high-quality images that accurately showcase a product’s appearance, features, and details. Effective product photography combines proper lighting, composition, camera settings, backgrounds, and editing techniques to produce professional images that increase customer trust and improve online sales.
Learn More About Product Photography
If you’re looking to master product photography from beginner to advanced level, don’t miss our complete guide:
👉 Powerful Product Photography Secrets for Photos
Inside this comprehensive guide, you’ll learn:
- Camera settings for product photography
- Lighting techniques for every budget
- Background selection
- Composition tips
- Lens recommendations
- Editing workflow
- AI tools for product photography
- Studio setup ideas
- Photography mistakes to avoid
- Professional workflow from planning to final image
This pillar guide connects all of our product photography tutorials in one place, making it the perfect starting point for beginners and experienced photographers alike.
1. Beach Photoshoots: Capturing the Natural Breeze & Ocean Backdrop
Why the Beach is Perfect:
The beach is the ultimate setting locations for sarong photoshoots, offering a natural and dreamy atmosphere. The combination of golden sand, crashing waves, and warm sunlight creates an ethereal look, enhancing the elegance of the sarong.
Best Time for a Beach Photoshoot:
- Golden Hour: Just after sunrise or before sunset for soft, warm lighting.
- Midday with Shadows: For dramatic contrasts and strong silhouettes.
- Cloudy Days: To avoid harsh lighting and create a moody effect.
Posing & Styling Tips:
- Let the wind work in your favor – hold the sarong lightly to create movement.
- Use the shoreline – walking along the water’s edge enhances the flow of fabric.
- Experiment with wet draping – a wet sarong clings to the body, emphasizing curves elegantly.
2. Poolside Shoots: Luxury & High-Fashion Aesthetic
Why Poolside Settings Work:
For a more glamorous and controlled setting, poolside locations are perfect. They offer a clean, modern look with a balance of reflections, water elements, and stylish lounging areas.
Ideal Poolside Features:
- Infinity Pools: Provide a sleek, seamless backdrop.
- Tiled or Wooden Decks: Add depth and contrast.
- Private Villas or Resorts: Offer an exclusive, high-end aesthetic.
Creative Ideas for Poolside Photos:
- Sarong as a Cover-Up: Style it over a swimsuit for an effortless vacation vibe.
- Floating Sarong Look: Let the sarong float in the water for a surreal effect.
- Sitting by the Edge: Showcasing reflections while dipping feet in the pool creates a serene, elegant pose.
3. Tropical Gardens: Embracing Nature’s Lush Beauty
Why Tropical Gardens Work for Sarong Photography:
Surrounded by greenery, tropical flowers, and filtered sunlight, tropical gardens create an exotic, nature-inspired aesthetic. The organic surroundings provide a beautiful contrast to the soft, flowing texture of the sarong.
How to Make the Most of a Garden Photoshoot:
- Use vibrant flowers – place colorful flora in the background to enhance composition.
- Play with light and shadow – dappled sunlight through leaves adds depth.
- Incorporate natural props – tree branches, bamboo fences, and tropical plants enrich the setting.
4. Waterfalls & Lakes: A Dreamy & Ethereal Look
Why Water-Based Locations Enhance Sarong Photoshoots:
Waterfalls and lakes introduce an element of motion and reflection, making them an excellent choice for capturing the fluidity of sarong drapery. The mist and natural textures add a fairytale-like quality to the images.
Tips for Shooting at Water-Based Locations:
- Use long exposure settings – create soft, dreamy water effects.
- Play with wet fabric draping – water enhances the sarong’s transparency and flow.
- Go barefoot for authenticity – grounding the subject in nature creates an organic, effortless vibe.
5. Desert & Dunes: Minimalist & Dramatic Photography
The Appeal of Desert Photoshoots:
The vast, open landscapes of deserts and dunes create a minimalist yet dramatic background. The neutral tones of the sand contrast beautifully with the bold colors of sarongs.
Best Styling for a Desert Shoot:
- Wind-swept sarong movements – dramatic fabric flows against open landscapes.
- Sunset hues – golden-hour lighting enhances the warmth of the scene.
- Monochrome elegance – pairing neutral tones with a pop of color adds high-fashion appeal.
6. Indoor Studio: High-End Editorial Vibes
Why an Indoor Studio Works:
For more controlled lighting and conceptual shots, an indoor studio setting allows you to experiment with different backgrounds, shadows, and dramatic lighting setups.
Ways to Elevate Indoor Sarong Photography:
- Backlit Effects: Creates stunning silhouettes against sheer fabric.
- Minimalist Setup: Focuses on elegance and texture without distractions.
- Soft Draping: Use wind machines or handheld fans for gentle fabric movement.
Conclusion: Choosing the Best Location for Your Sarong Shoot
Each location offers unique advantages, whether you’re aiming for natural, high-fashion, or artistic shots. By selecting the right environment and pairing it with intentional styling, you can achieve breathtaking sarong photography that stands out.
No matter the setting, embrace the fluidity of the sarong, experiment with movement, and let the location enhance your visual storytelling.
Frequently Asked Questions:
What is product photography?
Product photography is the process of photographing products in a way that highlights their features, quality, and design. High-quality product photos help businesses increase customer trust, improve conversions, and reduce product returns.
What equipment is best for product photography?
For most products, you’ll need:
A camera or modern smartphone
A tripod
Softbox or LED lighting
White or colored background
Reflectors or diffusers
Basic photo editing software
Professional equipment can improve quality, but proper lighting is usually more important than an expensive camera.
What lighting is best for product photography?
Soft, diffused lighting is generally the best choice because it minimizes harsh shadows and accurately represents product colors. Softboxes, LED panels, and natural window light are commonly used depending on the shooting environment.
How can I improve product photography for eCommerce?
To improve eCommerce product photos:
Use consistent lighting
Keep backgrounds clean
Photograph multiple angles
Show product details and textures
Maintain accurate colors
Optimize image size for faster website loading
Edit images without making the product look unrealistic
Can I use a smartphone for product photography?
Yes. Modern smartphones can produce professional-looking product photos when paired with good lighting, a stable tripod, and proper editing. For many small businesses, a smartphone is an excellent starting point before investing in dedicated camera equipment.
Why is product photography important for online sales?
Customers cannot physically inspect products online. High-quality product images build trust, improve user experience, increase click-through rates, and often lead to higher conversion rates while reducing product returns.
Can AI improve product photography?
Yes. AI tools can remove backgrounds, enhance image quality, improve lighting, generate realistic backgrounds, resize images for different marketplaces, and automate editing workflows. AI should be used to enhance product photos while keeping them accurate and representative of the actual product.
What image size is best for product photography websites?
The ideal image size depends on the platform, but most websites perform well with:
JPEG or WebP format
1200–2000 pixels on the longest side
Compressed images under 300 KB when possible
Proper alt text for accessibility and SEO
Related Product Photography Guides
Continue improving your photography skills with these helpful resources:
- Product Photography Lighting Guide
- Best Cameras for Product Photography
- DIY Product Photography Setup at Home
- White Background Product Photography Tips
- Product Photography Camera Settings Explained
- Best Lenses for Product Photography
- AI Product Photography Tools
- Product AI Photo Editing Guide
- Photography Tutorials for Beginners
Recommended Resources
Improve Your Product Photography Skills
Photography is a skill that improves with practice. Try experimenting with different lighting setups, camera angles, and editing techniques to discover what works best for your products. Even small improvements in composition and lighting can make your images look significantly more professional.
If you enjoyed this guide, explore more tutorials on The Candid Shoot to continue improving your photography skills.




Leave a Reply