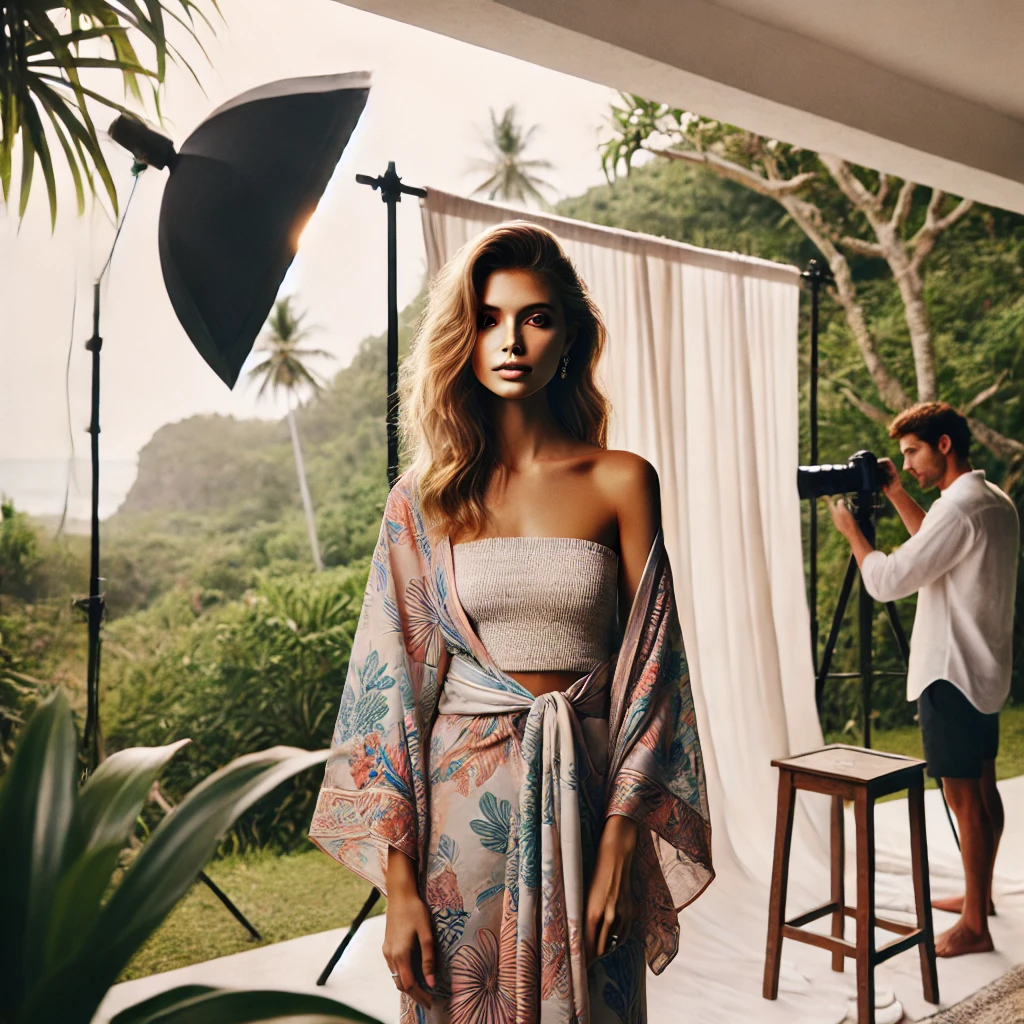
Sarong fashion photography captures elegance, movement, and artistic styling, making it a staple in both editorial and commercial fashion photography. A well-executed photoshoot highlights the fluidity of the fabric, the natural environment, and the model’s expression. However, even the most stunning raw images benefit from expert post-processing techniques. With the right editing, a simple sarong fashion shoot can transform into a high-fashion masterpiece.
Editing plays a vital role in fine-tuning details, enhancing colors, refining textures, and elevating the overall aesthetic. Whether you’re a professional photographer, a social media influencer, or an editor, mastering these techniques can significantly improve your sarong fashion photography. This comprehensive guide explores the best editing techniques to achieve flawless, editorial-quality images.
1. Enhancing Colors for Vibrant & Fashion-Forward Edits
Color is one of the most crucial elements in sarong fashion photography because it defines the style and mood of the image. The right color grading techniques can make the fabric pop while maintaining a polished and professional finish.
A. Adjusting Hue, Saturation & Luminance (HSL)
- Boost the Colors of the Sarong: Increase saturation slightly to highlight its vibrancy without making it look artificial.
- Balance Skin Tones: Adjust the luminance of reds and oranges to keep skin looking smooth and natural.
- Enhance the Background: Modify the blues for a richer sky and greens for lush, tropical surroundings.
B. Creating a Cohesive Color Palette
Fashion photography thrives on color harmony. Use Lightroom or Photoshop to apply color presets or manually adjust tones to ensure the sarong, model’s skin, and background blend seamlessly.
Popular Color Grading Styles:
✔ Warm & Golden: Best for sunset beach shots.
✔ Cool & Ethereal: Ideal for a high-fashion editorial feel.
✔ Earthy & Natural: Complements boho-chic sarong styles.
✔ Bold & High-Contrast: Works well for striking, modern looks.
💡 Pro Tip: Use the “Split Toning” feature in Lightroom to add subtle highlights and shadows, giving depth to the image.
2. Perfecting Textures for a Polished Look
Sarongs are known for their flowing, lightweight fabrics, which require careful texture enhancement in editing.
A. Sharpening the Fabric Details
- Increase Clarity: Enhances fabric folds and intricate details.
- Use High-Pass Filter in Photoshop: Sharpens edges while maintaining smooth skin textures.
- Apply Texture & Dehaze Filters: Adds depth, especially in golden hour or backlit shots.
B. Smoothing the Flow of the Fabric
Motion can create unwanted wrinkles or distortion in the fabric. Use the Liquify Tool in Photoshop to subtly reshape the sarong while maintaining its natural movement.
💡 Pro Tip: Slightly reduce clarity in select areas while maintaining sharpness along the edges to achieve a soft yet defined look.
3. Skin Retouching for a Natural, Editorial Finish
A flawless yet natural skin texture is essential in fashion photography. Over-editing can make the subject look artificial, while under-editing might leave distractions.
A. Frequency Separation for Even Skin Texture
Use frequency separation to remove blemishes while keeping natural skin texture intact. This method smooths the skin without losing fine details.
B. Dodging & Burning for Contour Enhancement
This technique helps sculpt facial features and highlight body curves naturally. ✔ Dodge (Lighten): Apply to highlights on cheekbones, shoulders, and collarbones. ✔ Burn (Darken): Enhance natural shadows to add depth and shape.
💡 Pro Tip: Keep it subtle. High-fashion photography should enhance natural beauty rather than alter features dramatically.
4. Refining the Background for a Clean Composition
The background plays a major role in sarong photography, whether it’s a tropical beach, a poolside deck, or a minimal studio backdrop.
A. Removing Distractions
Use the Spot Healing Brush Tool in Photoshop to erase any unwanted elements, such as stray people, harsh shadows, or distractions in the frame.
B. Blurring & Depth Effects
- Use Gaussian Blur: If the background competes with the subject, add a subtle blur.
- Apply Depth Masks: Enhance separation between the subject and background for a more dynamic look.
💡 Pro Tip: Avoid over-blurring, as it can make the image look unrealistic. Instead, mimic natural lens bokeh effects.
5. Playing with Light & Shadows for a High-Fashion Look
Lighting in editing can drastically transform the mood of sarong photography.
A. Adjusting Highlights & Shadows
- Increase highlights to enhance sunlit areas.
- Deepen shadows to add dimension and drama.
- Maintain midtones for a well-balanced look.
B. Adding Artificial Light Effects
Want to create an editorial glow? Try: ✔ Soft Glow Effect: Adds a dreamy, ethereal look. ✔ Lens Flares & Light Leaks: Simulate natural sunlight reflections. ✔ Gradient Overlays: Enhance sky tones for more dynamic beach scenes.
💡 Pro Tip: When adding light effects, match the angle of natural light in the original image to keep edits realistic.
6. Final Touches: Cropping & Framing for Impact
Composition can be refined further in post-production through cropping and framing techniques.
A. Cropping for Fashion-Forward Impact
- Follow the rule of thirds to create a balanced image.
- Experiment with tight crops for a bold, modern feel.
- Keep enough negative space to emphasize movement and fabric flow.
B. Resizing for Social Media & Print
- For Instagram, use 4:5 or 1:1 aspect ratios for the best visual impact.
- For editorial layouts, ensure images are high-resolution and properly formatted.
💡 Pro Tip: If the image is meant for print, export it at 300 DPI to maintain quality.
Conclusion: Transforming Sarong Fashion Photography with Editing
Editing is the final, crucial step in sarong fashion photography, taking images from raw captures to high-fashion editorials. By mastering color grading, texture enhancement, skin retouching, background refinement, and lighting adjustments, you can create breathtaking, professional-quality photographs.
Whether you aim for a bold, vibrant look or a soft, dreamy aesthetic, these techniques will help you achieve a polished and compelling final image. Experiment, refine your style, and most importantly—let the elegance of the sarong shine through.
-
Empowerment Through Boudoir Photography: The Candid Shoot
-

Bold Photography: Creating Powerful & Confident Visual Stories
-
Jaipur’s Favorite Destination for Couple Shoots | The Candid Shoot
-
Bold Shoot Photographer with Studio in Jaipur | The Candid Shoot
-
Empowerment Through Boudoir Photography: The Candid Shoot
Boudoir Photography as Empowerment Boudoir photography has evolved far beyond traditional notions of intimacy or sensuality. Modern boudoir photography is about empowerment, confidence, and self-expression, not merely performing for the camera. At its heart, boudoir photography is a visual dialogue between the subject and themselves, mediated by a professional photographer. It provides a private, safe
-
Jaipur’s Favorite Destination for Couple Shoots | The Candid Shoot
Why Couple Shoots Matter More Than Ever Couple shoots have evolved far beyond posed photographs and forced smiles. Today, couples look for experiences that feel natural, meaningful, and reflective of who they are together. A couple shoot is no longer about perfection. It is about presence, connection, and shared emotion. At The Candid Shoot, we
-
Bold Shoot Photographer with Studio in Jaipur | The Candid Shoot
The phrase “bold shoot photographer” often triggers assumptions—many of them incomplete, outdated, or shaped by stereotypes. In reality, bold photography has evolved far beyond shock value or surface-level aesthetics. Today, bold shoots represent self-expression, body confidence, emotional honesty, and artistic courage. At The Candid Shoot, bold photography is not about exposure—it is about expression. It
-
Styling Tips for Maternity Shoots: Looking Timeless, and Confident
Styling as the Silent Storyteller in Maternity Shoots Maternity shoots are not simply about documenting pregnancy. They are about honoring a season of transformation—physical, emotional, relational, and often spiritual. Styling plays a foundational role in how that transformation appears, feels, and endures through photographs. When people look back at maternity photographs years later, they rarely
-
Mobile Photography Hacks: Candid Moments with Your Phone
Discover high-impact mobile photography hacks to capture genuine, gorgeous candid moments with your phone. Learn practical tips, composition secrets, and pro techniques to turn everyday scenes into stunning visual stories. Introduction: The New Age of Mobile Photography Photography has evolved beyond heavy cameras, technical jargon, and expensive equipment. Today, the power to capture extraordinary moments