
Table of Contents
Introduction
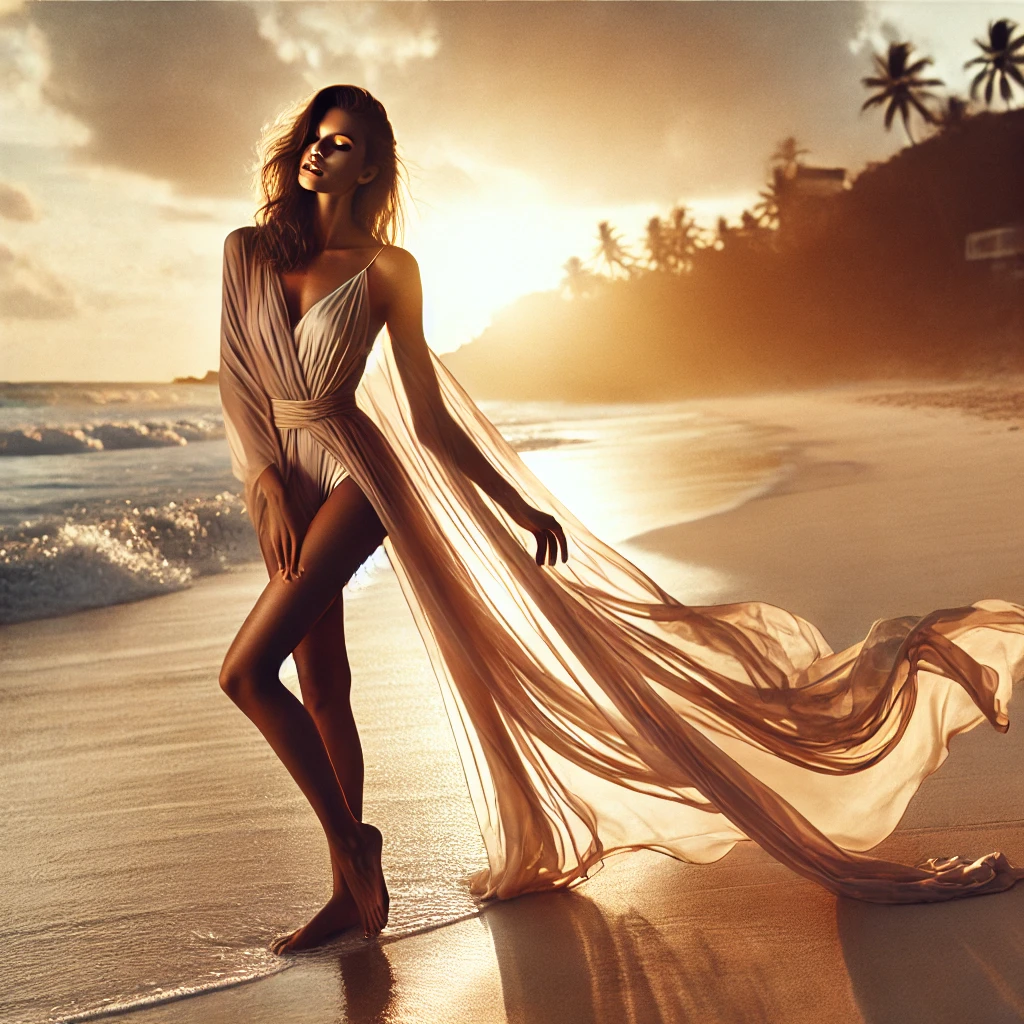
Sarongs are an essential beachwear accessory, blending effortless style with versatility. Whether wrapped around the waist, draped over the shoulders, or used as a flowing cover-up, sarongs add elegance and movement to sarong beachwear photography. Their lightweight fabric catches the breeze, creating a dynamic and visually captivating effect that enhances the composition of any photoshoot. For photographers and models alike, knowing how to style, pose, and utilize a sarong in beachwear photography can elevate an image from simple to breathtaking. In this guide, we’ll explore how to choose the right sarong, work with natural elements, and capture stunning shots that exude warmth, sophistication, and tropical beauty.
Why Trust The Candid Shoot?
At The Candid Shoot, we publish practical photography guides based on real-world shooting techniques, camera knowledge, lighting setups, and post-processing workflows. Our goal is to simplify photography concepts so beginners, hobbyists, creators, and professionals can capture better images with confidence.
Every guide is carefully reviewed and updated to reflect current photography trends, camera technology, AI-powered editing tools, and industry best practices. Whenever relevant, we reference trusted photography resources and official manufacturer documentation to ensure our recommendations remain accurate and reliable.
Whether you’re photographing products for an online store, social media, Amazon listings, or personal projects, our tutorials are designed to help you improve image quality while making informed equipment and workflow decisions.
Quick Answer
Product photography is the process of creating high-quality images that accurately showcase a product’s appearance, features, and details. Effective product photography combines proper lighting, composition, camera settings, backgrounds, and editing techniques to produce professional images that increase customer trust and improve online sales.
Learn More About Product Photography
If you’re looking to master product photography from beginner to advanced level, don’t miss our complete guide:
👉 Powerful Product Photography Secrets for Photos
Inside this comprehensive guide, you’ll learn:
- Camera settings for product photography
- Lighting techniques for every budget
- Background selection
- Composition tips
- Lens recommendations
- Editing workflow
- AI tools for product photography
- Studio setup ideas
- Photography mistakes to avoid
- Professional workflow from planning to final image
This pillar guide connects all of our product photography tutorials in one place, making it the perfect starting point for beginners and experienced photographers alike.
1. Choosing the Perfect Sarong for Beachwear Photography
A well-chosen sarong complements both the subject and the surrounding environment, enhancing the overall visual appeal.
A. Fabric Selection: Light, Flowing, and Photogenic
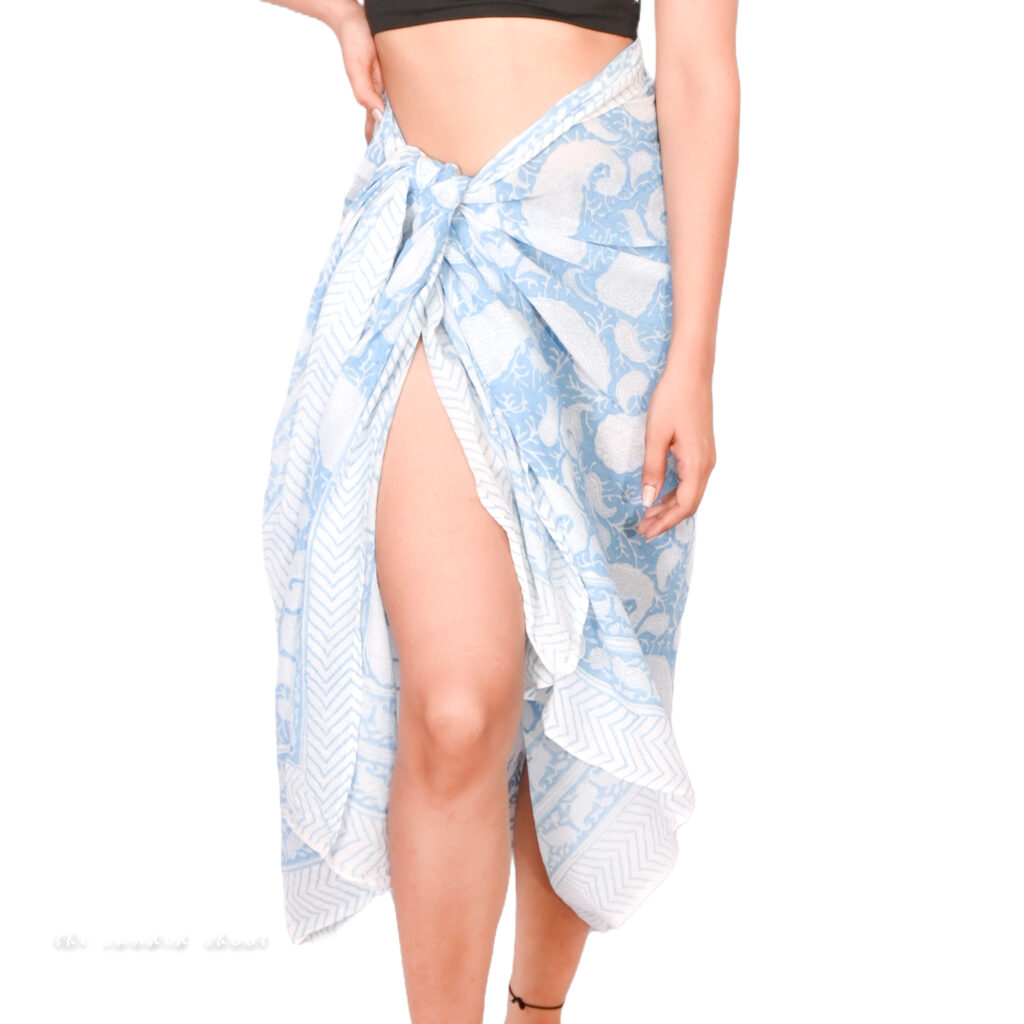
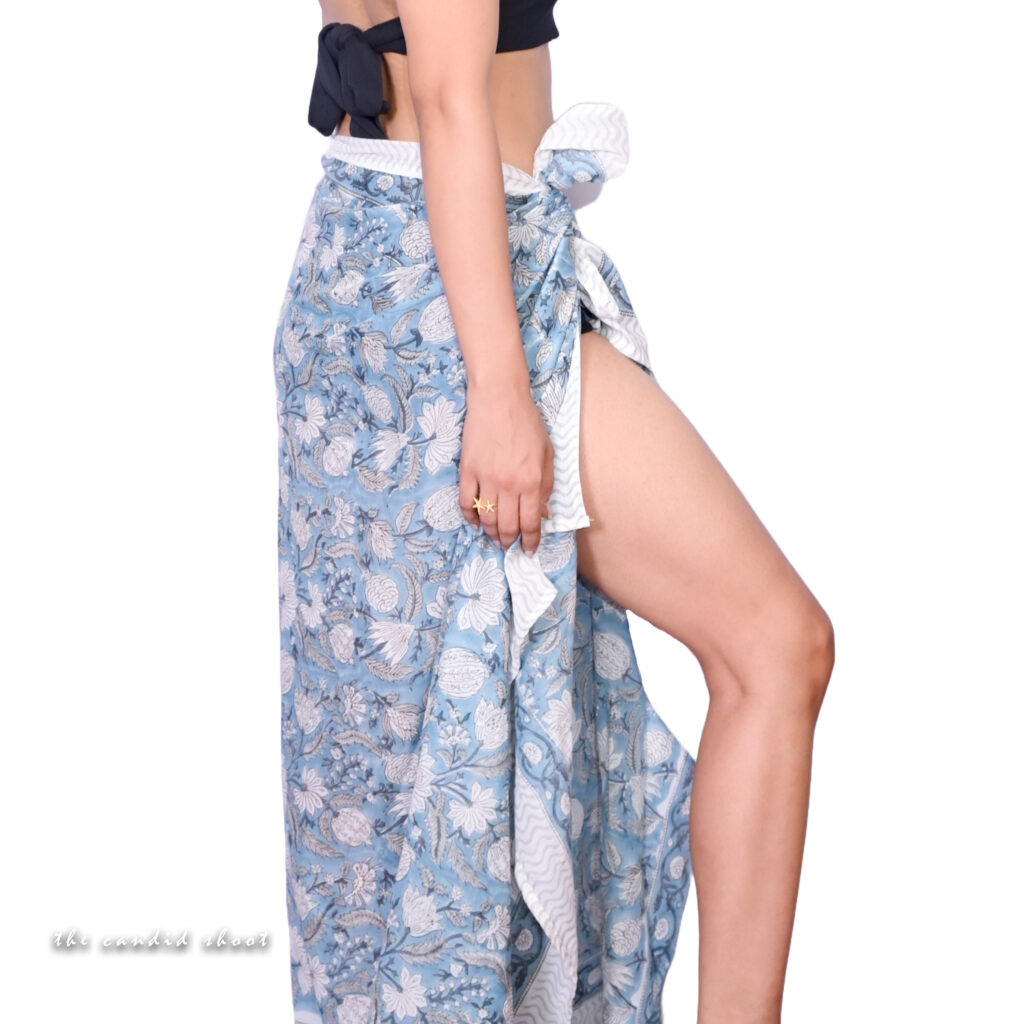
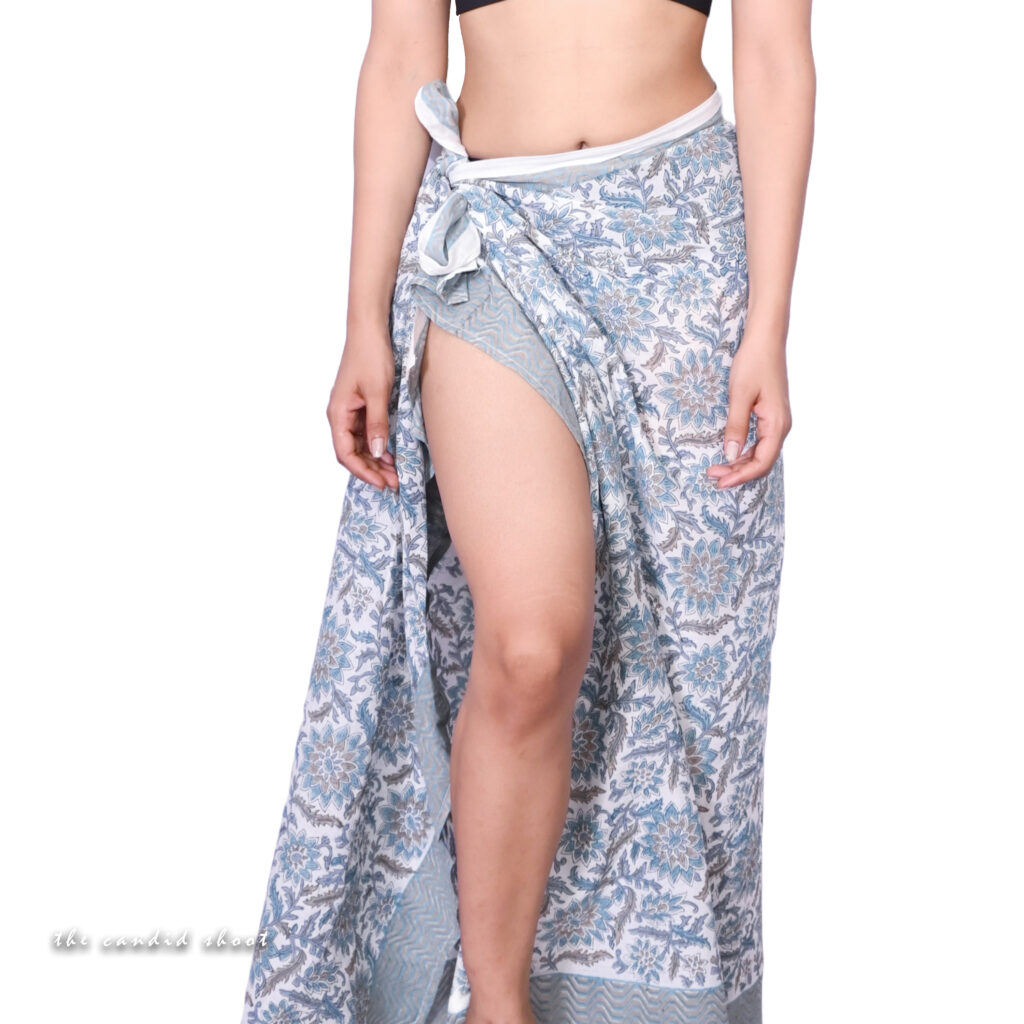
The fabric of the sarong significantly impacts how it appears in photos. Opt for materials that move gracefully in the breeze and allow for layering and draping.
- Sheer Chiffon & Silk – Creates a soft, romantic aesthetic with light diffusion.
- Cotton & Linen – Offers a relaxed, bohemian vibe that suits tropical settings.
- Satin & Lightweight Jersey – Adds a luxurious feel while reflecting light beautifully.
💡 Pro Tip: Avoid heavy fabrics that don’t catch the wind or flow well, as they can appear stiff and unflattering in photographs.
B. Colors & Patterns: Enhancing Mood & Composition
The color and design of a sarong play a vital role in defining the mood of the shoot.
- Soft Pastels & Whites – Create a dreamy, ethereal effect.
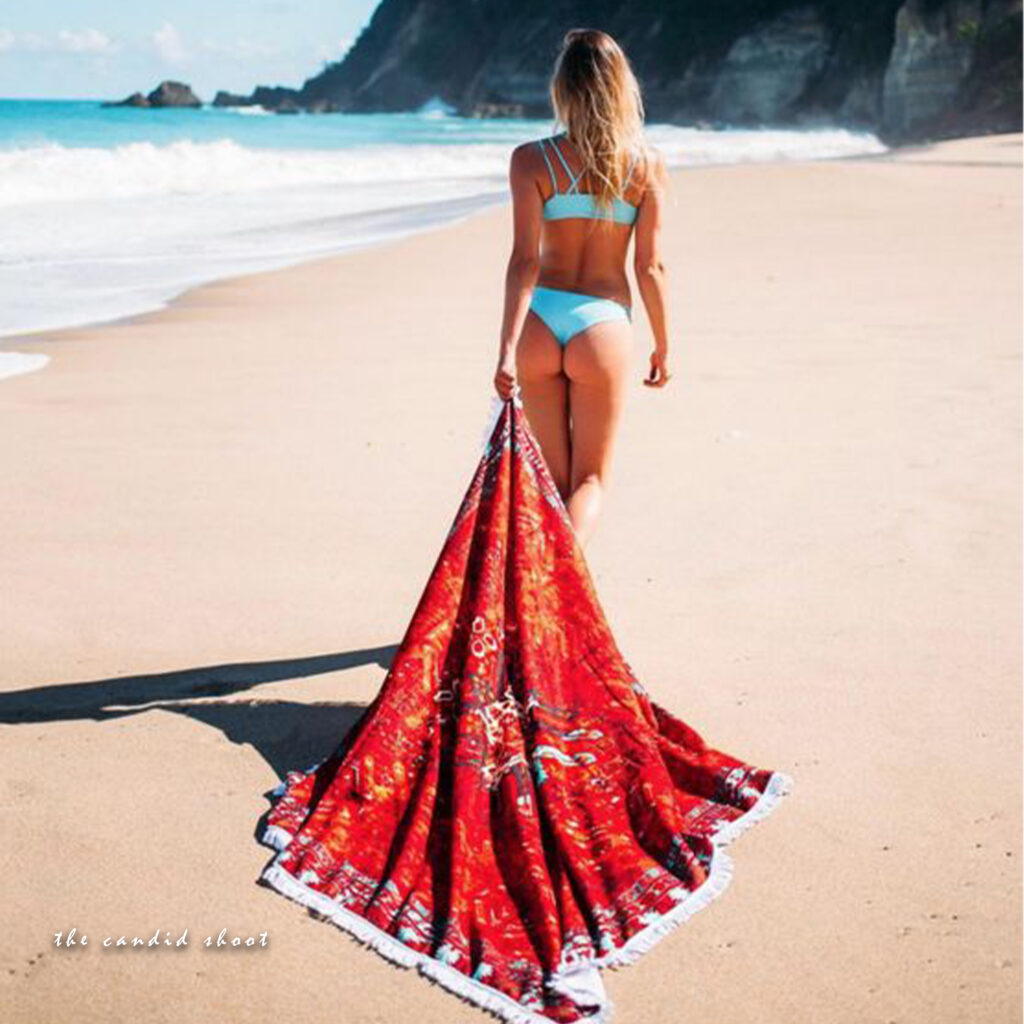
- Bold Reds & Blues – Add a striking contrast against ocean and sand.
- Earthy Neutrals – Blend harmoniously with the natural environment.
- Tropical Prints & Ombre Styles – Introduce vibrant energy and artistic flair.
💡 Photographer’s Insight: Choose a sarong color that contrasts or complements the model’s skin tone and the location’s natural elements for the best visual balance.
2. Mastering Sarong Draping Techniques for Stunning Photos
The way a sarong is styled affects the overall impact of the shot. Experimenting with different draping methods allows for diverse compositions and moods.
A. Classic & Elegant Wraps
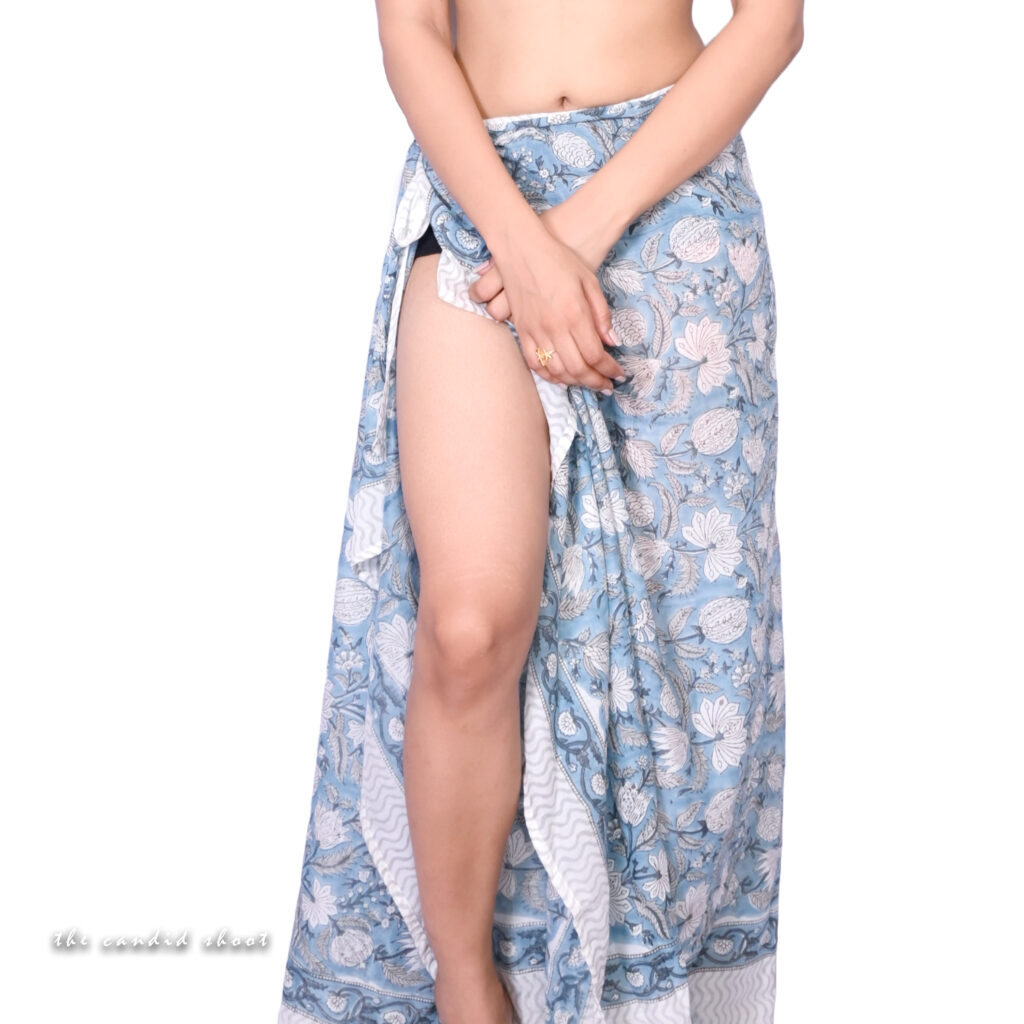
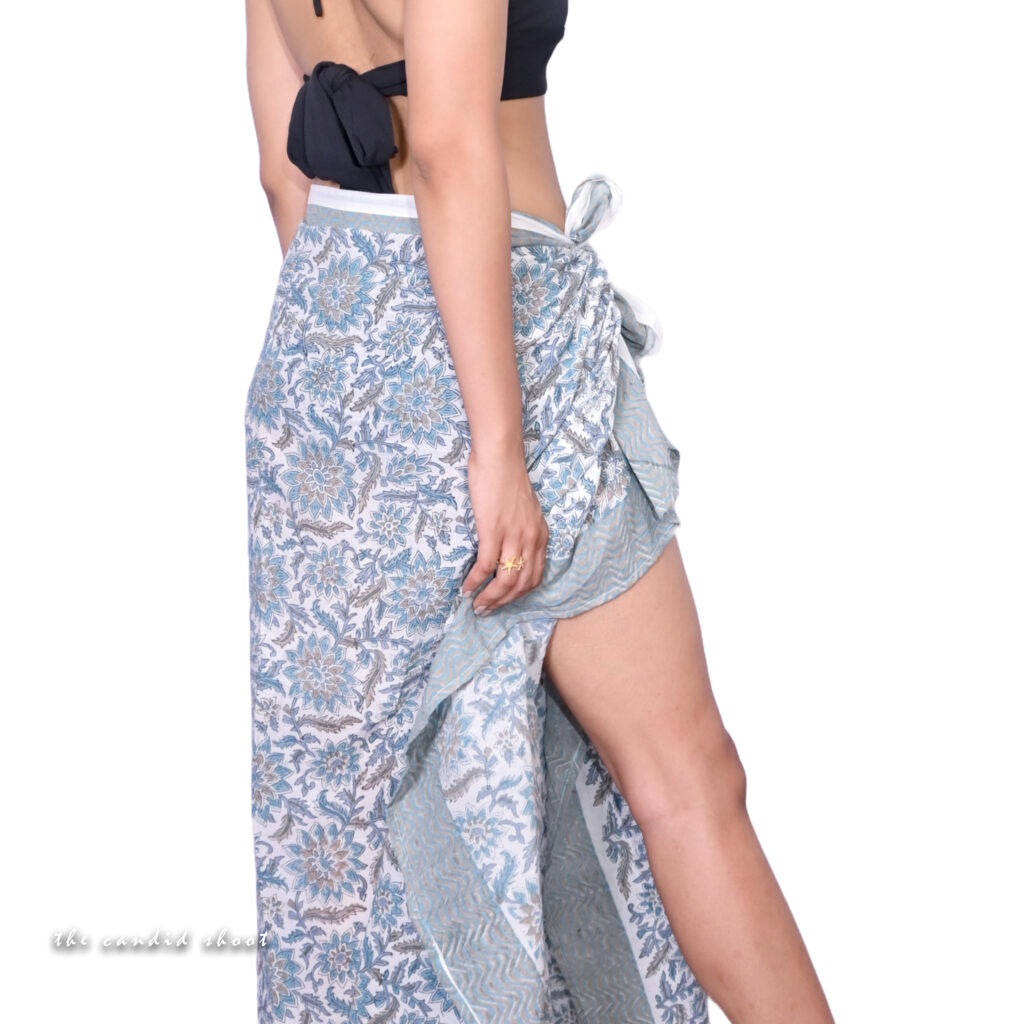
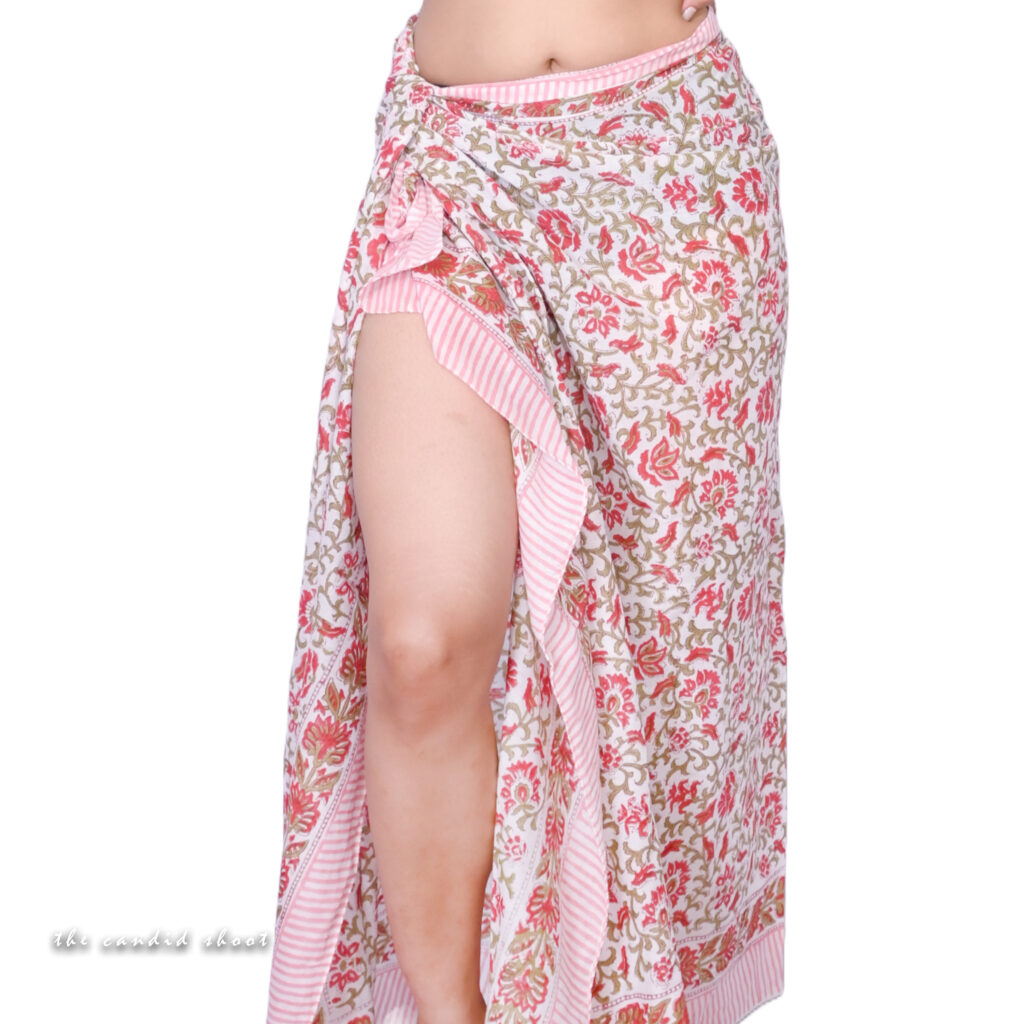
- Waist Wrap & Side Knot – A simple yet timeless way to wear a sarong, creating an effortlessly chic look.
- One-Shoulder Drape – Adds sophistication while subtly revealing skin.
- Halter Dress Style – Tied around the neck for a flowing, dress-like silhouette.
B. Creative & Artistic Drapes
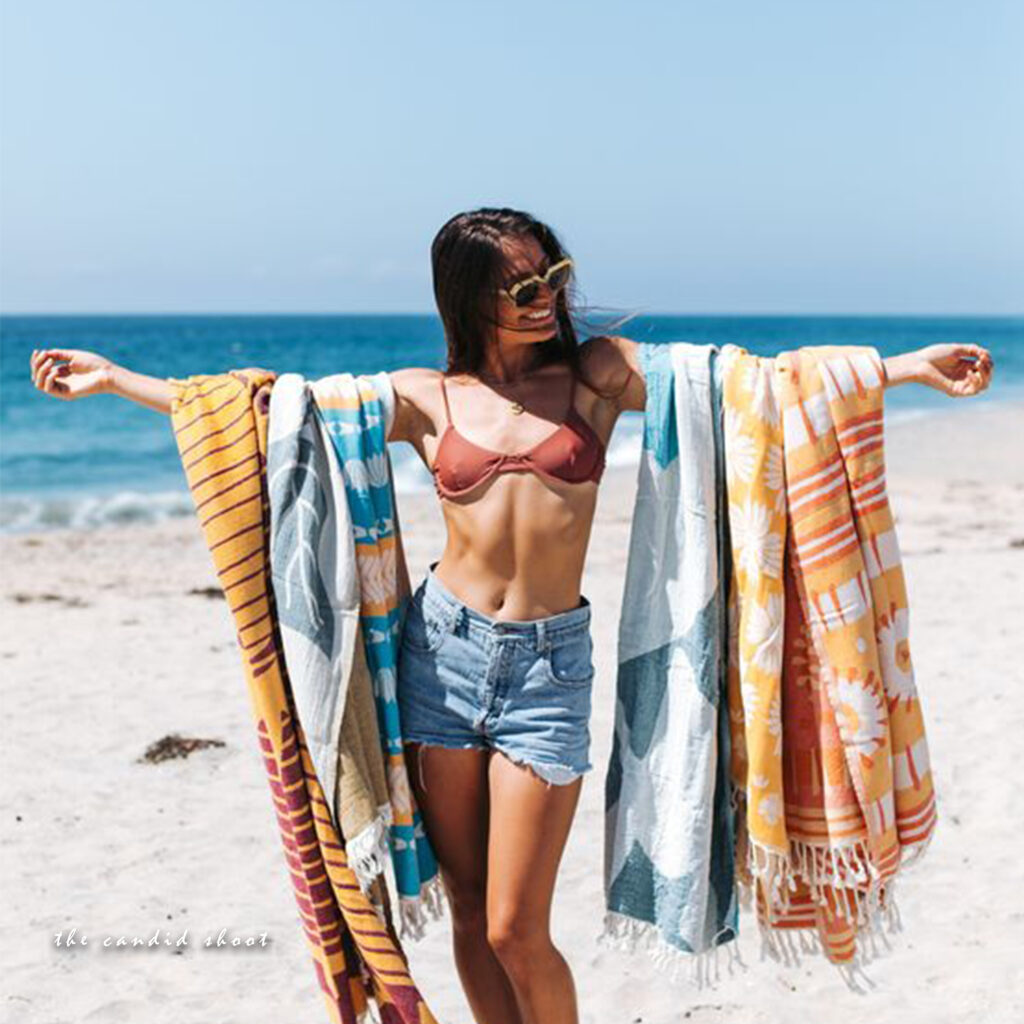
- Loose Wrap with Movement – Holding the sarong lightly allows for natural sways and wind effects.
- Open Front with Bikini Reveal – Balances modesty with sensuality.
- Overhead Flowing Fabric – Holding the sarong above the head adds dramatic movement and an artistic feel.
💡 Styling Tip: Experiment with different ways to wrap and tie the sarong to find what best enhances body contours and movement.

3. Lighting & Composition: Creating Breathtaking Shots
A. Using Natural Light for Maximum Impact
Beach photography thrives on natural light, but understanding how to use it correctly is key.
- Golden Hour (Sunrise/Sunset) – Provides warm, soft lighting that enhances skin tones and adds a romantic glow.
- Midday Light with Shadows – Can create artistic silhouettes if balanced properly.
- Backlighting with the Sun – Highlights the translucency of sheer sarongs, creating an ethereal effect.
💡 Tip: When shooting in harsh sunlight, use a sarong as a diffused light filter for softer skin tones.
B. Composition & Framing: Capturing the Essence of the Moment
- Rule of Thirds – Position the subject slightly off-center for a balanced shot.
- Leading Lines – Use waves, sand ripples, or sarong drapes to guide the viewer’s eye.
- Silhouettes & Close-Ups – Play with contrast and fabric details for artistic storytelling.
4. Capturing Movement: The Key to Dynamic Sarong Photography
The beauty of sarongs lies in their fluidity, and capturing movement enhances the energy of the shot.
A. Working with Wind & Water
- Let the Breeze Play with the Fabric – Creates a graceful, natural flow.
- Wet Sarong Effect – Clings to the body, emphasizing natural curves and textures.
- Underwater Shots – Offers a surreal, weightless aesthetic.
B. Posing for Organic Motion
- Twisting & Turning – Adds life and expression.
- Walking Along the Shore – Captures elegance in motion.
- Hand Movements with Fabric – Creates storytelling through interaction.
💡 Tip: Encourage models to move naturally, adjusting poses to create a sense of spontaneity and realism.
5. Expressions & Emotions: Elevating the Visual Story
A great sarong beachwear shot isn’t just about the outfit—it’s about the energy and expression behind it.
A. Eye Contact & Expressions
- Direct Gaze into Camera – Exudes confidence and allure.
- Soft, Downcast Eyes – Creates an intimate, dreamy mood.
- Natural, Unscripted Smiles – Evoke warmth and authenticity.
B. Body Language & Confidence
- Relaxed & Natural Postures – Avoid stiffness; embrace fluidity.
- Delicate Hand Placements – Grazing the fabric adds sensuality.
- Full-Body Awareness – Every limb contributes to the final composition.
💡 Photographer’s Insight: Directing small movements rather than rigid poses results in more captivating, organic shots.
6. Post-Processing & Editing for a Refined Look
Even the most natural beach shots can benefit from subtle enhancements.
- Adjusting Color Balance – Enhancing warm tones for a sun-kissed glow.
- Highlighting Textures – Bringing out the fabric’s movement and detail.
- Light Retouching – Keeping edits minimal for an authentic feel.
💡 Tip: Avoid over-smoothing skin—natural highlights and shadows create depth and realism.
Final Thoughts: The Art of Sarong Beachwear Photography
Sarongs are more than just a fashion statement—they are a powerful storytelling element in beach photography. When styled creatively and paired with expert lighting, movement, and composition, they bring an unparalleled elegance to the frame.
For photographers, mastering sarong beachwear photography means blending artistry with natural beauty. Whether capturing soft, flowing movements or bold, striking silhouettes, the right approach will create unforgettable images that radiate warmth, confidence, and effortless sophistication.
Frequently Asked Questions:
What is product photography?
Product photography is the process of photographing products in a way that highlights their features, quality, and design. High-quality product photos help businesses increase customer trust, improve conversions, and reduce product returns.
What equipment is best for product photography?
For most products, you’ll need:
A camera or modern smartphone
A tripod
Softbox or LED lighting
White or colored background
Reflectors or diffusers
Basic photo editing software
Professional equipment can improve quality, but proper lighting is usually more important than an expensive camera.
What lighting is best for product photography?
Soft, diffused lighting is generally the best choice because it minimizes harsh shadows and accurately represents product colors. Softboxes, LED panels, and natural window light are commonly used depending on the shooting environment.
How can I improve product photography for eCommerce?
To improve eCommerce product photos:
Use consistent lighting
Keep backgrounds clean
Photograph multiple angles
Show product details and textures
Maintain accurate colors
Optimize image size for faster website loading
Edit images without making the product look unrealistic
Can I use a smartphone for product photography?
Yes. Modern smartphones can produce professional-looking product photos when paired with good lighting, a stable tripod, and proper editing. For many small businesses, a smartphone is an excellent starting point before investing in dedicated camera equipment.
Why is product photography important for online sales?
Customers cannot physically inspect products online. High-quality product images build trust, improve user experience, increase click-through rates, and often lead to higher conversion rates while reducing product returns.
Can AI improve product photography?
Yes. AI tools can remove backgrounds, enhance image quality, improve lighting, generate realistic backgrounds, resize images for different marketplaces, and automate editing workflows. AI should be used to enhance product photos while keeping them accurate and representative of the actual product.
What image size is best for product photography websites?
The ideal image size depends on the platform, but most websites perform well with:
JPEG or WebP format
1200–2000 pixels on the longest side
Compressed images under 300 KB when possible
Proper alt text for accessibility and SEO
Related Product Photography Guides
Continue improving your photography skills with these helpful resources:
- Product Photography Lighting Guide
- Best Cameras for Product Photography
- DIY Product Photography Setup at Home
- White Background Product Photography Tips
- Product Photography Camera Settings Explained
- Best Lenses for Product Photography
- AI Product Photography Tools
- Product AI Photo Editing Guide
- Photography Tutorials for Beginners
Recommended Resources
Improve Your Product Photography Skills
Photography is a skill that improves with practice. Try experimenting with different lighting setups, camera angles, and editing techniques to discover what works best for your products. Even small improvements in composition and lighting can make your images look significantly more professional.
If you enjoyed this guide, explore more tutorials on The Candid Shoot to continue improving your photography skills.





Leave a Reply