Creating professional product photos at home has become an essential skill for eCommerce store owners, social media influencers, and small business entrepreneurs. With the right techniques, anyone can capture high-quality images that rival studio photography. This guide covers everything from essential equipment to lighting setups, composition, editing, and practical tips to elevate your product photography game.
1. Why High-Quality Product Photography Matters
1.1 The Role of Product Images in Consumer Decision-Making
Customers rely heavily on visuals when shopping online. High-quality product images enhance trust, showcase features, and influence buying behavior.
1.2 The Impact on Branding and Professionalism
Crisp, well-lit photos establish credibility and create a polished brand identity, making your products stand out in a competitive market.
1.3 Increased Engagement and Conversions
Social media platforms and online marketplaces favor visually appealing content. Eye-catching images lead to better engagement, shares, and sales conversions.
2. Essential Equipment for Home Product Photography
2.1 Choosing the Right Camera
- DSLR vs. Mirrorless: DSLRs offer flexibility, while mirrorless cameras provide compact, high-resolution options.
- Smartphones: Newer models with advanced camera systems can produce professional-quality photos with the right setup.
2.2 Lenses for Product Photography
- 50mm Prime Lens: Ideal for capturing detailed shots with natural perspective.
- Macro Lens: Perfect for intricate details like jewelry or small accessories.
2.3 Tripods and Stabilizers
- A sturdy tripod ensures sharp images and consistency across shots.
- A remote shutter release or self-timer helps eliminate motion blur.
2.4 Backdrops and Surfaces
- White seamless paper for clean, professional looks.
- Textured backgrounds for creative branding.
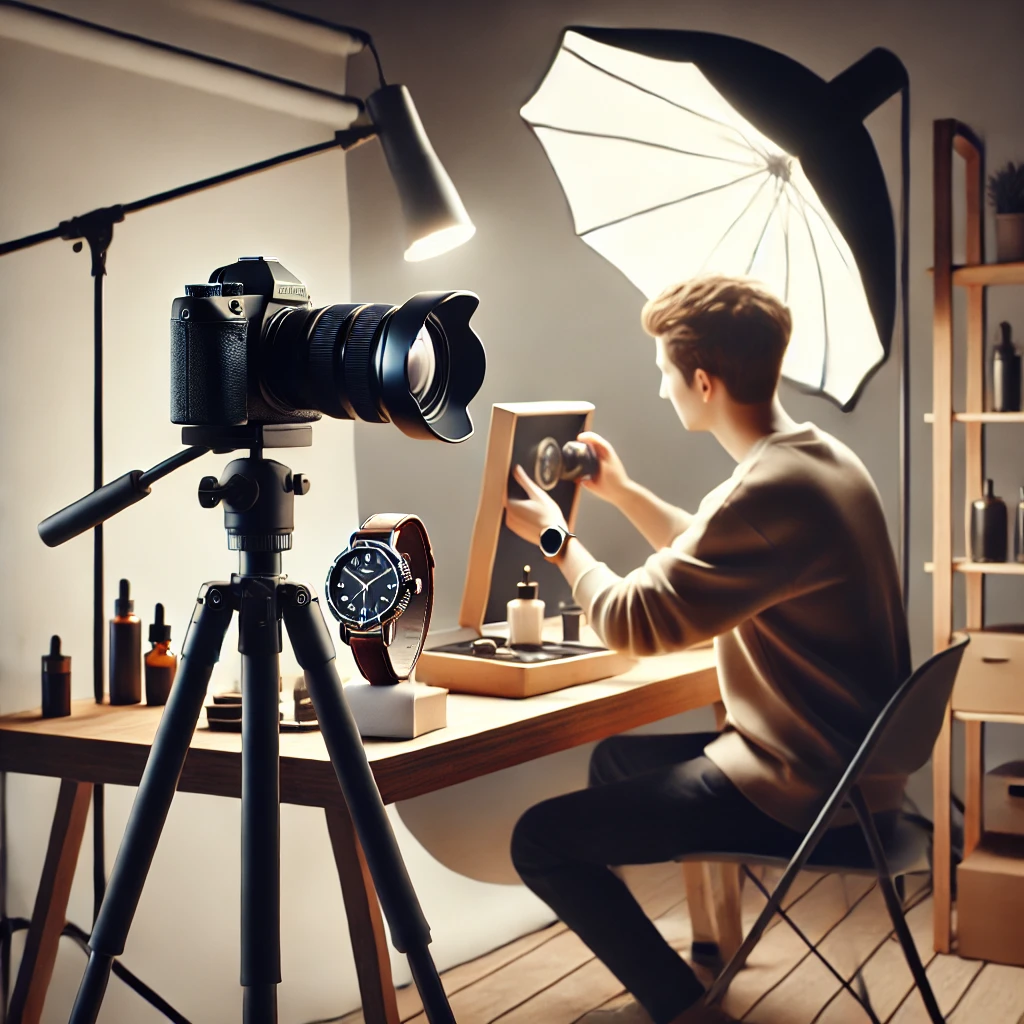
2.5 Lighting Equipment
- Softbox Lights: Provide even, diffused lighting to reduce harsh shadows.
- Ring Light: Great for illuminating smaller products and enhancing details.
- Natural Light Setup: Positioning products near large windows creates soft, natural shadows.
3. The Best Camera Settings for Product Photography
3.1 Manual vs. Auto Mode
Shooting in manual mode allows for greater control over exposure, depth of field, and white balance.
3.2 Recommended Camera Settings
- ISO: Keep it low (100-400) for minimal noise.
- Aperture (f-stop): f/8-f/16 ensures sharp focus across the product.
- Shutter Speed: Use a fast shutter speed (1/125s or higher) to prevent motion blur.
- White Balance: Adjust based on the lighting source to maintain accurate colors.
4. Mastering Lighting Techniques for Product Photography
4.1 Natural Light Setup
- Best used in the morning or late afternoon for soft shadows.
- Utilize white reflectors to bounce light and reduce harsh shadows.
4.2 Studio Lighting Basics
- Three-Point Lighting: Key light, fill light, and backlight create a professional setup.
- Diffusers and Reflectors: Control shadows and add balance to your images.
4.3 DIY Budget Lighting Hacks
- White foam boards as cheap reflectors.
- LED desk lamps with diffusers as soft lighting sources.
5. Composition and Styling for Professional Results
5.1 Rule of Thirds and Product Placement
Position products strategically to create a balanced composition and draw focus to key details.
5.2 Using Props and Backgrounds
Props add context and storytelling elements, but avoid cluttering the frame.
5.3 Experimenting with Angles and Perspectives
Different angles highlight various product features and create dynamic visuals.
6. Editing and Retouching Your Product Photos
6.1 Best Editing Software Options
- Adobe Lightroom & Photoshop: Industry standard for color correction and retouching.
- Canva & Snapseed: Free alternatives for quick editing.
6.2 Basic Edits to Enhance Product Images
- Adjust brightness, contrast, and saturation for vibrant images.
- Remove blemishes or distractions to maintain focus on the product.
6.3 Exporting for Different Platforms
Optimize images for web and social media to maintain quality while reducing file size.
7. Creating a DIY Home Studio on a Budget
7.1 Choosing the Right Space
A dedicated photography corner with minimal distractions improves consistency.
7.2 Setting Up a White Box for Small Products
A white box helps eliminate shadows and creates uniform lighting.
7.3 Organizing Your Workflow for Efficiency
- Plan shots in advance with a shot list.
- Use consistent lighting and camera settings for uniform results.
8. Common Mistakes to Avoid in Home Product Photography
8.1 Poor Lighting Choices
Overexposed or underexposed images can misrepresent the product’s true color.
8.2 Ignoring Background Distractions
A cluttered background diverts attention from the product.
8.3 Using Unstable Camera Angles
Unsteady shots lead to blurred, unprofessional images.
9. Showcasing Your Product Photos on Different Platforms
9.1 Optimizing for eCommerce Websites
Crop and resize images to meet marketplace requirements (e.g., Amazon, Etsy, Shopify).
9.2 Social Media Strategies
Tailor images to each platform’s format (Instagram square, Pinterest vertical, etc.).
9.3 Using Product Photos in Marketing Materials
Incorporate images into website banners, newsletters, and advertisements.
Conclusion
Shooting professional product photos at home is achievable with the right techniques, equipment, and creative approach. By mastering lighting, composition, and editing, you can create high-quality images that boost engagement and elevate your brand’s online presence. Start experimenting today and transform your DIY photography into a studio-quality masterpiece!
-
Vivo X300 Pro Photography Kit: Next-Gen Mobile Imaging
-

Empowerment Through Boudoir Photography: The Candid Shoot
-

Bold Photography: Creating Powerful & Confident Visual Stories
-

Jaipur’s Favorite Destination for Couple Shoots | The Candid Shoot
-
Vivo X300 Pro Photography Kit: Next-Gen Mobile Imaging
Discover the complete vivo X300 Pro photography kit guide with in-depth camera analysis, real-world case studies, portrait techniques, cinematic workflows, and pro-level tips. Learn how vivo X300 Pro transforms mobile photography for creators, influencers, and studio professionals. The vivo X300 Pro — Redefining Mobile Imaging for Creators Why the vivo X300 Pro Deserves a Dedicated
-
Empowerment Through Boudoir Photography: The Candid Shoot
Boudoir Photography as Empowerment Boudoir photography has evolved far beyond traditional notions of intimacy or sensuality. Modern boudoir photography is about empowerment, confidence, and self-expression, not merely performing for the camera. At its heart, boudoir photography is a visual dialogue between the subject and themselves, mediated by a professional photographer. It provides a private, safe
-
Jaipur’s Favorite Destination for Couple Shoots | The Candid Shoot
Why Couple Shoots Matter More Than Ever Couple shoots have evolved far beyond posed photographs and forced smiles. Today, couples look for experiences that feel natural, meaningful, and reflective of who they are together. A couple shoot is no longer about perfection. It is about presence, connection, and shared emotion. At The Candid Shoot, we
-
Bold Shoot Photographer with Studio in Jaipur | The Candid Shoot
The phrase “bold shoot photographer” often triggers assumptions—many of them incomplete, outdated, or shaped by stereotypes. In reality, bold photography has evolved far beyond shock value or surface-level aesthetics. Today, bold shoots represent self-expression, body confidence, emotional honesty, and artistic courage. At The Candid Shoot, bold photography is not about exposure—it is about expression. It
-
Styling Tips for Maternity Shoots: Looking Timeless, and Confident
Styling as the Silent Storyteller in Maternity Shoots Maternity shoots are not simply about documenting pregnancy. They are about honoring a season of transformation—physical, emotional, relational, and often spiritual. Styling plays a foundational role in how that transformation appears, feels, and endures through photographs. When people look back at maternity photographs years later, they rarely


