Photography is more than just capturing images; it is an art form that allows you to freeze time and express creativity. Whether you want to pursue photography as a profession or a hobby, understanding the fundamentals is essential. This photography guide will help you master the basics, from camera settings to composition techniques, ensuring you develop strong photography skills.
1. Understanding the Basics of Photography
Before diving into advanced photography guide, it is crucial to grasp the foundational concepts.
1.1 What is Photography?
Photography is the process of capturing light using a camera to create images. The quality of an image depends on several factors, including lighting, composition, and exposure settings.
1.2 Types of Photography
There are various genres of photography, each requiring a different skill set and approach:
- Portrait Photography – Capturing people’s emotions and expressions.
- Landscape Photography – Showcasing natural scenery and environments.
- Street Photography – Documenting everyday life in public spaces.
- Wildlife Photography – Capturing animals in their natural habitats.
- Macro Photography – Focusing on close-up details of small subjects.
- Event Photography – Capturing moments from events like weddings, concerts, and parties.
2. Essential Camera Gear for Beginners
Selecting the right photography equipment is the first step to improving your skills.
2.1 Camera Types
Understanding different types of cameras will help you make an informed decision when purchasing one:
- DSLR (Digital Single-Lens Reflex) – Offers high image quality and manual control.
- Mirrorless Cameras – Lightweight and offer advanced features without the bulk of a DSLR.
- Compact Cameras – Portable and easy to use but with limited manual controls.
- Smartphone Cameras – Convenient and increasingly powerful with AI enhancements.
2.2 Essential Accessories
- Lenses – Prime and zoom lenses for different photography needs.
- Tripod – Helps stabilize shots, especially in low light.
- Memory Cards – High-capacity SD cards for storing images.
- Camera Bag – Protects your gear while traveling.
- Cleaning Kit – Maintains your camera lens for optimal performance.
3. Mastering Camera Settings
Understanding your camera settings will help you control how your photos turn out.
3.1 The Exposure Triangle
The three primary settings that influence exposure are:
- Aperture (f-stop) – Controls depth of field and the amount of light entering the camera.
- Shutter Speed – Determines how long the sensor is exposed to light.
- ISO Sensitivity – Adjusts the camera’s sensitivity to light.
3.2 White Balance
White balance ensures that colors in your photos appear natural under different lighting conditions.
3.3 Shooting Modes
- Auto Mode – The camera selects settings automatically.
- Manual Mode – Allows full control over exposure settings.
- Aperture Priority (A/Av Mode) – You set the aperture while the camera adjusts other settings.
- Shutter Priority (S/Tv Mode) – You set the shutter speed while the camera adjusts aperture and ISO.
4. Composition Techniques for Stunning Photos
Good composition helps make your images more visually appealing.
4.1 Rule of Thirds
Divide the frame into a 3×3 grid and position your subject at the intersections.
4.2 Leading Lines
Use natural lines to guide the viewer’s eye through the image.
4.3 Framing
Use objects like windows or trees to create a frame around your subject.
4.4 Symmetry and Patterns
Look for symmetry and repeating patterns to add aesthetic appeal.
4.5 Negative Space
Leaving empty space around the subject can create a dramatic effect.
5. Lighting in Photography
Lighting plays a crucial role in photography and affects mood, sharpness, and exposure.
5.1 Types of Light Sources
- Natural Light – Sunlight provides soft and warm tones.
- Artificial Light – Studio lighting, flash, and LEDs allow greater control over illumination.
5.2 Best Times to Shoot
- Golden Hour – Shortly after sunrise or before sunset for warm, soft light.
- Blue Hour – Just before sunrise or after sunset for a cool, moody effect.
- Midday – Harsh shadows, ideal for high-contrast images.
5.3 Using Reflectors and Diffusers
These tools help soften or redirect light for more balanced exposure.
6. Post-Processing and Editing
Editing enhances your photos by adjusting colors, exposure, and details.
6.1 Editing Software
- Adobe Lightroom – Ideal for color correction and batch processing.
- Adobe Photoshop – Advanced editing and retouching.
- Snapseed – A powerful mobile editing app.
- Canva – Great for adding text and graphics to images.
6.2 Basic Editing Adjustments
- Adjust brightness and contrast.
- Enhance colors and saturation.
- Crop and straighten images.
- Remove distractions or blemishes.
7. Developing Your Photography Style
Finding your unique style takes time and experimentation.
7.1 Study Different Photography Styles
Look at professional photographers’ work for inspiration.
7.2 Practice Regularly
Consistent shooting improves your skills and creative vision.
7.3 Experiment with Different Techniques
Try new angles, compositions, and lighting setups to find what works best for you.
7.4 Create a Portfolio
Showcase your best work in an online or printed portfolio.
Conclusion
Photography is an exciting journey that blends technical skills with artistic expression. By understanding camera settings, mastering composition, and refining your style, you can capture stunning images. Keep practicing, experimenting, and learning to grow as a photographer.
Whether you are capturing portraits, landscapes, or everyday moments, this beginner’s photography guide will help you build a strong foundation for success.
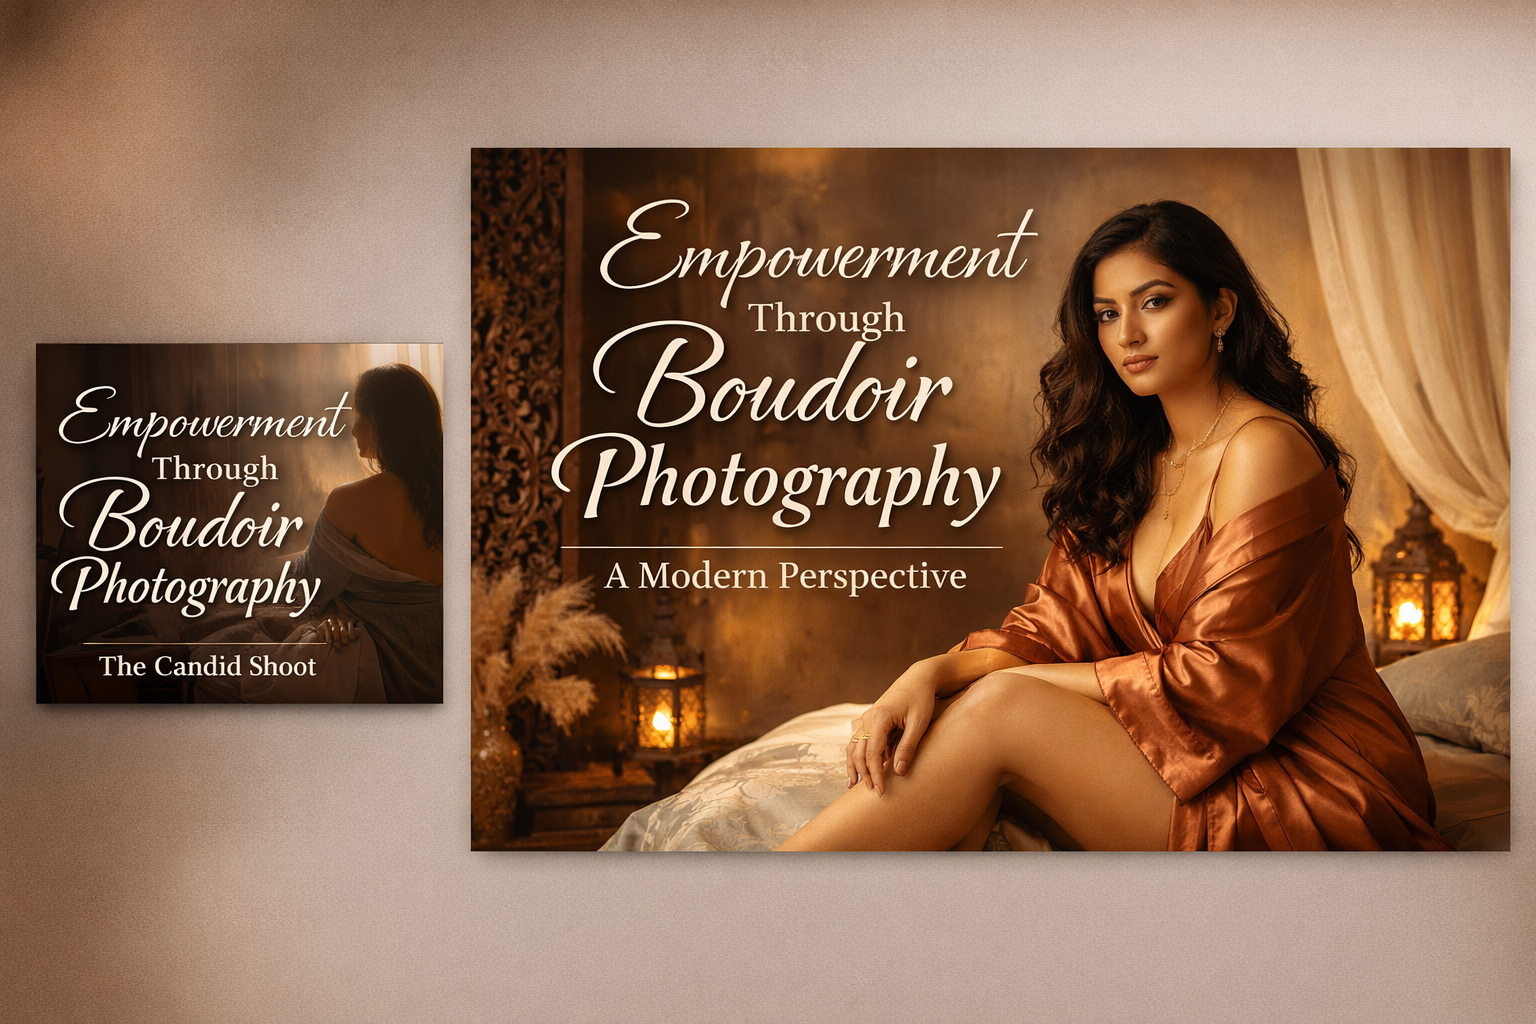
Empowerment Through Boudoir Photography: The Candid Shoot

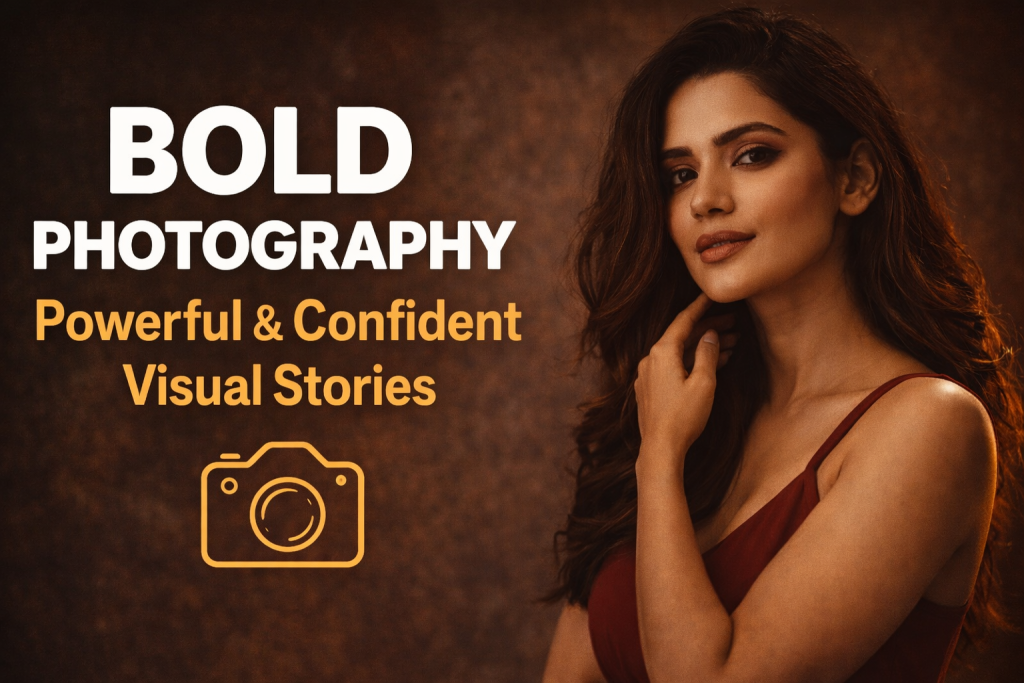
Bold Photography: Creating Powerful & Confident Visual Stories
-

Jaipur’s Favorite Destination for Couple Shoots | The Candid Shoot
-
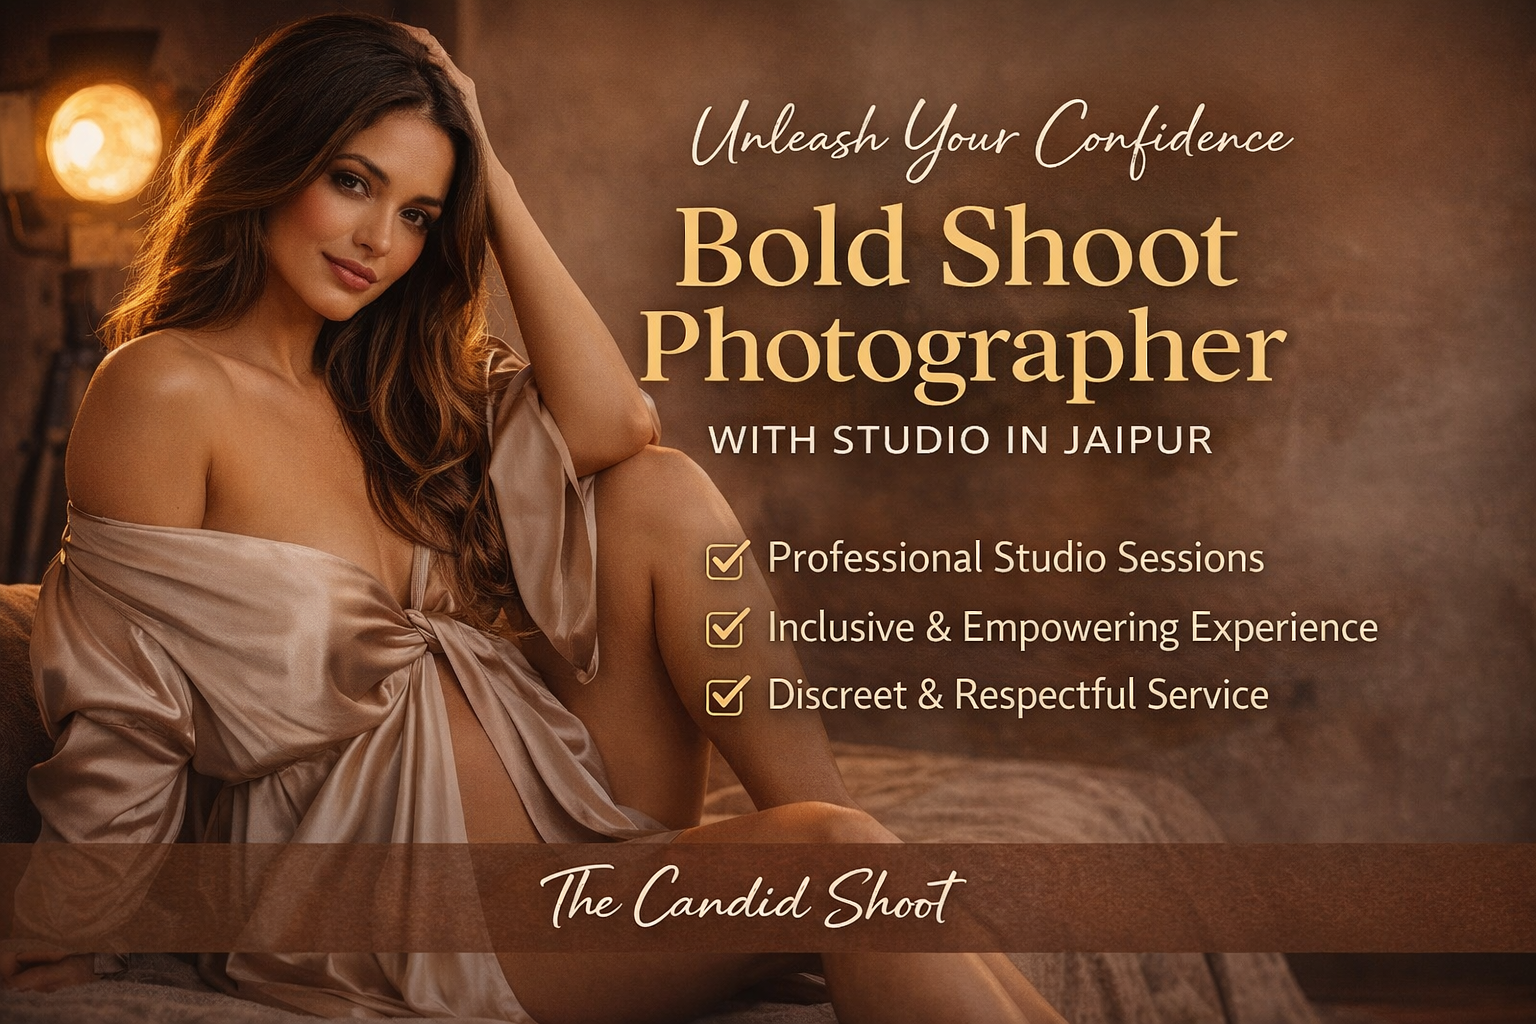
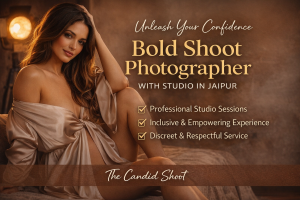
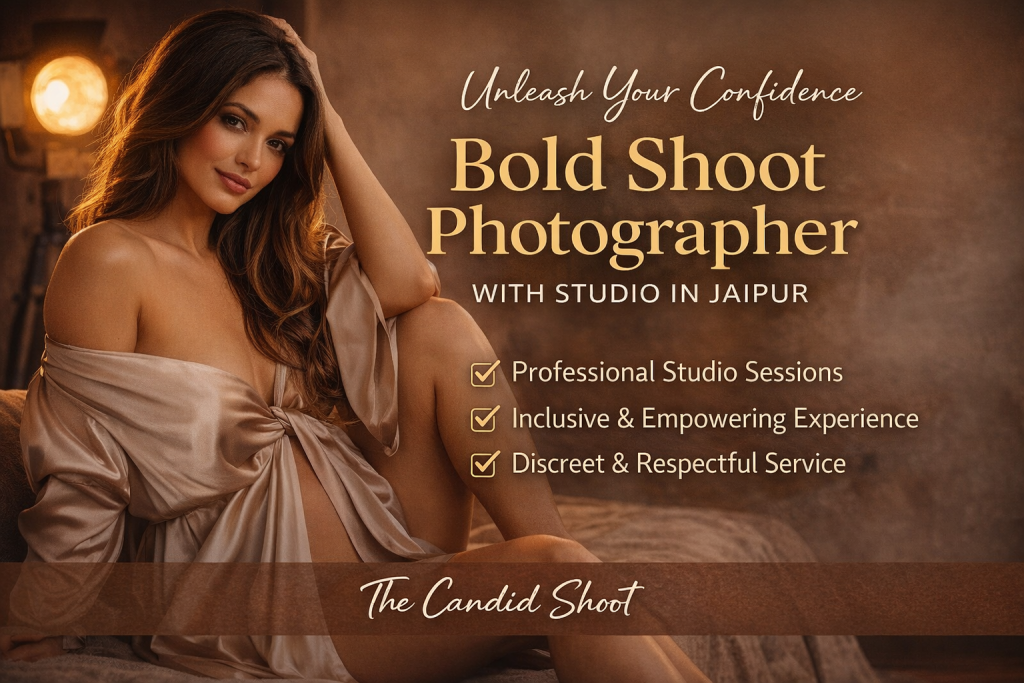
Bold Shoot Photographer with Studio in Jaipur | The Candid Shoot
Empowerment Through Boudoir Photography: The Candid Shoot
Boudoir Photography as Empowerment Boudoir photography has evolved far beyond traditional notions of intimacy or sensuality. Modern boudoir photography is about empowerment, confidence, and self-expression, not merely performing for the camera. At its heart, boudoir photography is a visual dialogue between the subject and themselves, mediated by a professional photographer. It provides a private, safe
Jaipur’s Favorite Destination for Couple Shoots | The Candid Shoot
Why Couple Shoots Matter More Than Ever Couple shoots have evolved far beyond posed photographs and forced smiles. Today, couples look for experiences that feel natural, meaningful, and reflective of who they are together. A couple shoot is no longer about perfection. It is about presence, connection, and shared emotion. At The Candid Shoot, we
Bold Shoot Photographer with Studio in Jaipur | The Candid Shoot
The phrase “bold shoot photographer” often triggers assumptions—many of them incomplete, outdated, or shaped by stereotypes. In reality, bold photography has evolved far beyond shock value or surface-level aesthetics. Today, bold shoots represent self-expression, body confidence, emotional honesty, and artistic courage. At The Candid Shoot, bold photography is not about exposure—it is about expression. It
Styling Tips for Maternity Shoots: Looking Timeless, and Confident
Styling as the Silent Storyteller in Maternity Shoots Maternity shoots are not simply about documenting pregnancy. They are about honoring a season of transformation—physical, emotional, relational, and often spiritual. Styling plays a foundational role in how that transformation appears, feels, and endures through photographs. When people look back at maternity photographs years later, they rarely
Mobile Photography Hacks: Candid Moments with Your Phone
Discover high-impact mobile photography hacks to capture genuine, gorgeous candid moments with your phone. Learn practical tips, composition secrets, and pro techniques to turn everyday scenes into stunning visual stories. Introduction: The New Age of Mobile Photography Photography has evolved beyond heavy cameras, technical jargon, and expensive equipment. Today, the power to capture extraordinary moments