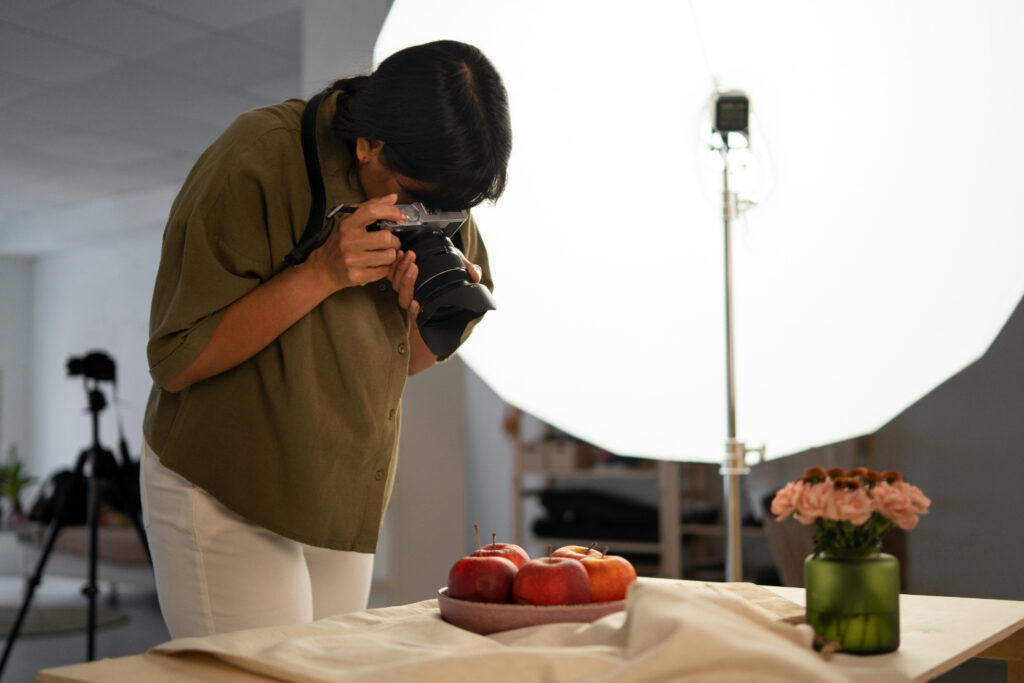
When it comes to product photography, getting the colors right is crucial to showcasing your products in their best light. One of the most essential aspects of this is mastering white balance. White balance (WB) refers to the process of adjusting the colors in your photos to make them appear as natural and true to life as possible. Poor white balance can result in unnatural hues, making products look less appealing or misrepresenting their true colors.
This guide will walk you through the fundamentals of white balance, explain its importance in product photography, and provide you with practical tips on how to achieve the perfect balance every time. By the end of this blog, you’ll have a solid understanding of how to manipulate white balance settings for flawless product shots that capture the true essence of your products.
1. What is White Balance in Photography?
White balance is the process of adjusting the color temperature in your photos. It compensates for the various lighting conditions, ensuring that white objects appear truly white and that other colors are accurately represented. The ultimate goal of white balance is to neutralize any color casts caused by different light sources, such as incandescent bulbs, daylight, or fluorescent lights.
In simpler terms, white balance corrects any unwanted color tones that may affect the overall color scheme in your product photos. By understanding and adjusting white balance, you ensure that the colors in your photos are as accurate as possible, providing a true representation of the product to potential customers.
2. The Importance of White Balance in Product Photography
In product photography, visual appeal is everything. Whether you’re shooting jewelry, clothing, electronics, or food, the accurate portrayal of colors plays a key role in the buying decision. A product shot with incorrect white balance can distort its true colors, leading to misinterpretation of the product by your audience.
For example, if you’re shooting a white shirt under warm incandescent light, the shirt might appear yellowish in the image, giving your customers the wrong impression. On the other hand, a cold or bluish tone could make a vibrant red product look dull and lifeless. By mastering white balance, you can ensure that your product is showcased in its best light, allowing potential buyers to make informed purchasing decisions.
3. How White Balance Affects Color Accuracy in Product Photography
Color accuracy is essential in product photography because it directly impacts how your product is perceived. Incorrect white balance leads to color shifts that can significantly alter the final image. For instance:
- A warm light can cause the image to appear overly yellow or orange.
- A cool light can make the image look blue or green.
These shifts can mislead customers, who rely on accurate product visuals when shopping online. If a customer sees an image that doesn’t represent the product accurately, they may feel misled, which can result in dissatisfaction or even returns.
Therefore, achieving the right white balance helps in maintaining consistency across product images, especially when photographing multiple items for a catalog or website. Accurate colors ensure that your customers trust your product images and are more likely to make a purchase.
4. The Role of Color Temperature in White Balance
Color temperature refers to the warmth or coolness of the light source in your photograph, measured in Kelvin (K). Different lighting sources emit different color temperatures. For example:
- Daylight is typically around 5500K (neutral white).
- Incandescent bulbs usually have a color temperature between 2500K and 3000K, resulting in a warmer, yellowish hue.
- Fluorescent lights often emit cooler light with a blueish tint, ranging between 4000K and 5000K.
In product photography, it’s important to match your camera’s white balance setting with the color temperature of the light source. If your camera is set to a white balance mode that doesn’t align with the lighting, you may end up with an image that has unwanted color shifts.
Understanding color temperature and adjusting your white balance settings accordingly is key to achieving accurate color representation in your photos.
5. Types of White Balance Settings on Your Camera
Most digital cameras and smartphones offer several pre-set white balance options, designed to handle common lighting conditions. Here are some of the most commonly used white balance settings:
5.1 Auto White Balance (AWB)
This setting automatically adjusts the white balance based on the lighting conditions detected by the camera. While convenient, AWB might not always deliver the most accurate results, especially in complex lighting situations. It’s often useful for quick shots but might require further adjustments in post-production for product photography.
5.2 Daylight
This setting is ideal when shooting in natural daylight or under clear, direct sunlight. It’s commonly used for outdoor product photography.
5.3 Cloudy
The cloudy setting is designed to compensate for the cool tones of overcast skies. It adds a bit of warmth to your images, which can be useful for creating a more pleasing and natural look, especially when shooting products outdoors.
5.4 Tungsten/Incandescent
This setting is used when shooting under incandescent or tungsten light sources, which tend to produce a warm, yellowish glow. It corrects the color temperature by cooling down the image.
5.5 Fluorescent
Fluorescent lights can create a greenish or blueish hue. The fluorescent setting on your camera compensates for this, warming up the image to balance out the colors.
5.6 Custom White Balance
Custom white balance allows you to set the white balance manually by measuring a white or neutral-colored object in the scene. This gives you precise control over how the colors appear in your image, ensuring accurate color representation for your product.
6. Manual Adjustment: Customizing White Balance for Perfect Shots
Sometimes, the pre-set white balance modes don’t deliver the accuracy you need, especially for professional product photography. In these cases, manually adjusting the white balance allows for complete control over your images.
6.1 Using a Gray Card
A gray card is a neutral gray surface used to calibrate white balance. By photographing the gray card under the same lighting conditions as your product, you can manually set the white balance to match the scene’s color temperature. This is particularly useful when working with artificial lighting setups or when precise color accuracy is essential.
6.2 Adjusting Kelvin Temperature
Many cameras allow you to manually adjust the Kelvin (K) value. Lower values (around 2500K) will produce warmer tones, while higher values (up to 7500K or more) result in cooler tones. Fine-tuning the Kelvin setting lets you match the light source and achieve the desired look for your product.
7. How to Check White Balance During a Shoot
Checking and adjusting white balance during a shoot ensures that you get the perfect shot without needing significant post-processing. Here’s how you can do it:
7.1 Use the Camera’s Histogram
The histogram is a graphical representation of the exposure levels in your image. It can help you detect color issues that might indicate incorrect white balance. If the histogram shows a heavy concentration of red or blue tones, the white balance might need adjusting.
7.2 Take Test Shots
Don’t hesitate to take test shots and review them on your camera’s display. This allows you to visually check if the white balance is correct. If the colors look off, adjust the settings and take another test shot.
7.3 Use White Balance Cards
Carrying white balance cards or gray cards with you is a handy way to ensure accurate white balance on location. Use these cards as reference points, and adjust your camera settings accordingly.
8. Post-Processing: Fine-Tuning White Balance in Editing
While getting white balance right in-camera is crucial, you can also fine-tune the color temperature during post-processing. Editing software like Adobe Lightroom or Photoshop allows you to adjust the white balance sliders to correct any color casts that may have been missed. This can be especially helpful when shooting in tricky lighting conditions or when you want to refine your images for consistency.
8.1 Using Lightroom’s White Balance Tool
In Lightroom, the white balance tool is straightforward. You can adjust the temperature and tint sliders to warm or cool the image, making minor corrections. Lightroom also offers the option to use the eyedropper tool to click on a neutral part of the image, automatically adjusting the white balance.
8.2 Correcting Color Shifts
If the product appears too yellow, blue, or green in the image, you can correct these shifts by tweaking the sliders in post-processing. With careful adjustments, you can achieve a more natural and true-to-life representation of your product.
9. Tips for Maintaining Consistency Across Multiple Product Shots
Consistency is key when photographing products for online stores or catalogs. Here are some tips to ensure that your product images maintain consistent white balance:
9.1 Use the Same Lighting Setup
Whenever possible, try to use the same lighting setup for all product shots. This ensures that the color temperature remains consistent across your images.
9.2 Shoot in RAW
Shooting in RAW format provides greater flexibility when adjusting white balance during post-processing. RAW files retain more color data, allowing for precise corrections without compromising image quality.
9.3 Create Custom Presets
If you often photograph products under similar lighting conditions, consider creating custom white balance presets for faster adjustments in future shoots.
Conclusion: Mastering White Balance for Stunning Product Photography
Mastering white balance in product photography is essential for producing high-quality, accurate, and visually appealing images that resonate with customers. Whether you’re adjusting settings in-camera or fine-tuning during post-production, understanding white balance helps ensure that your product images reflect the true colors and qualities of your products.
With practice and attention to detail, you can elevate your product photography to new heights, ensuring that every image showcases your products in their best light. Remember that a well-executed product shot is not just about technical skill, but also about conveying the essence of the product and making a connection with potential buyers. By mastering white balance, you set the foundation for stunning, professional product photography that helps drive sales and build brand credibility.
-
Vivo X300 Pro Photography Kit: Next-Gen Mobile Imaging
-

Empowerment Through Boudoir Photography: The Candid Shoot
-

Bold Photography: Creating Powerful & Confident Visual Stories
-

Jaipur’s Favorite Destination for Couple Shoots | The Candid Shoot
-
Vivo X300 Pro Photography Kit: Next-Gen Mobile Imaging
Discover the complete vivo X300 Pro photography kit guide with in-depth camera analysis, real-world case studies, portrait techniques, cinematic workflows, and pro-level tips. Learn how vivo X300 Pro transforms mobile photography for creators, influencers, and studio professionals. The vivo X300 Pro — Redefining Mobile Imaging for Creators Why the vivo X300 Pro Deserves a Dedicated
-
Empowerment Through Boudoir Photography: The Candid Shoot
Boudoir Photography as Empowerment Boudoir photography has evolved far beyond traditional notions of intimacy or sensuality. Modern boudoir photography is about empowerment, confidence, and self-expression, not merely performing for the camera. At its heart, boudoir photography is a visual dialogue between the subject and themselves, mediated by a professional photographer. It provides a private, safe
-
Jaipur’s Favorite Destination for Couple Shoots | The Candid Shoot
Why Couple Shoots Matter More Than Ever Couple shoots have evolved far beyond posed photographs and forced smiles. Today, couples look for experiences that feel natural, meaningful, and reflective of who they are together. A couple shoot is no longer about perfection. It is about presence, connection, and shared emotion. At The Candid Shoot, we
-
Bold Shoot Photographer with Studio in Jaipur | The Candid Shoot
The phrase “bold shoot photographer” often triggers assumptions—many of them incomplete, outdated, or shaped by stereotypes. In reality, bold photography has evolved far beyond shock value or surface-level aesthetics. Today, bold shoots represent self-expression, body confidence, emotional honesty, and artistic courage. At The Candid Shoot, bold photography is not about exposure—it is about expression. It
-
Styling Tips for Maternity Shoots: Looking Timeless, and Confident
Styling as the Silent Storyteller in Maternity Shoots Maternity shoots are not simply about documenting pregnancy. They are about honoring a season of transformation—physical, emotional, relational, and often spiritual. Styling plays a foundational role in how that transformation appears, feels, and endures through photographs. When people look back at maternity photographs years later, they rarely


