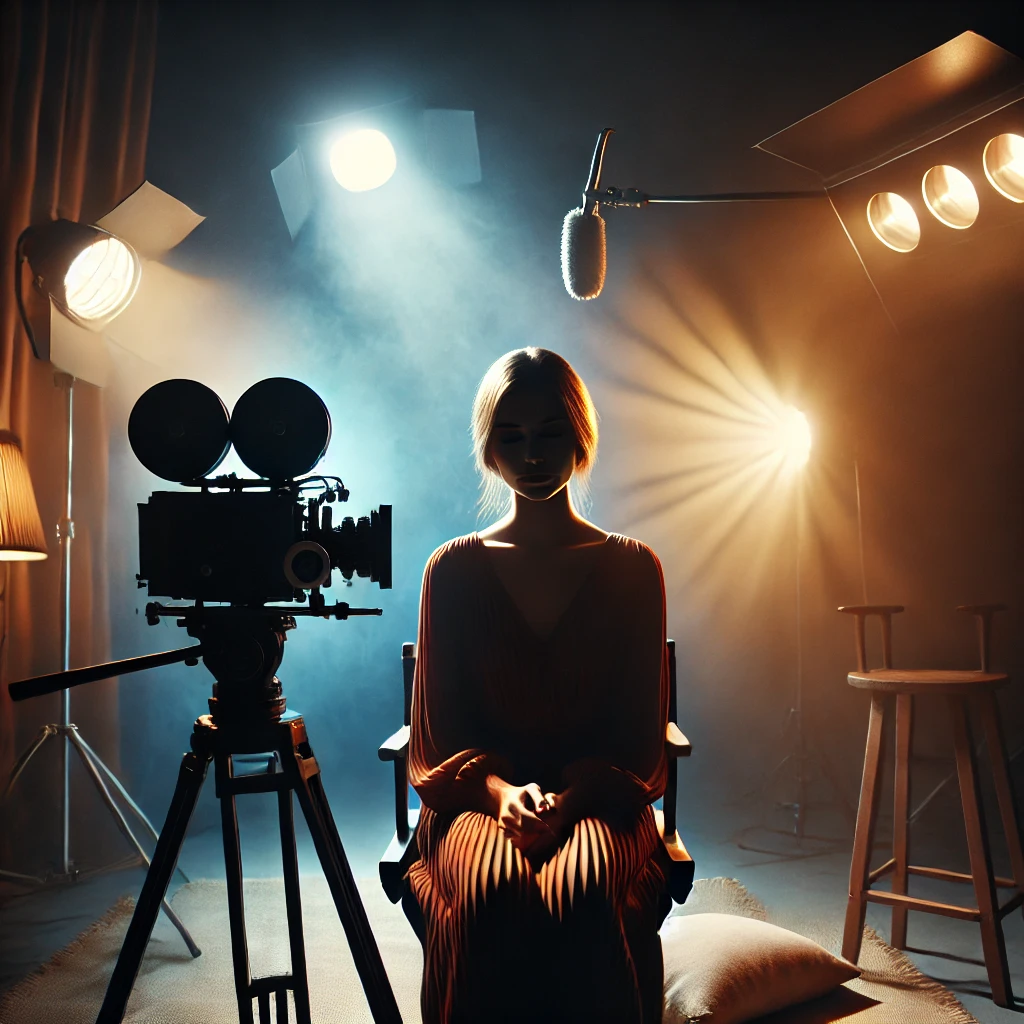
Cinematic photography captures the mood, emotion, and storytelling elements found in movies. It relies on careful composition, lighting, and color grading to create a scene that feels immersive and dramatic. You don’t need expensive gear to achieve this effect—simple techniques can elevate your images to a cinematic level.
In this guide, we’ll explore the essential steps to create stunning cinematic photography, from choosing the right settings to enhancing your images with post-processing.
1. Understand Cinematic Photography
Cinematic photography is about more than just taking a good picture; it’s about telling a story through visuals. This style is heavily influenced by cinema, using:
- Dynamic lighting to enhance mood and depth
- Carefully framed compositions that mimic movie shots
- A distinct color palette for storytelling
- Shallow depth of field for subject emphasis
- Motion and emotion to evoke feelings
2. Choose the Right Camera Settings
To achieve a cinematic look, consider the following settings:
- Aperture: Use a wide aperture (f/1.8 – f/2.8) for a shallow depth of field, isolating your subject.
- Shutter Speed: Follow the 180-degree shutter rule (shutter speed = 1/ (2x frame rate)) for natural motion blur.
- ISO: Keep ISO low to avoid grainy images while maintaining proper exposure.
- Aspect Ratio: Use a 2.35:1 or 16:9 aspect ratio to mimic movie screens.
3. Master Cinematic Composition
Great composition is crucial for cinematic photography. Here are some essential techniques:
- Rule of Thirds: Place subjects along the grid lines for a balanced composition.
- Leading Lines: Use roads, railings, or buildings to guide the viewer’s eye.
- Negative Space: Create breathing room in your frame for a dramatic effect.
- Foreground Elements: Add layers to create depth and realism.
- Frame Within a Frame: Use doorways, windows, or arches to naturally frame your subject.
4. Lighting Techniques for a Cinematic Effect
Lighting is one of the most critical elements in cinematic photography. Try these methods:
- Golden Hour: Shoot during sunrise or sunset for warm, soft light.
- Low-Key Lighting: Use deep shadows and high contrast for a moody effect.
- Artificial Lighting: Experiment with LED panels, fairy lights, or practical lights for a controlled look.
- Silhouettes: Position your subject against a strong backlight for a dramatic outline.
- Rim Lighting: Use backlighting to highlight the subject’s edges and create separation from the background.
5. Color Grading and Editing for Cinematic Tones
Post-processing plays a vital role in cinematic photography. Follow these editing tips:
- Desaturate Colors Slightly: Achieve a muted, moody tone.
- Use Teal and Orange Tones: This popular color scheme enhances skin tones and contrasts with backgrounds.
- Add Vignettes: Focus attention on the subject by darkening edges.
- Enhance Shadows and Highlights: Adjust contrast to create depth.
- Use LUTs (Look-Up Tables): Apply cinematic presets for consistent color grading.
6. Incorporate Motion and Emotion
Cinematic photography thrives on movement and emotion. Consider these elements:
- Use Slow Shutter Speed: Capture motion blur for a dynamic effect.
- Include Genuine Expressions: Candid shots feel more authentic and immersive.
- Tell a Story: Think about the emotions you want your image to convey.
7. Experiment with Different Lenses
Lens choice dramatically impacts the cinematic feel:
- 50mm (Nifty Fifty): Great for portraits and storytelling.
- 35mm: Captures more of the environment while keeping the subject in focus.
- 85mm: Ideal for intimate close-ups and soft backgrounds.
- Wide-Angle Lens: Creates dramatic, immersive scenes.
8. Utilize Practical Effects
Enhance your cinematic shots with creative effects:
- Smoke or Fog Machines: Add atmosphere to a scene.
- Rain or Water Reflections: Create visual depth.
- Lens Flares: Introduce an artistic, film-like touch.
- Glass or Prisms: Produce dreamy distortions and light refractions.
9. Create a Mood Board for Inspiration
Before shooting, gather inspiration from films, photographers, or artwork:
- Analyze Movie Scenes: Study compositions and lighting in cinematic films.
- Use Pinterest or Instagram: Collect visual references.
- Storyboard Your Shots: Plan out your scenes in advance.
10. Keep Practicing and Experimenting
Cinematic photography is an art that improves with practice. Keep experimenting with:
- Different lighting conditions
- Unique compositions
- Post-processing techniques
- New camera settings
Final Thoughts
Cinematic photography isn’t about having the most expensive gear; it’s about creativity and storytelling. By applying these simple yet effective techniques, you can transform ordinary shots into stunning, film-like masterpieces.
Start experimenting today and bring the magic of cinema into your photography!
-
Vivo X300 Pro Photography Kit: Next-Gen Mobile Imaging
-

Empowerment Through Boudoir Photography: The Candid Shoot
-

Bold Photography: Creating Powerful & Confident Visual Stories
-

Jaipur’s Favorite Destination for Couple Shoots | The Candid Shoot
-
Vivo X300 Pro Photography Kit: Next-Gen Mobile Imaging
Discover the complete vivo X300 Pro photography kit guide with in-depth camera analysis, real-world case studies, portrait techniques, cinematic workflows, and pro-level tips. Learn how vivo X300 Pro transforms mobile photography for creators, influencers, and studio professionals. The vivo X300 Pro — Redefining Mobile Imaging for Creators Why the vivo X300 Pro Deserves a Dedicated
-
Empowerment Through Boudoir Photography: The Candid Shoot
Boudoir Photography as Empowerment Boudoir photography has evolved far beyond traditional notions of intimacy or sensuality. Modern boudoir photography is about empowerment, confidence, and self-expression, not merely performing for the camera. At its heart, boudoir photography is a visual dialogue between the subject and themselves, mediated by a professional photographer. It provides a private, safe
-
Jaipur’s Favorite Destination for Couple Shoots | The Candid Shoot
Why Couple Shoots Matter More Than Ever Couple shoots have evolved far beyond posed photographs and forced smiles. Today, couples look for experiences that feel natural, meaningful, and reflective of who they are together. A couple shoot is no longer about perfection. It is about presence, connection, and shared emotion. At The Candid Shoot, we
-
Bold Shoot Photographer with Studio in Jaipur | The Candid Shoot
The phrase “bold shoot photographer” often triggers assumptions—many of them incomplete, outdated, or shaped by stereotypes. In reality, bold photography has evolved far beyond shock value or surface-level aesthetics. Today, bold shoots represent self-expression, body confidence, emotional honesty, and artistic courage. At The Candid Shoot, bold photography is not about exposure—it is about expression. It
-
Styling Tips for Maternity Shoots: Looking Timeless, and Confident
Styling as the Silent Storyteller in Maternity Shoots Maternity shoots are not simply about documenting pregnancy. They are about honoring a season of transformation—physical, emotional, relational, and often spiritual. Styling plays a foundational role in how that transformation appears, feels, and endures through photographs. When people look back at maternity photographs years later, they rarely


