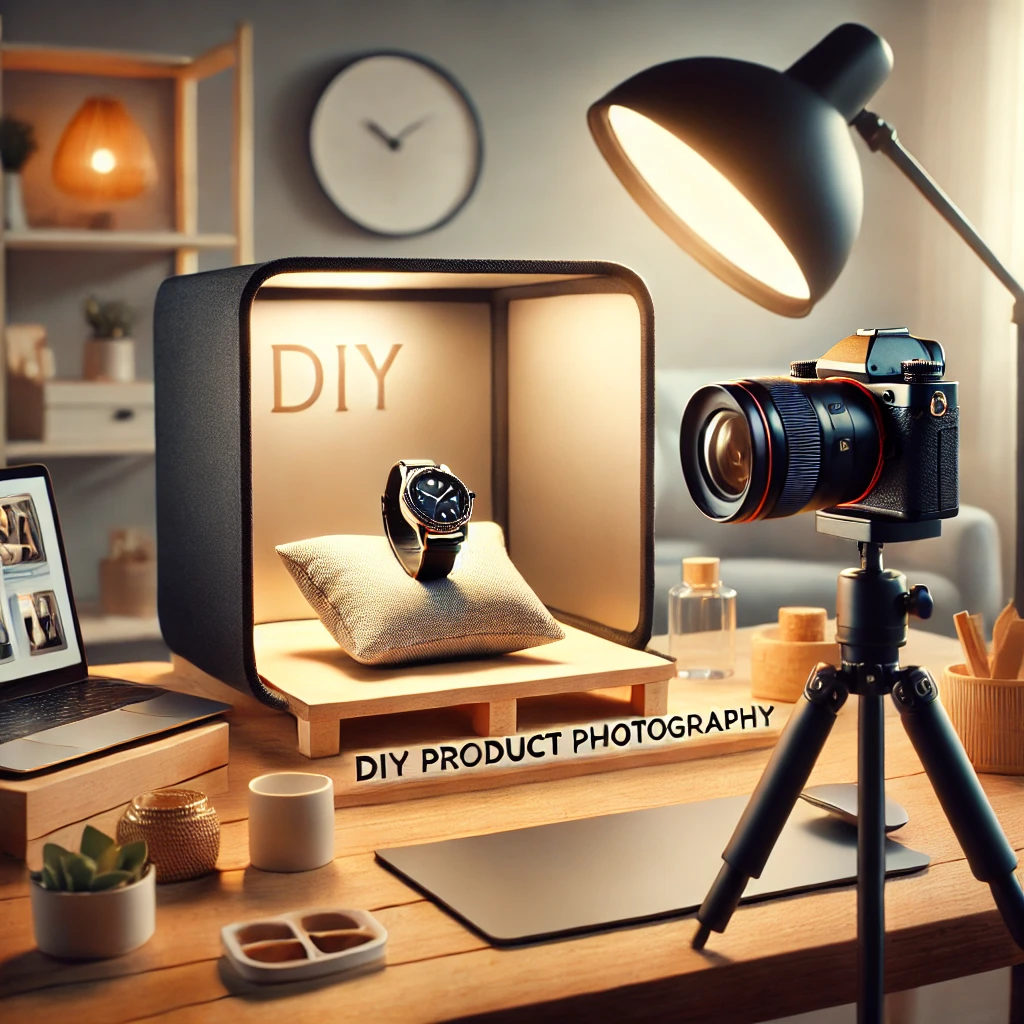
High-quality product photography is essential for e-commerce success. Whether you’re selling on Shopify, Etsy, or Amazon, visually compelling images can increase conversions and build trust with customers. Hiring a professional photographer is ideal, but not always feasible. Thankfully, with the right setup and techniques, you can achieve professional-looking product photos at home. This guide covers everything you need to know about DIY product photography, from essential gear to editing.
Why DIY Product Photography Matters
- Reduces costs by eliminating professional fees
- Gives you creative control over branding and styling
- Enables consistent content creation for social media and listings
- Enhances customer engagement with high-quality visuals
1. Essential Equipment for DIY Product Photography
1.1 Camera Options: Smartphone vs. DSLR
- Smartphones: Recent models like the iPhone 15 Pro and Samsung Galaxy S23 Ultra offer advanced camera systems that work well for product photography.
- DSLR or Mirrorless Cameras: Provide more manual control over settings like aperture, ISO, and shutter speed.
1.2 Lenses for Product Photography
- 50mm Prime Lens: Great for lifestyle product shots
- Macro Lens: Ideal for capturing intricate details
- 24-70mm Zoom Lens: Versatile for various compositions
1.3 Tripod for Stability
- Prevents blurry shots
- Helps with maintaining consistent angles and perspectives
1.4 Lighting Setup
- Natural Light: Best for soft, organic product shots
- Artificial Light: Continuous LED panels or softboxes ensure consistent lighting
- Ring Light: Ideal for smaller products like jewelry
1.5 Backgrounds & Surfaces
- White seamless paper for a clean look
- Wooden or textured backgrounds for a rustic feel
- Acrylic or glass for reflections
2. Setting Up Your Home Studio
2.1 Choosing the Right Space
- Select a clutter-free, well-lit area
- Position your setup near a window for natural light
- Use a light tent or DIY lightbox for controlled lighting
2.2 Creating a DIY Lightbox
- Use a cardboard box with cut-out sides
- Line the interior with white paper
- Place LED lights on both sides for even illumination
3. Camera Settings for Product Photography
3.1 ISO
- Keep ISO low (100-200) to reduce noise
3.2 Aperture (f/stop)
- f/8 to f/11 for sharp focus on entire product
- f/2.8 for shallow depth of field and artistic effects
3.3 Shutter Speed
- Use a tripod to avoid motion blur
- 1/125s or faster for handheld shots
4. Composition & Styling
4.1 Rule of Thirds
- Position product slightly off-center for a balanced composition
4.2 Leading Lines
- Use props or surfaces to guide the viewer’s eye to the product
4.3 Color Theory
- Choose backgrounds and props that complement the product
4.4 Props & Accessories
- Keep them minimal to avoid distractions
- Ensure they enhance the product’s appeal
5. Editing Your Product Photos
5.1 Best Editing Software
- Adobe Lightroom (best for color correction)
- Photoshop (advanced retouching)
- Canva (beginner-friendly)
- Snapseed (smartphone editing)
5.2 Basic Editing Steps
- Adjust brightness, contrast, and exposure
- Crop and straighten images
- Remove distractions and imperfections
- Apply sharpening for clarity
6. Common Mistakes to Avoid
6.1 Poor Lighting
- Avoid harsh shadows or uneven lighting
6.2 Incorrect White Balance
- Adjust white balance settings for accurate colors
6.3 Overuse of Filters
- Keep edits natural to maintain authenticity
6.4 Ignoring Image Dimensions
- Resize images for web optimization to avoid slow loading times
7. Optimizing Product Photos for E-Commerce
7.1 File Format & Size
- Use JPEG or PNG with high resolution
- Compress files to improve website speed
7.2 Alt Text & SEO
- Use descriptive filenames (e.g., “handmade-ceramic-mug.jpg”)
- Add alt text with relevant keywords
7.3 Consistent Branding
- Maintain uniform lighting, angles, and backgrounds across all photos
8. DIY Product Photography for Different Products
8.1 Jewelry
- Use macro lenses for fine details
- Soft lighting to avoid reflections
8.2 Clothing
- Flat lay or ghost mannequin techniques for presentation
8.3 Food
- Bright, natural light enhances textures
- Use props like utensils or ingredients for storytelling
8.4 Electronics
- Clean backgrounds with minimal distractions
- Focus on key product features
9. Advanced Techniques for Professional Quality
9.1 Focus Stacking
- Combine multiple images for sharpness
9.2 Using Reflectors
- White reflectors brighten shadows
- Black reflectors add depth and contrast
9.3 Capturing Motion
- Use slow shutter speeds for dynamic shots
10. Final Thoughts: Perfecting DIY Product Photography
With the right techniques and practice, DIY product photography can rival professional results. By mastering lighting, composition, and editing, you can create stunning visuals that boost conversions and elevate your brand. Start experimenting today and refine your skills with each shoot!
-
Empowerment Through Boudoir Photography: The Candid Shoot
-

Jaipur’s Favorite Destination for Couple Shoots | The Candid Shoot
-
Bold Shoot Photographer with Studio in Jaipur | The Candid Shoot
-
Empowerment Through Boudoir Photography: The Candid Shoot
Boudoir Photography as Empowerment Boudoir photography has evolved far beyond traditional notions of intimacy or sensuality. Modern boudoir photography is about empowerment, confidence, and self-expression, not merely performing for the camera. At its heart, boudoir photography is a visual dialogue between the subject and themselves, mediated by a professional photographer. It provides a private, safe
-
Jaipur’s Favorite Destination for Couple Shoots | The Candid Shoot
Why Couple Shoots Matter More Than Ever Couple shoots have evolved far beyond posed photographs and forced smiles. Today, couples look for experiences that feel natural, meaningful, and reflective of who they are together. A couple shoot is no longer about perfection. It is about presence, connection, and shared emotion. At The Candid Shoot, we
-
Bold Shoot Photographer with Studio in Jaipur | The Candid Shoot
The phrase “bold shoot photographer” often triggers assumptions—many of them incomplete, outdated, or shaped by stereotypes. In reality, bold photography has evolved far beyond shock value or surface-level aesthetics. Today, bold shoots represent self-expression, body confidence, emotional honesty, and artistic courage. At The Candid Shoot, bold photography is not about exposure—it is about expression. It
-
Styling Tips for Maternity Shoots: Looking Timeless, and Confident
Styling as the Silent Storyteller in Maternity Shoots Maternity shoots are not simply about documenting pregnancy. They are about honoring a season of transformation—physical, emotional, relational, and often spiritual. Styling plays a foundational role in how that transformation appears, feels, and endures through photographs. When people look back at maternity photographs years later, they rarely
-
Mobile Photography Hacks: Candid Moments with Your Phone
Discover high-impact mobile photography hacks to capture genuine, gorgeous candid moments with your phone. Learn practical tips, composition secrets, and pro techniques to turn everyday scenes into stunning visual stories. Introduction: The New Age of Mobile Photography Photography has evolved beyond heavy cameras, technical jargon, and expensive equipment. Today, the power to capture extraordinary moments


I’m extremely impressed together with your writing talents as well as with the format for your blog. Is this a paid subject or did you modify it yourself? Anyway keep up the nice high quality writing, it is rare to peer a great weblog like this one nowadays!
Thank you for the appreciation, Glad to hear that.. keep reading, We will keep adding more valuable content.