Lighting is a crucial element in photography. It shapes the subject, sets the mood, and enhances the overall quality of an image. For beginner photographers, investing in lighting equipment can seem daunting due to high costs. However, there are budget-friendly options that can elevate your photography without draining your wallet. In this article, we will explore the best budget lighting options for photography beginners, covering different types of lighting setups, their benefits, and how to use them effectively.
Why is Lighting Important in Photography?
Before diving into budget lighting options, it’s essential to understand why lighting is crucial in photography. The right lighting can:
- Improve image sharpness and clarity.
- Create depth and dimension in photos.
- Enhance colors and contrast.
- Reduce noise in low-light conditions.
Types of Lighting in Photography
Photography lighting can be broadly classified into natural light and artificial light. Both have their pros and cons:
- Natural Light: Free and widely available, but difficult to control.
- Artificial Light: Provides more control, but can be expensive and complicated for beginners.
Let’s explore budget-friendly artificial lighting options that can improve your photography skills.
Best Budget Lighting Options for Beginners
1. LED Light Panels
Why choose LED panels?
- Affordable and energy-efficient.
- Adjustable brightness and color temperature.
- Ideal for both indoor and outdoor shoots.
Best Budget Options:
- Neewer 660 LED Panel
- Viltrox L116T LED Panel
- Godox LEDP260C
How to Use:
- Position the LED panel at a 45-degree angle to your subject.
- Diffuse the light using softboxes or DIY materials for a softer effect.
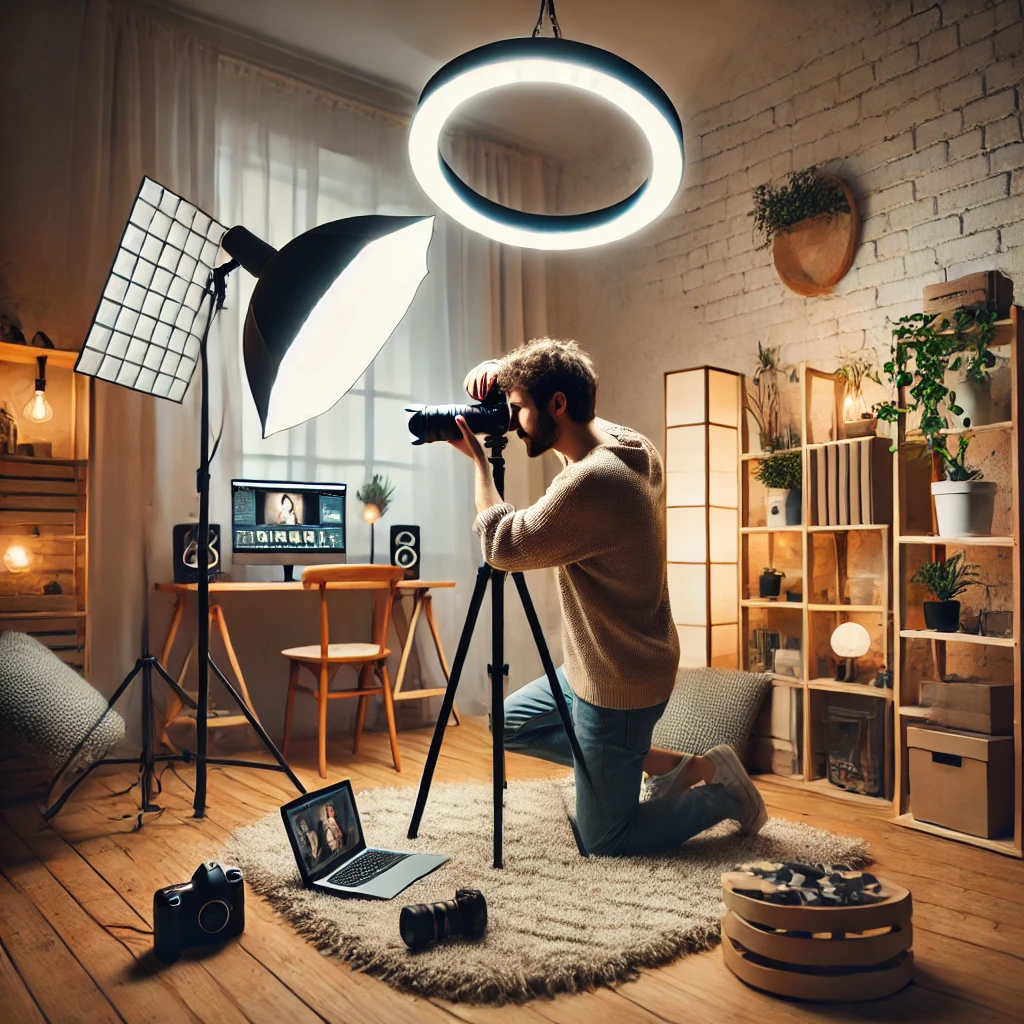
2. Ring Lights
Why choose ring lights?
- Provides even, soft lighting.
- Ideal for portrait and macro photography.
- Affordable and easy to use.
Best Budget Options:
- Neewer 18-inch Ring Light Kit
- UBeesize 10-inch Ring Light
- Rotolight NEO 2
How to Use:
- Place the camera inside the ring light for even lighting.
- Adjust brightness based on ambient light conditions.
3. Softboxes and Umbrella Lighting Kits
Why choose softboxes?
- Mimics natural daylight.
- Reduces harsh shadows.
- Great for portrait and product photography.
Best Budget Options:
- LimoStudio Softbox Lighting Kit
- Neewer 700W Softbox Kit
- Emart Umbrella Continuous Lighting Kit
How to Use:
- Position softboxes at a 45-degree angle to your subject.
- Use white reflectors to balance light distribution.
4. Speedlights (External Flashes)
Why choose speedlights?
- Portable and versatile.
- Can be used off-camera for creative lighting setups.
- Budget-friendly compared to studio strobes.
Best Budget Options:
- Godox TT600
- Yongnuo YN560 IV
- Neewer NW-670 TTL Flash
How to Use:
- Bounce the flash off walls or ceilings for softer light.
- Use diffusers or reflectors to control harshness.
5. DIY Lighting Hacks for Budget Photographers
If you’re on an extreme budget, try these DIY hacks:
- Use White Bedsheets or Shower Curtains: Act as a natural diffuser.
- Aluminum Foil Reflectors: Create DIY bounce cards to soften shadows.
- Household LED Bulbs with Clamp Lights: Inexpensive yet effective lighting.
- Fairy Lights for Creative Effects: Adds ambiance and a warm glow.
Choosing the Right Budget Lighting for Your Photography Style
| Photography Type | Best Budget Lighting Option |
|---|---|
| Portrait Photography | Softboxes, Ring Lights, Speedlights |
| Product Photography | LED Panels, Softboxes, Umbrella Kits |
| Macro Photography | Ring Lights, LED Panels |
| Outdoor Portraits | Reflectors, Speedlights |
| Creative Photography | Fairy Lights, DIY Lights |
Lighting Accessories for Better Results
To get the most out of your budget lighting, consider investing in these low-cost accessories:
- Light Stands: Ensure stability and adjustability.
- Reflectors: Bounce and diffuse light for a softer effect.
- Gels and Filters: Add color and mood to images.
- Diffusers: Soften harsh lighting for a professional look.
Final Thoughts
Photography lighting doesn’t have to be expensive. With the right budget-friendly options, beginners can create professional-looking images without spending a fortune. Whether you choose LED panels, softboxes, or DIY solutions, understanding how to use light effectively will significantly improve your photography.
Frequently Asked Questions (FAQs)
1. What is the best budget lighting for portrait photography? Softboxes, ring lights, and LED panels are great budget-friendly options for portrait photography.
2. Can I use natural light instead of artificial lighting? Yes, but artificial lighting provides more control, especially in indoor settings.
3. What’s the cheapest way to improve my lighting setup? DIY hacks like using reflectors, white sheets, and household LED bulbs can be effective.
4. Are LED lights better than softboxes? Both have their advantages. LED lights are portable, while softboxes provide softer, more controlled lighting.
5. How can I make my lighting setup look professional on a budget? Use diffusers, reflectors, and multiple light sources to create balanced, high-quality lighting.
Invest in affordable lighting and watch your photography skills grow! Let us know your favorite budget lighting solutions in the comments below.
Book your cameras now with The Candid Shoot and create timeless memories today!
-
Vivo X300 Pro Photography Kit: Next-Gen Mobile Imaging
-

Empowerment Through Boudoir Photography: The Candid Shoot
-

Bold Photography: Creating Powerful & Confident Visual Stories
-

Jaipur’s Favorite Destination for Couple Shoots | The Candid Shoot
-
Vivo X300 Pro Photography Kit: Next-Gen Mobile Imaging
Discover the complete vivo X300 Pro photography kit guide with in-depth camera analysis, real-world case studies, portrait techniques, cinematic workflows, and pro-level tips. Learn how vivo X300 Pro transforms mobile photography for creators, influencers, and studio professionals. The vivo X300 Pro — Redefining Mobile Imaging for Creators Why the vivo X300 Pro Deserves a Dedicated
-
Empowerment Through Boudoir Photography: The Candid Shoot
Boudoir Photography as Empowerment Boudoir photography has evolved far beyond traditional notions of intimacy or sensuality. Modern boudoir photography is about empowerment, confidence, and self-expression, not merely performing for the camera. At its heart, boudoir photography is a visual dialogue between the subject and themselves, mediated by a professional photographer. It provides a private, safe
-
Jaipur’s Favorite Destination for Couple Shoots | The Candid Shoot
Why Couple Shoots Matter More Than Ever Couple shoots have evolved far beyond posed photographs and forced smiles. Today, couples look for experiences that feel natural, meaningful, and reflective of who they are together. A couple shoot is no longer about perfection. It is about presence, connection, and shared emotion. At The Candid Shoot, we
-
Bold Shoot Photographer with Studio in Jaipur | The Candid Shoot
The phrase “bold shoot photographer” often triggers assumptions—many of them incomplete, outdated, or shaped by stereotypes. In reality, bold photography has evolved far beyond shock value or surface-level aesthetics. Today, bold shoots represent self-expression, body confidence, emotional honesty, and artistic courage. At The Candid Shoot, bold photography is not about exposure—it is about expression. It
-
Styling Tips for Maternity Shoots: Looking Timeless, and Confident
Styling as the Silent Storyteller in Maternity Shoots Maternity shoots are not simply about documenting pregnancy. They are about honoring a season of transformation—physical, emotional, relational, and often spiritual. Styling plays a foundational role in how that transformation appears, feels, and endures through photographs. When people look back at maternity photographs years later, they rarely


